This year, February 1st falls on a Saturday. For those of us who observe Imbolc on that date, the festive feeling of the year’s first sabbat feels extra heightened thanks to its weekend occurrence.
Imbolc (also known as Imbolg), is a meaningful and magickal point in the year. Rooted though it is in the heart of winter for plenty of folks around the world, Imbolc’s return helps to align us all the more with the journey towards spring. This road is one that quite literally comes about thanks to the power of light – specifically, sunlight.
Many of us honour, embrace and celebrate this fact at Imbolc by ensuring that candles are an integral part of our sabbat rituals, working and festivities.
Their warmth and light representing that of the sun, while also reminding us of a time in our-not-so-distant collective past when candles often played a vital role in helping people get through the long, dark months of winter (just as they still do, even in this age of electric lighting, for many in today’s world).
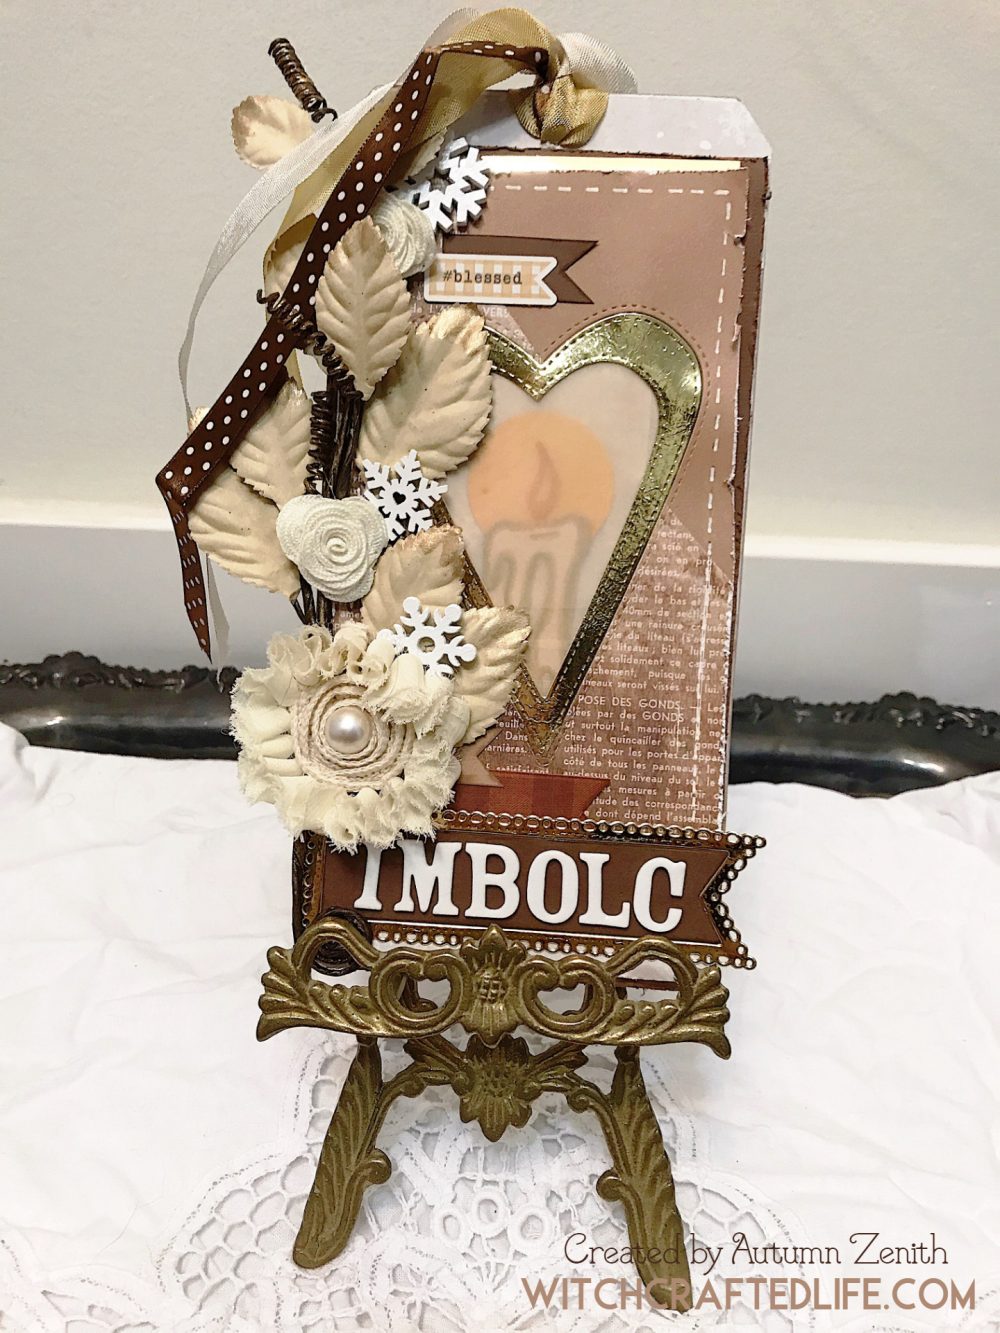
This winter, I started to feel Imbolc’s rejuvenating energy quite early on. Shortly after it made its presence known to me again, I decided that I wanted to create a handmade tag that acknowledged and expressed the importance of light at Imbolc.
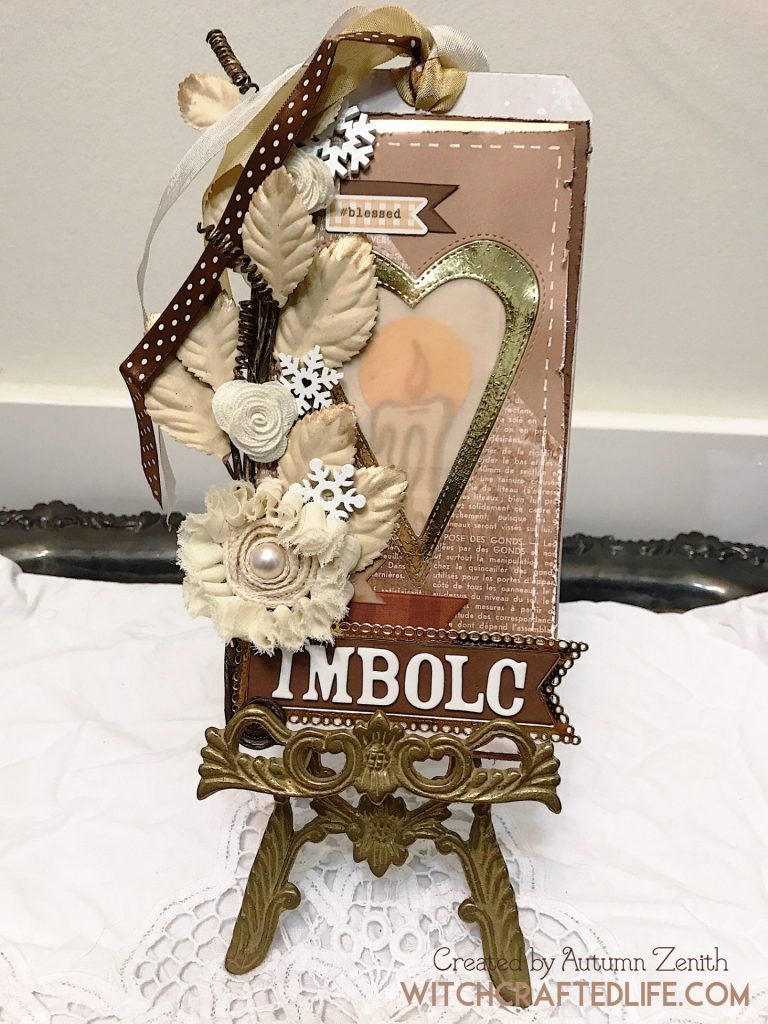
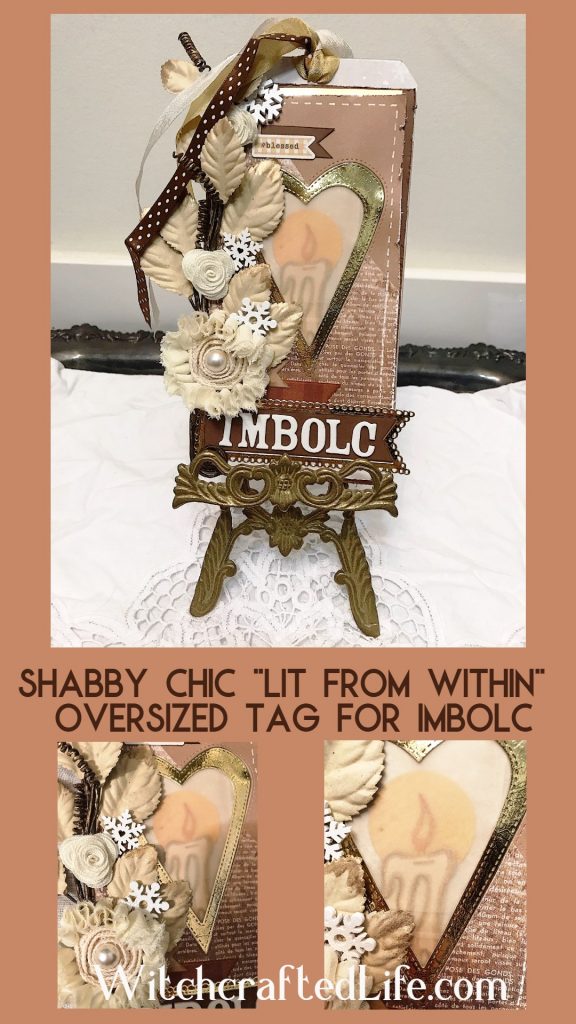
Oversized “lit from within” candle tag
It’s been a hot minute since I last made a tag!
What better time, I thought to myself, than the year’s first Pagan sabbat to do just that again.
I began with a jumbo-sized premade tag base. You could easily create a tag yourself here instead, either with a ruler, pencil and scissors or with a metal die and a die cutting machine (or electronic die cutter).
This tag base measures 8.5 inches/21.5 cm tall and just over 4 inches/10.1 cm across/wide.
Paper crafting colour options for Imbolc projects
Numerous colours are traditionally associated with Imbolc. These include, but are not limited to, red, black, white, cream, pink, silver, blue, yellow, and gold.
Personally, I tend to associate each of the sabbats with the colours that are most prevalent in nature at the time that these special days occur.
Here in the wild woods of Western Canada, that means plenty of icy whites, muted browns, pale creams, faded blues, and the deep verdant shades of evergreen trees.
While blue and green did not make an appearance on this project, the other colours just mentioned – coupled with gold to further symbolize the returning light of spring – were used on this generously sized tag.
Some other possible colour combinations that could have looked lovely here, and which work great for Imbolc craft projects in general, include the following:
-Grey, silver, and white (and/or light blue)
-Red, black, and white
-Green, brown, and gold or brass
-White, silver, and pale pink
-Navy blue, white, and gold or silver
-Icy blue, white, and silver or platinum
-Brown, green, and cream
-Gold, red and white (or brown)
-Silver, red and pink
How to make the “lit from within” candle element of this Imbolc tag
Once I’d settled on my colour palette and selected the papers and cardstock that I’d be using for it, I went to work creating the star element of this tag: the glowing candle in the middle.
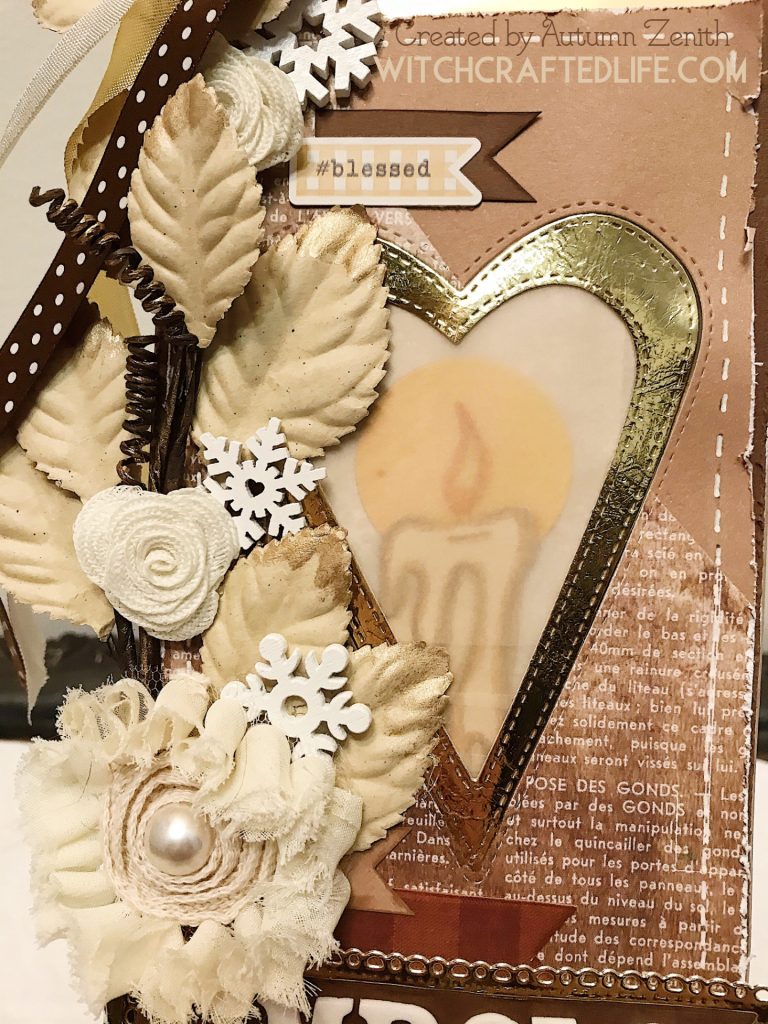
To do this, I first die cut a candle from cream colour cardstock. I then used Copic Ciao markers to outline the candle and the area that looks like dripping wax, as well as to colour in the flame.
Copics do tend to feather (bleed) a bit on ordinary cardstock, the one that I used here included. I wasn’t concerned in this instance, though, as I’d already planned to nestled the die cut candle underneath of some vellum.
While it is somewhat harder to see in these photos verses in real life, I placed the candle and yellow circle of paper on light grey and white snowflake print paper.
You can see this paper more clearly at the very top of the tag, as I used the same paper on that portion of this project as well.
I wanted the candle to look as though it was illuminating out into the world from a window, as snow fell peacefully outside. This is a scene that is very common to me all through the winter and which often occurs at our house on Imbolc itself.
If you do not have a candle-shaped die or access to a digitally equipped die cutting machine, some alternative options include the following:
-Stamp, colour and fussy cut out a candle-shaped piece.
-Pre-made candle die cut, sticker, or chipboard piece.
-Draw a candle yourself and then fussy cut it out.
-Cut out the image of a glowing candle from a photograph, illustration, magazine page, or similar.
-Print and cut out a digi stamp of a candle.
-Use clip art or dingbat font with a candle shape from your word pressing program or an online source. Print, colour (if it is not already coloured) and fussy cut the shape.
To help further convey the sense of a glowing candle, I die cut a small circle from golden yellow coloured paper and placed it behind the flame area.
Alternatively, you could easily use a circle punch, circle stencil, or freehand a circle shape instead.
Once my candle was assembled, I backed it against the snowflake print paper. I then dug through my stash for the creamiest coloured vellum that I had.
I specifically wanted the vellum to look aged and for it to give the candle a somewhat opaque appearance, again, as if one was viewing it through a snowy, frosty, or icy window.
I combined two different brown papers (one plain, one text print), positioning them at a horizontal angle both for visual interest and to represent the divide between the darker and lighter halves of the year.
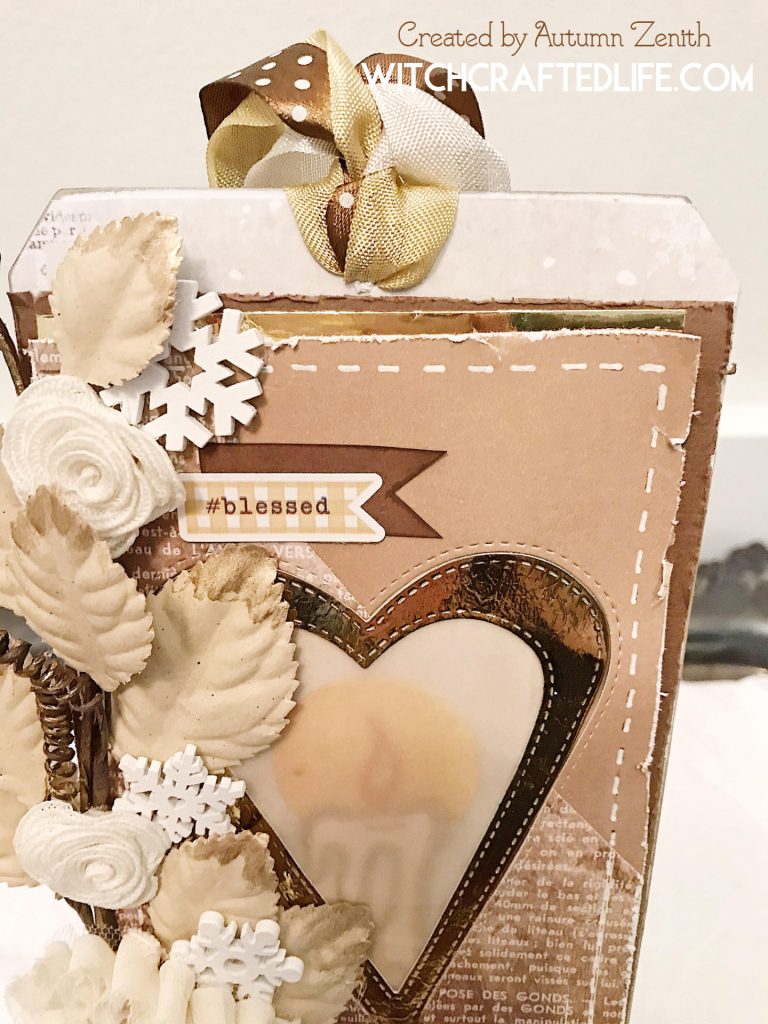
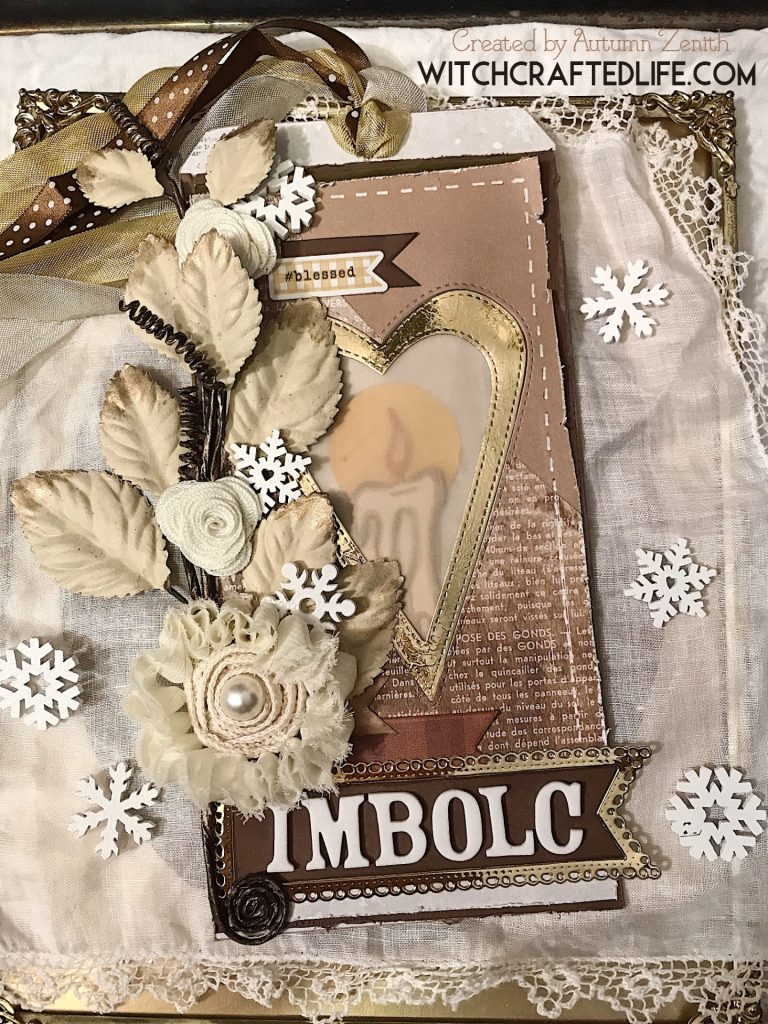
I then die cut a lovely elongated/primitive style heart shape from the two brown papers. I backed this area with the cream vellum and placed my “glowing candle” beneath it, with the grey and white snowflake print paper behind the candle itself.
Next, I cut out a smaller frame in the same die cut heart shape and positioned in the aperture area. I specifically went with metallic gold cardstock in this spot as I wanted to further convey the sense of warmth and light that accompanies lit candles.
Embellishing an Imbolc tag
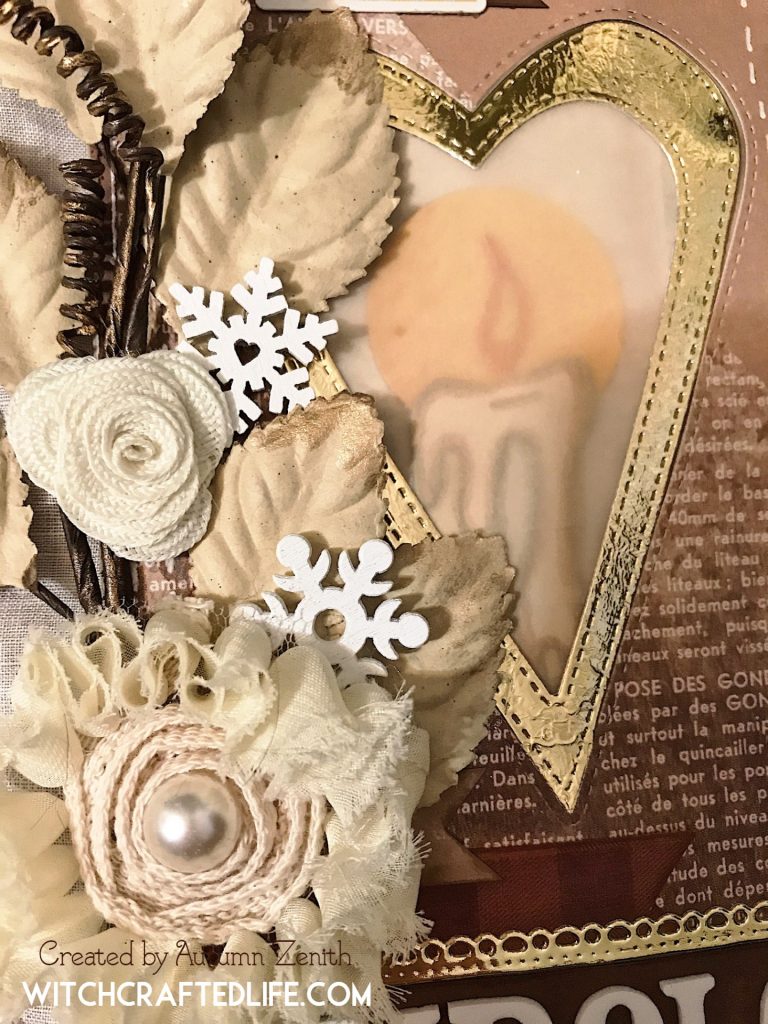
To further embellish this Imbolc tag, I selected some dimensional flowers, a curly branch/vine piece, cream coloured fabric leaves, and cute little painted white wooden snowflakes (one even has a tiny heart cutout in the center, which I chose because it complimented the die cut heart aperture here).
I also used a small sticker with the hashtag #blessed on it, as I feel Imbolc – like all of the sabbats – is a time of immense blessings and positive energy in our lives.
I freehand cut a notched-end piece of brown plaid paper and die cute a larger notched end piece from both gold metallic and brown cardstocks. I layered these two pieces together and topped them with some white Thickers letter stickers, which I used to spell out the word Imbolc.
Let’s face it, there aren’t exactly a lot of premade Pagan sabbat related paper crafting products out there. In most cases, you’ll need to create your own titles and sentiments for sabbat themed projects.
To top things off, I selected two shades (beigey-grey and light gold) of seam binding and a cute white and brown polka dot print ribbon, which I looped through the hole at the top of the tag.
Tag making tips and ideas from this project
-If you don’t have cream or ivory coloured vellum to hand, use white instead or apply a light layer of pale ivory or very pale grey, taupe or brown ink to the underside of your vellum to tint it (ensure the ink is dry before proceeding to layer the candle beneath it).
–Combine two or more papers diagonally, vertically, or horizontally to break up larger areas, add visual interest, and potentially use up some of your paper scraps in the process.
-Instead of wooden snowflakes, you could easily use snowflake-shaped die cut pieces, stickers, chipboard, resin pieces, flatback charms, or even cute little hand-cut snowflakes instead.
-And by the same token, if you didn’t want to use snowflakes, how about hearts, leaves, stars, or crescent moon shapes, sequins, enamel drops, rhinestones, metal charms, or other dimensional embellishments instead?
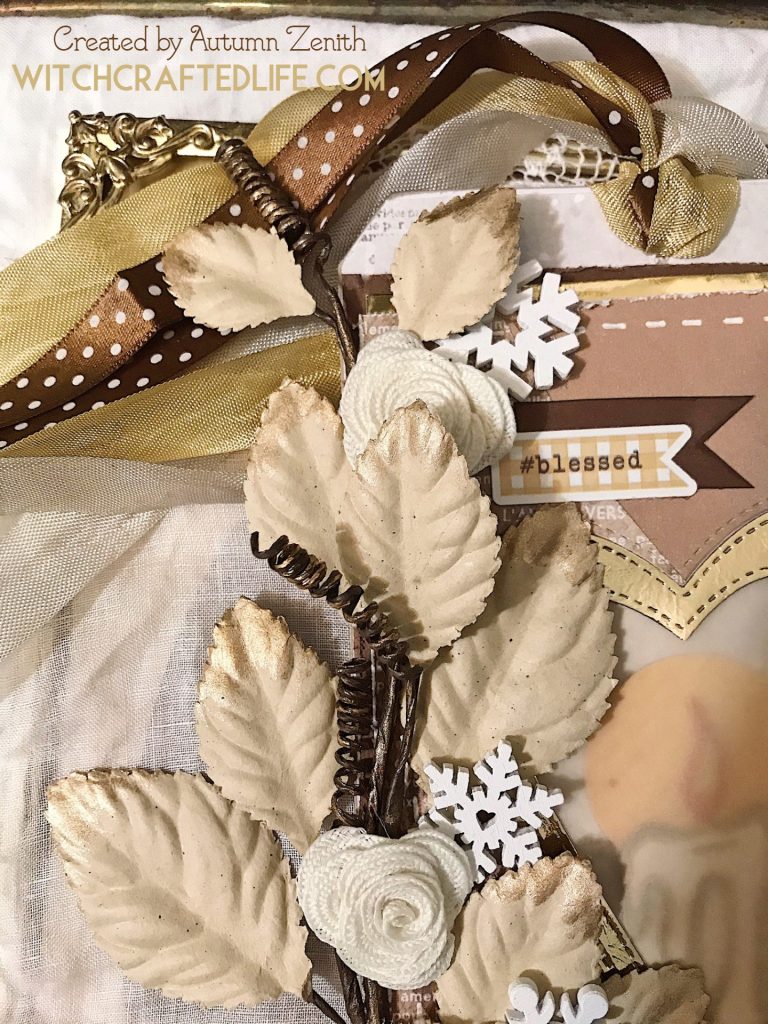
–Any shape of opening (aperture) that allows the candle portion of the tag to show could be used here. Circes, ovals, diamonds, triangles, squares, rectangles, stars, and snowflakes are just some of the possible options.
-While vellum works like a charm in this setting, alternatively, glassine, wax paper, cellophane, densely woven tulle or lace, sheer fabrics, acetate, and even tracing paper could be used instead.
-No gold metallic paper or cardstock? Use silver, platinum or rose gold metallic cardstock instead. Or how about white, silver, or gold glitter cardstock?
Or you could change the colour of your cardstock (starting with a white cardstock base) with gold embossing powder, gold glitter, gold paint, metallic gold coloured pencil crayon, gold leafing, gold Nuvo Glimmer Paste, or gold gilding wax instead.
–You could easily turn this same design into a card front instead, either with or without the actual tag component itself.
Likewise, you could use this elegant “lit from within” candle technique on scrapbook pages, mini albums (how gorgeous would it be on the cover of an album?), and many other types of paper crafting projects as well.
Create “lit from within” candles for other occasions
This candle works wonderfully for Imbolc – just as it would for other Pagan sabbats, particularly Samhain and Yule.
It would also be fantastic for a multitude of different occasions as well. These include:
-Birthdays
-Weddings
-Anniversaries
-Thank you wishes
-Get well wishes
-Sympathy wishes (including the loss of a pet)
-Support and encouragement wishes
-Supporting or thanking members of the military or police for their service
-Graduation
-Candlemas (February 2nd)
-Valentine’s Day (what’s more romantic than candlelight?)
-Mother’s Day
-The 4th of July
-Halloween
-Remembrance Day
– Hanukkah
-Christmas
-Kwanza
-New Year’s Eve
-Eid
-Diwali
Products to help you recreate this “lit from within” Imbolc tag
-Oversized tag base – I used a Ranger Ink Dylusions Media Tag
-Dark brown cardstock
-Light brown cardstock
-Golden yellow cardstock or paper
-Metallic gold cardstock or paper – I used Kodamaa Metallic Special Bright Gold Paper
-Brown and white text print paper – I used Respirer l’air de la Mer from Prima’s French Rivera collection
-Grey and white snowflake print paper – I used Beautiful from Bo Bunny’s Winter Wishes collection
-Cream, white or very light grey coloured vellum
-Candle shaped metal die (or use one of the alternatives suggested above)
-Circle-shaped metal die (or use one of the alternatives suggested above)
-Heart-shaped metal die (or use one of the alternatives suggested above)
-Banner die (or hand-cut a banner instead)
-White gel pen – I used Signo White Gel Pen (for the hand-drawn faux stitching detailing). Sakura’s White Gelly Roll Pen would be another good option
-White letter stickers – I used Rockabye Thickers from American Crafts (you could use die cut or stamped letters here instead)
-Brown and white or cream plaid paper – I used a piece of paper from the 6×6 inch Cider Woods Mat Stack by DCWV
-Various shades of brown ink for edging some of the papers and cardstock – I used Memento Dew Drop ink in Toffee Crunch, Rich Cocoa, and Peanut Brittle
-Markers of choice to colour the candle and flame with (you could also use pencil crayons, watercolour paints, acrylic paint, inks and a fine point ink applicator tool, Faber Castell Gelatos, gel pens, Distress Crayons, or another suitable colouring medium.
-Word sticker (optional) – I used the #blessed sticker from the Fall Market Element Sticker Sheet by Carta Bella
-Various dimensional flowers, leaves, and (optionally) vine/branch embellishment – for the branch, I used Leaf Spray 460867 from Recollections
-Wooden snowflake embellishments (or use one of the alternatives suggested above)
-Various colour coordinated ribbons and/or seam bindings or other trims of choice
-Dimensional foam, pop dots, or similar to elevate some of your layers
-Adhesive, such as a tape runner, of your choice (I often use my Scotch Tape Glider)
Other ways to use candles in your Imbolc papercraft projects
The snowy sky is the limit when it comes to ways of using candles in your Imbolc projects.
Some other ideas would be to use papers featuring candle prints (images of the sun would be a great fit as well), stamp and colour candles on your project, adhere actual mini candles to your projects (such as birthday candles or chiam candles), use melted wax or melted wax crayons, create 3D candle-shaped projects, or use a candle themed stencil or embossing folder on your makes.
In general, themes of light, warmth, hope, prosperity, cleansing, renewal, fertility, love, comfort, strength, and renewal are natural fits for Imbolc.
Candles can help convey these messages and are a beautiful, classic symbol both of this sabbat and of wintertime itself (which, let’s face it, isn’t budging for many of us until at least March or April).
Bright blessings of Imbolc from my heart to yours!
Project share
Pin the image below – or any other in this post – to Pinterest, pop it into your Instagram Stories, post in on Twitter or Facebook, or share it anywhere else you wish to help yourself find it again and to inspire others at the same time.
If you make a project based on or inspired by this Imbolc tag – or want to share any of your other handmade crafts with me – please use the hashtags #WitchcraftedLife and #WitchcraftedLifeMakes on social media so that I can see your beautiful creations.
Beautiful work! I admire the talent it takes to make creations like this.
Thank you immensely, Ally. Not only for your deeply kind words about this project, but for joining me here on my new blog. It warmed my heart like the heat of a million flickering Imbolc candles to see a comment arrive from you.
♥ Autumn
What a lovely project! Can you catch me up on my scrapbooking? Haha! I hope you have a lovely Imbolc this weekend. <3
Thank you so much, lovely Willow. Am I do deduct that you’re a fellow paper crafter as well? 🙂
I don’t know if any of us (who are) will ever be fully caught up. I threw in the towel on that prospect ages ago and just delight now in any time, be it a few minutes or a few hours, that I’m able to get throughout my week/month to craft. Plus, much like with books to read and blog posts to pen, I absolutely adore always knowing that there’s something for me to look forward to diving head first into next.
May you have a bright, beautiful, and abundantly blessed Imbolc, my friend!
♥ Autumn
I am so NOT a crafter, but I love seeing how creative people can be! This is so beautiful. I had not heard of Imbolc before, so it’s an education as well. 🙂
We have glimpses of sun today (some glowing ball in the sky, according to rumours), and I definitely want to wear colour and feel metaphorical sunshine, if not literal sunshine!
Thank you deeply, my sweet friend. I am exactly the same way with arts and crafts that I myself do not do (as well as those that I do engage in). Seeing other peoples’ creativity, reading about their processes, and experiencing what their makes stir in me is one of my very favourite things in life. Creativity, I have long been convinced, begets creativity.
That sounds marvelous! We had a spot of sunshine here on the weekend and scarcely recognized what it was. 😀 I jest, of course, but we’ve had a very grey, dark, snowy winter so far here and will be extra eager to see spring return in a few weeks.
I’m honoured to have introduced you to Imbolc and really hope that you have a bright, beautiful start of February.
♥ Autumn
Beautiful tag, Autumn!
Your blog has inspired me to actually go through all my papercrafting items just this week! Who knows – maybe an Imbolc card is in my future, although I’m feeling a very strong pull to “upgrade” the box I have everything dumped into first. 😉
That is honestly one of the most incredibly kind and uplifting comments (compliments!) I could ever be paid.
Knowing that I’ve helped to rekindle your own passion for paper crafting sincerely made my week (and then some!). Thank you wholeheartedly, dear Lynne.
Happiest creating!
♥ Autumn
What an incredibly intricate and beautiful card, Autumn. It’s simply exquisite, and I love how you opted for colours representing the current season, while at the same time expressing a welcome to Spring. Wish you the most wonderful celebration of Imbolc and sending hugs across the oceans, my friend. xxx
You’re radiantly sweet, dear Ann. Thank you very much for your blush inducingly kind compliment.
I am definitely not a “less is more” type of paper crafter, as a general rule, and love to bring a lot of layers, embellishments, details, techniques, different papers, etc in my projects. Every once in a blue moon I’ll veer more on the minimal side, but I almost never feel completely happy with such creations and have been known to go back (sometimes months later) and add more to them. 😀
That is a beautiful wish. Thank you so much! From the bottom of my heart, I hope that you have a serene, joy-filled, and abundantly blessed Imbolc season as well.
Warm hugs from snowy BC,
♥ Autumn
Dear Autumn, I absolutely adore this artwork!! The many luscious layers of the varied soft neutrals are enchanting-From the pearls to the assortment of flowers and leaves.
Each time I see your work it makes me want to take up this beautiful craft. Your inspiration is truly an amazing gift!
Sweet Debi, thank you deeply for blessing my life with your radiant kindness.
These elegant shades of winter remind me of the gorgeous lace filled ensembles you’ve been sharing online lately. I have no doubt that you’d create stunning paper crafts of your own that would, in turn, steal my breath away, too, were you to take up this wonderful hobby.
Thank you so much again – and the very happiest of Valentine’s wishes coming your way.
♥ Autumn
A beautiful tag, lots of fabulous details – very soft and lovely muted tones,
Pauline – Crafting with Cotnob
x
You’re splendidly kind, Pauline. Thank you very much!
We’re still in the throes of winter here at the moment, so this palette (with some icy blue swirled into the mix) is continuing to inspire my makes and fill my (outdoor) photos alike – and I don’t mind in the slightest. Earth tones, fall colours, and midnight tones are my faves in most all areas of my life – crafting definitely included. What are some of your fave colours to work with?
♥ Autumn