Today is my half-birthday. In other words, exactly six months until my next birthday rolls around. I adore birthdays, be they my own or other peoples.
By far one of the best things about birthdays is the cards – and all the more so if they’re handmade! 😊
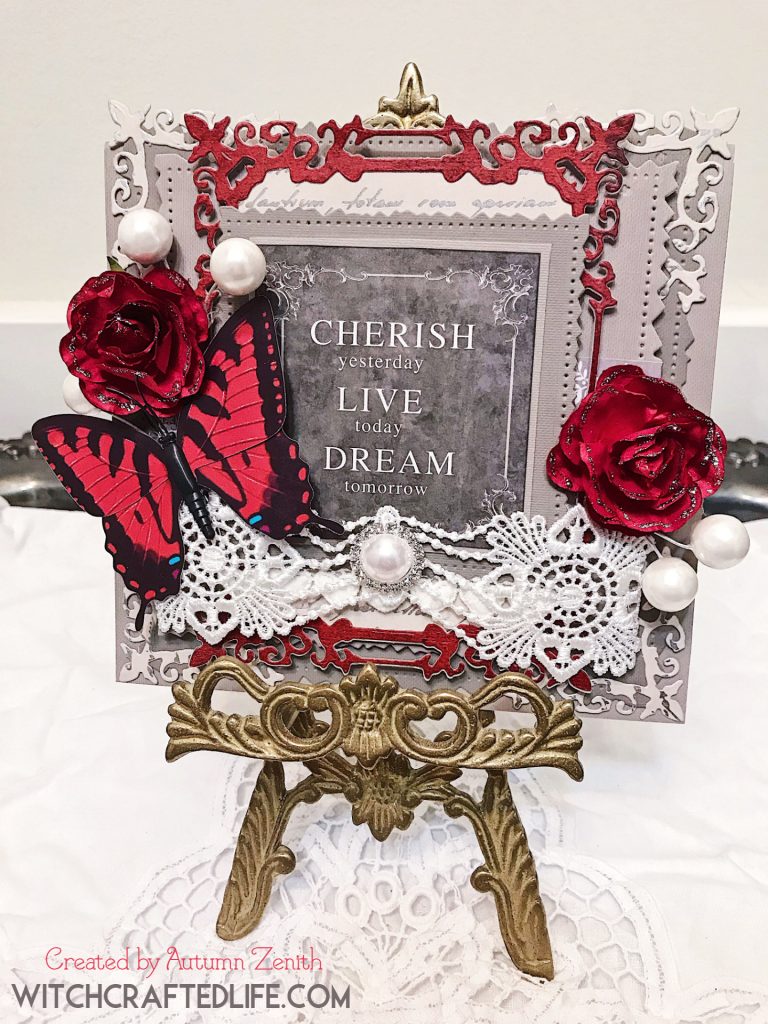
For the inaugural paper crafting project here on Witchcrafted Life, I wanted to share a card that I created recently that encapsulates so much about my personal crafting style, favourite colours, and a time period that positively adore.
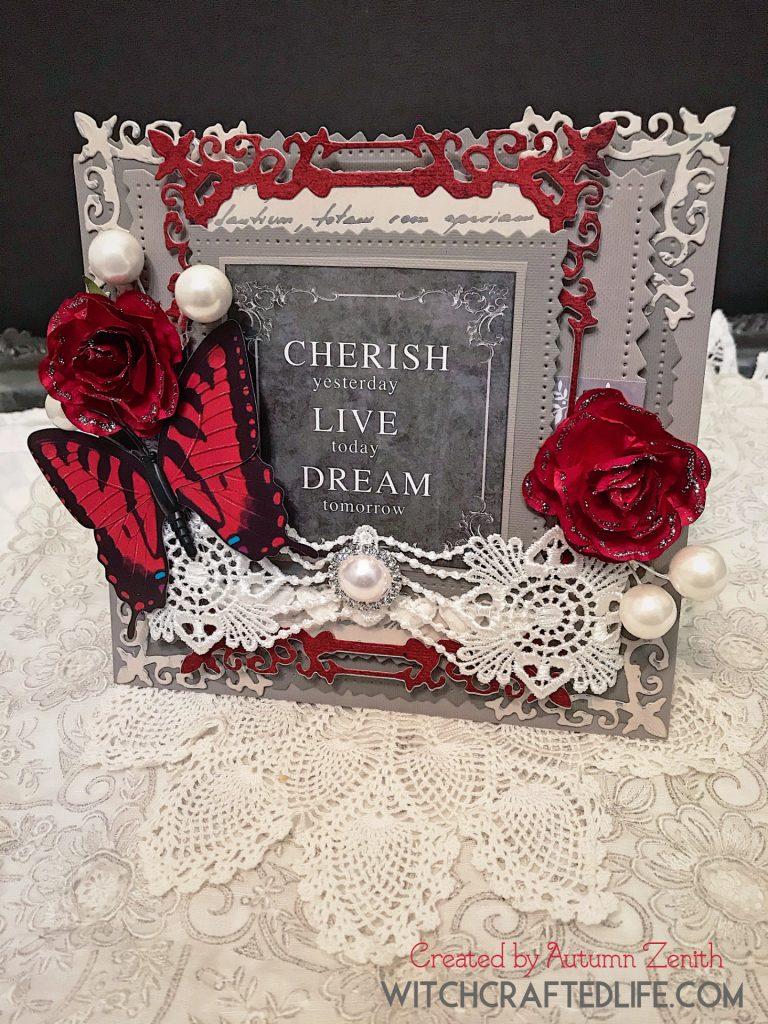
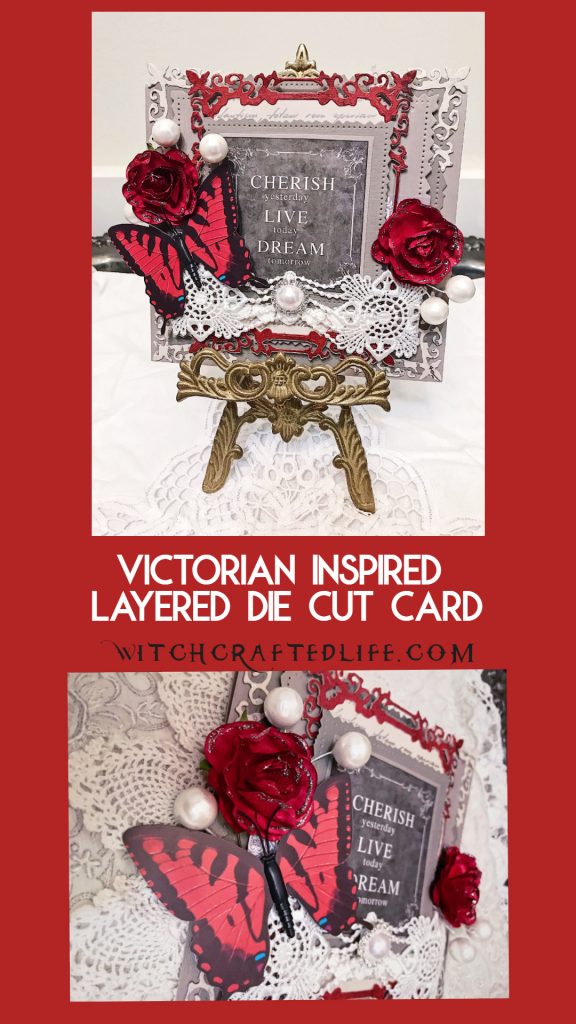
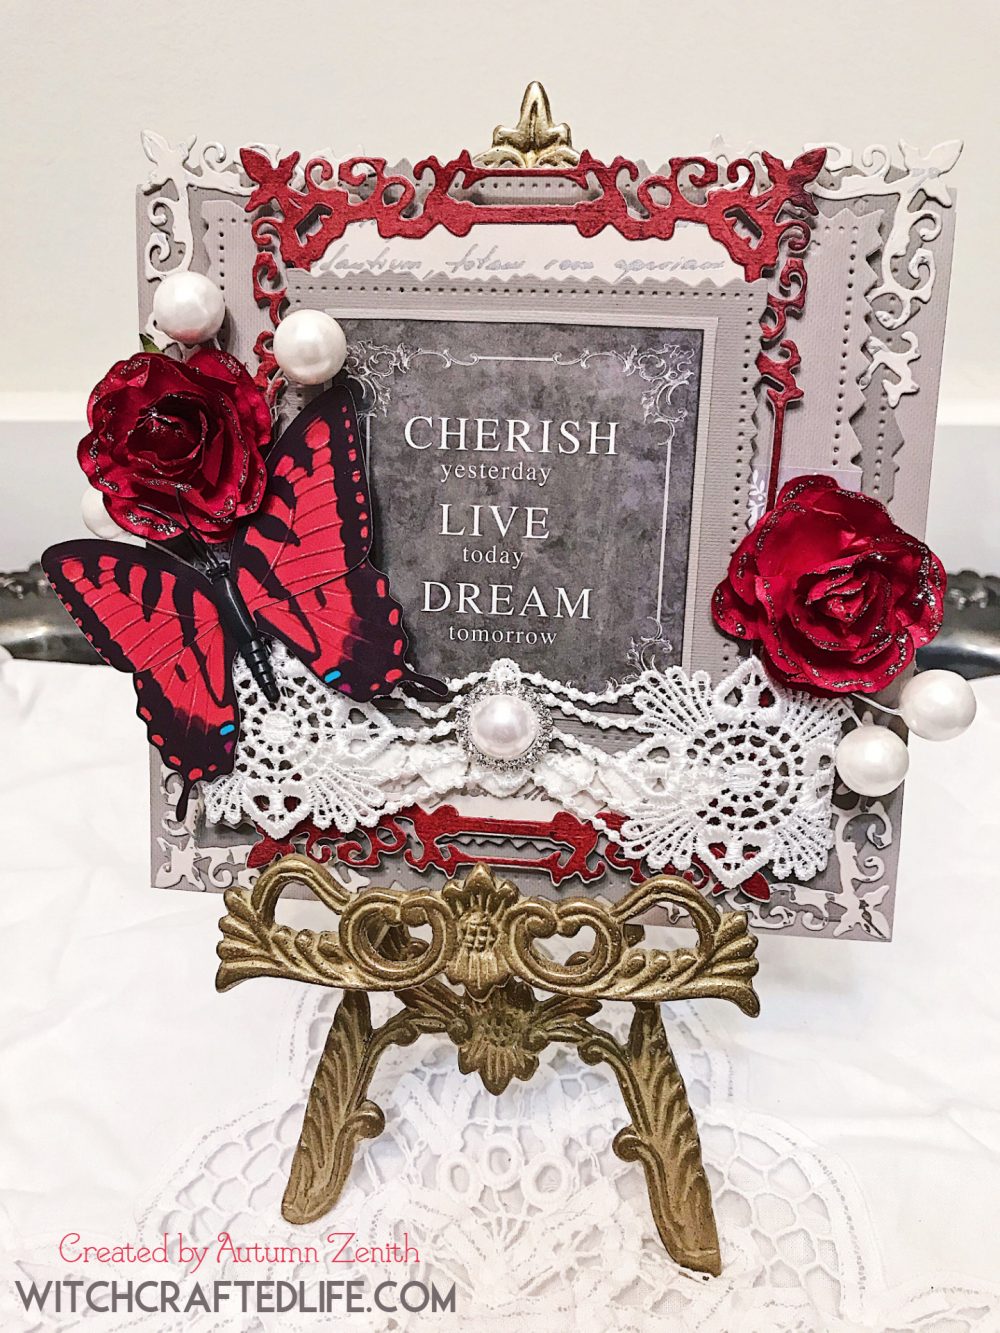
Cherish, Live, Dream Victorian-inspired shabby elegant card
This was the first card that I made after the fire happened that I truly loved (yes, for those doing that math, that was more than three years later).
In fact, it’s one of my favourite cards I’ve ever made at any point in my life. I’d even go so far as to say it’s in my top five favourite cards to date.
I tend to favour fairly good-sized cards and this one is no exception. It measures 6 inches/14.2 cm tall x about 6.4 inches/16.2 cm wide.
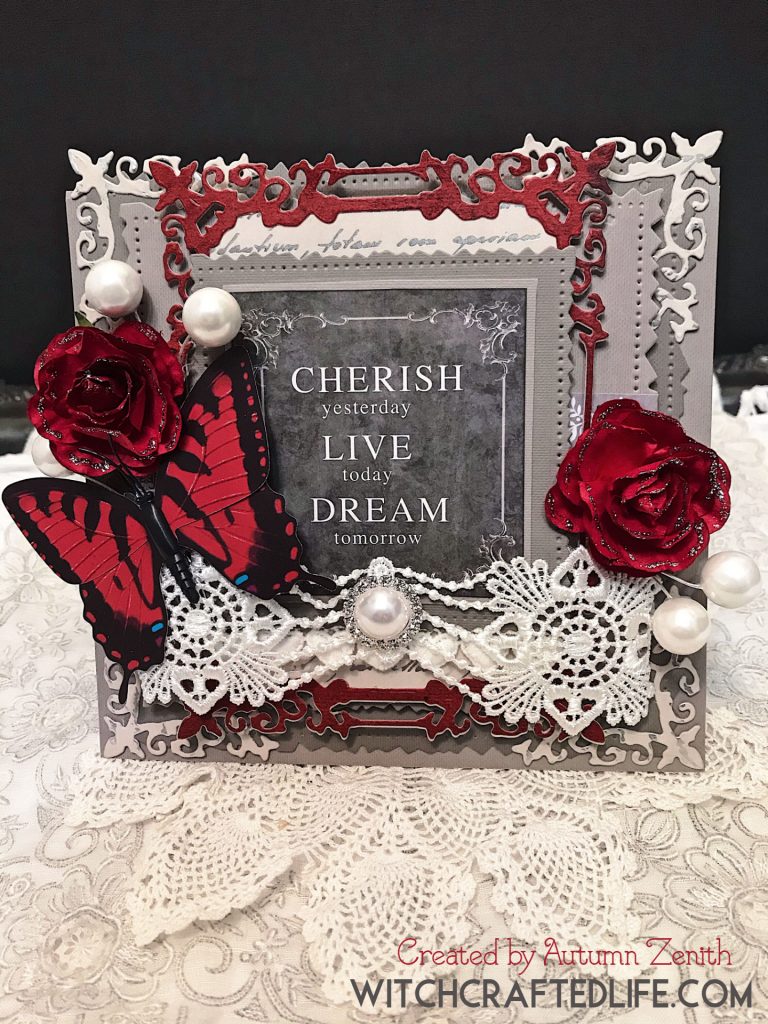
As a lifelong fan of the Victorian era (a passion that was inspired in part by my paternal grandma’s own love of that timeframe), I was in the mood to create a card that captured a sense of some of the artistic and aestetic styles of that fascinating segment in time.
While the term shabby chic is open to personal interpretation, I feel that this card stops shy of full-on shabby (though it certainly contains some elements of this style), and instead falls under the header of shabby elegant.
Victorian-inspired elements on this card
The majority of the products used on this card were selected because they channel the opulence and elegance that is often associated with the Victorian era.
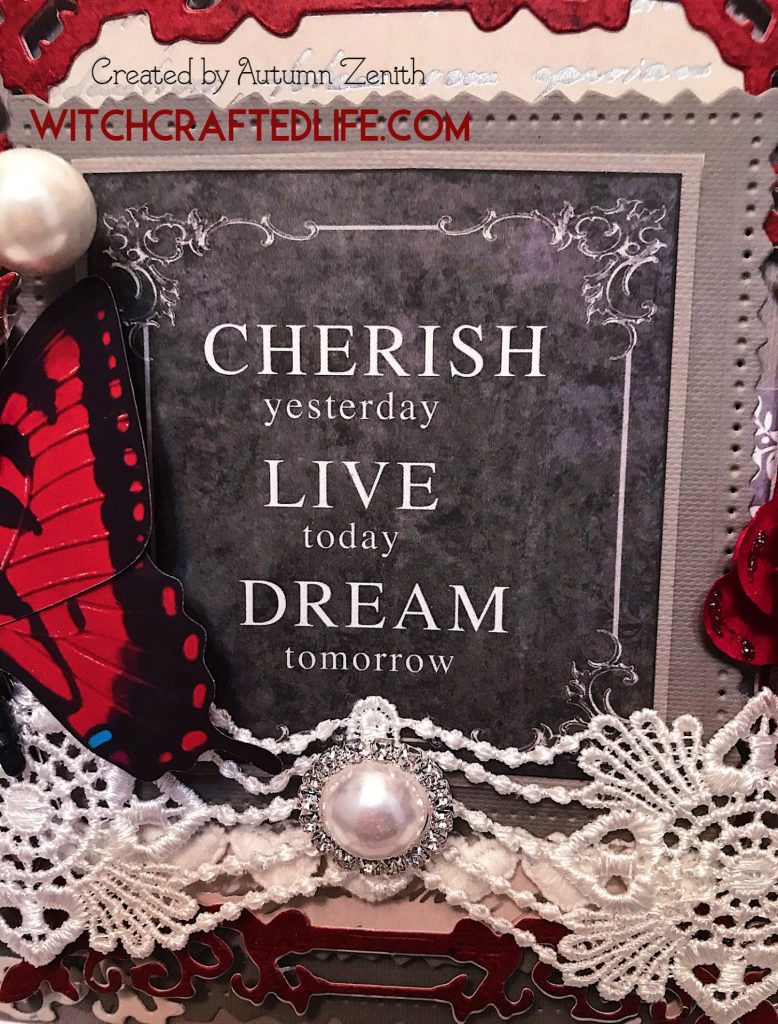
This includes the text print paper, which called to mind the flowing, beautiful handwriting possessed by many in the 19th century; the ornate metal dies that I used to create many of the layered pieces, and the detailed white applique trim.
As well as a faux pearl and rhinestone flat back embellishment, the focal sentiment paper (with its own sophisticated yesteryear inspired border design), the paper roses, the dimensional butterfly, and the colour palette of white, grey, and deep red (all of which were used in everything from home décor to fashion, including in the case of white and grey, some forms of mourning attire, during the Victorian years).
Putting this layered card together
After creating my card base in light grey cardstock, the colour of which reminds me of a mix between chalk dust and chimney smoke on a cool fall evening, I die cut out various detailed border frames.
I then layered these along with a central piece of Kaisercraft Rose Avenue Collection Silver Notes text print paper (which was also used for one of the frame layers).
I absolutely adore this gorgeous paper. Unfortunately, I only have one (now partially used) sheet of it and as Kaisercraft is no longer producing this paper, I can’t easily stock up on more.
I’ll definitely be keeping an eye out for a similar cursive script paper with metallic silver detailing like this beauty.
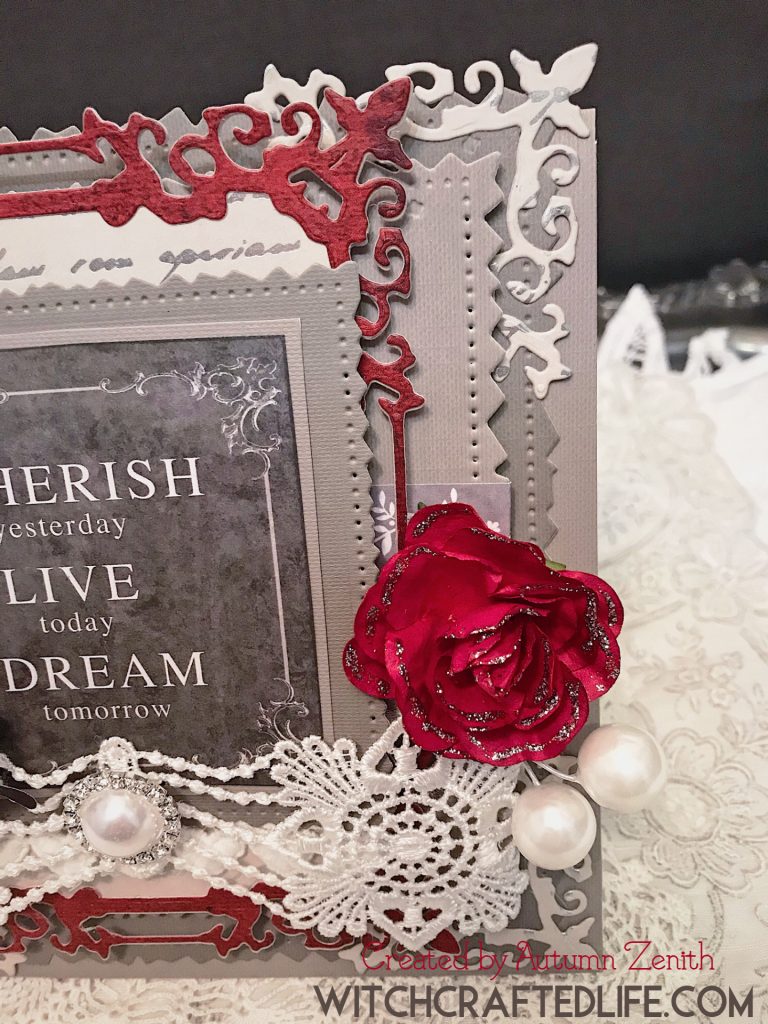
Though it is subtle to the point of almost being imperceivable in these photos, I applied medium to dark grey ink lightly to some of the edges of my papers and cardstocks.
As with a lot of the cards (and layouts, tags, etc) that I create, I love to raise some of my layers up with foam squares (or tape), pop dots, pieces of craft foam, or other methods that give a project a greater sense of depth and dimension.
I did that here with two of my layers, including the sentiment panel.
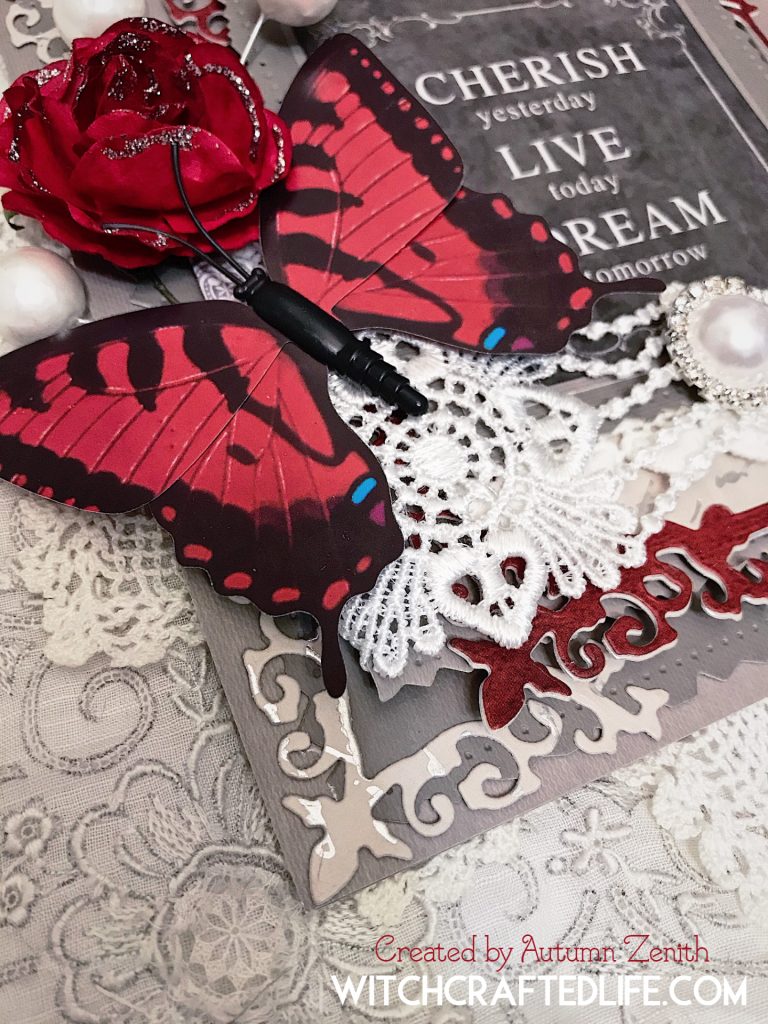
Once the layers were in place, I played around with various trim and embellishment ideas. I knew that I wanted an ornate lace and some flowers, and spent a good while digging through my stash until I hit upon the combo that you see here.
The card was coming together nicely at that point, but I felt that it needed more (story of my paper crafting life, let me tell you! 😃).
I added in some white coloured chunky ball ended floral spray pieces, the sophisticated faux pearl flatback, and a single good-sized butterfly embellishment.
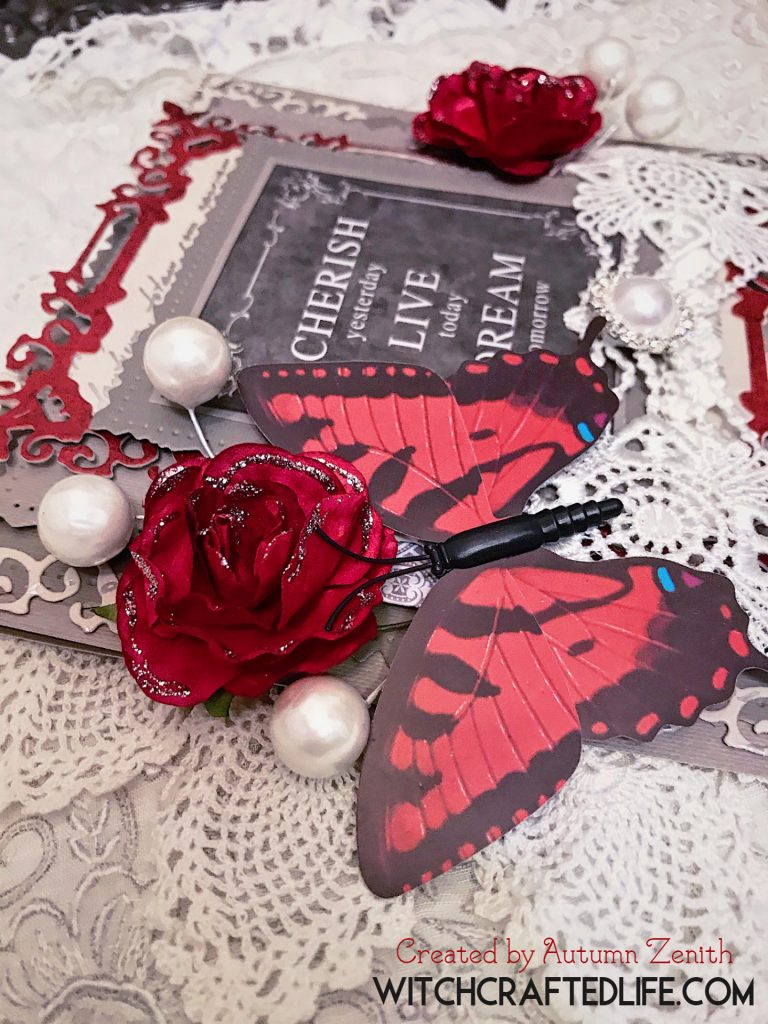
To tie into the metallic silver in the Kaisercraft script print paper and for added eye-catching charm, I applied some Ranger Stickles in Silver to the edges of the petals on the red paper roses.
And, voilà, my card front was ready to go (when, as in the case of this make, I create a card that is not yet indented for a specific person and/or event, I tend to leave the inside very simple or unadorned entirely until I’m ready to prepare the card for its recipient).
Card making tips and ideas from this project
–Centre your project around three main colours, at least one of which is a neutral. In this case, both white and grey are neutrals (as are the small supporting hits of black in elements such as the body of the butterfly and in the text on the sentiment). I prefer if the colours work in harmony, but it is entirely up to you if you want your trio to coordinate.
–Vary the proportions of each colour that use you, allowing one or two to dominate and the other(s) to play more of a supporting role.
–Use a cut-apart from a piece of 12×12 (or another size of) paper, a journaling card, a pocket album/Project Life card, or other pre-printed paper for your sentiment.
Stamping, embossing, letter stickers, rub-ons and other options are great as well, but few can compete with the ease and professional-looking text involved with commercially printed papers.
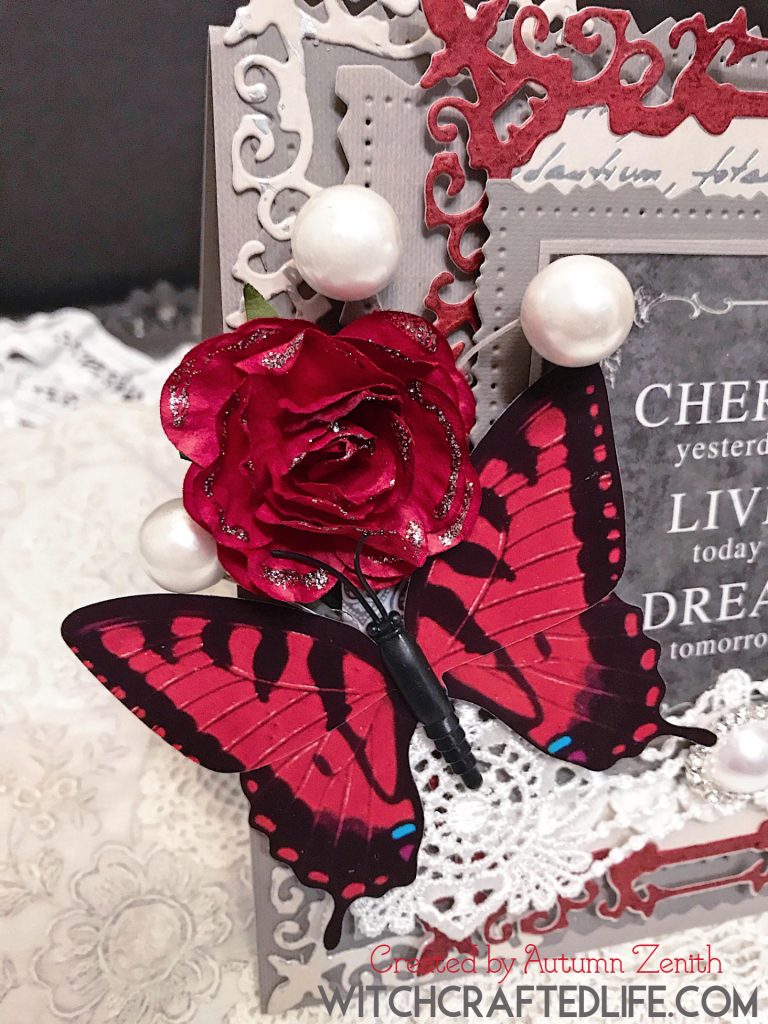
–Jazz up handmade or premade flowers with things such as Stickles, sparkles, embossing powder, markers (Copics or Spectrum Noir, for example), Liquid Pearls, Nuvo Drops, texture paste, microbeads, small sequins, inks, paint, and other projects that give your faux blooms further eye-catching appeal.
–Frame your sentiment with embellishment clusters on either side (generally left and right, or top and bottom, but you could opt for left and bottom as well, for example).
–Use uneven numbers of products. It’s a well-known design principle that uneven numbers of elements are often very appealing and visually engaging to the viewer.
Here the three main focal embellishments are the two red roses and the single red and black butterfly. There are enhanced by the two pairs of white floral sprays and the single faux pearl flatback (for a total of five additional embellishments on top of the main three components).
–Make a dark coloured sentiment pop by matting (framing) it on lighter coloured paper or cardstock – and vice versa if your sentiment Is light coloured.
Another good option for helping a sentiment cut-apart to stand out is to layer it atop vellum, glitter paper, or metallic cardstock.
–Balance patterned papers with solid coloured papers or cardstock. While designs that rely solely on either can be fab, it can sometimes be easier on the eyes to have the “break” that a mix of both offers up.
Here, the dark red paper is subtly printed (in a moulted type of pattern), as is the Kaisercraft text print paper, which I used for two different layers.
–Don’t be afraid to extend some of your design elements beyond the edges of your card. I do this ALL THE TIME with my projects.
It adds height and/or width, often makes a card look fancier or more elaborate, and can help to further the sense of a dimension on a given make.
–Layer on top of trims and lace. These types of materials can be awesome on their own, but sometimes they sing all the more when you top them with a little something-something!
I’m partial to pearls, rhinestones, flatback, buttons, wood veneer pieces, charms, die cut shapes, flowers and leaves, enamel dots, sequins, and other (often narrower widths of) trim, lace, twine, and the like.
–If you don’t have a die cutting machine or access to one, create ornately edged layers and other design components with decorative border punches, decorative edge scissors, pre-made die cut shapes and trims, pinking sheers, or freehand paper tearing for an extra distressed or shabby chic look.
Products to help you recreate this Victorian-inspired layered card
-Two different shade of grey cardstock or paper
-Dark red, burgundy or maroon coloured paper – I used Elegant Autumn #4 from Ella & Viv
-Sentiment from a sheet of cut apart paper – I used Angelic from Kaisercraft’s Rosabella Collection
-Fancy script text print paper – I used Silver Notes from Kaisercraft’s Rose Avenue Collection
-Various sizes and styles of elegant metal layering dies (see note above about alternatives, if you do not have a die cutting machine)
-Medium to dark grey ink – I used Tsukineko Memento Ink in Grey Flannel
-White applique lace trim
-Generously sized flatback faux pearl
-Paper roses
-Ball end floral sprays/stems (dollar stores, craft stores, and baking supply stores are good sources for these)
-Dimensional butterfly embellishment (the one used here is from Dollarama)
–Silver Stickles or other silver glitter glue, glitter paste, or loose glitter and suitable adhesive
-Dimensional foam, pop dots, or similar to elevate some of your layers
-Adhesive, such as a tape runner, of your choice (I often use my Scotch Tape Glider)
What occasion would this card be well suited for?
Given the lovely sentiment that this layered grey and red card features, you could give it to someone for a multitude of different occasions. Naturally, if you’re making a similar looking card, yourself, chances are you’ll be using an alternative sentiment.
Between the serene, almost somber colours and the touching sentiment, I feel this card would be well suited to everything from offering support and encouragement to a retirement, anniversaries to birthdays.
If the sentiment was changed (or perhaps even as it stands now, depending on the recipient) this card could also be a good fit for times of sympathy and loss, thanks to its colour palette, flowers and butterfly (the latter a symbol of hope and comfort).
I really do adore this card and the spirit of the Victorian era that it captures and can easily see myself “scraplifting” this general design again (and again!) for future card projects as well.
Are you inspired by certain historical eras or style with your paper crafting makes as well?
What sort of occasion do you see this card working especially well for?
Show me your paper crafting makes!
If you make a project based on or inspired by this card – or want to share any of your other handmade crafts with me – please use the hashtags #WitchcraftedLife and #WitchcraftedLifeMakes on social media so that I see your beautiful creations.
Quick notes about my paper crafting posts in general
As a side note to this project itself, I wanted to mention the following points as today’s post is my first project share on this blog.
-We live in a small house with some, but not a ton, of natural light and, honestly, not that much artificial lighting either. I’m shooting with an iPhone 7 and it’s currently wintertime, so I’m definitely experimenting with available lighting (just as I am with how I style and photograph my completed paper crafting makes).
As such, things may vary a bit on this front, especially throughout my initial project share posts, until I hit on a lighting + backdrop (and/or styling) combo that I’m currently happy with.
-I readily welcome you to share, pin, and repost my photos, I simply ask that you please credit them to me, Autumn Zenith at WitchcraftedLife.com
-Unless clearly stated, none of the materials used or products featured on my blog are sponsored, endorsed, or received gratis from companies, websites or physical stores.
Project share
Pin the image below – or any other in this post – to Pinterest, pop it into your Instagram Stories, post in on Twitter or Facebook, or share it anywhere else you wish to help yourself find it again and to inspire others at the same time.
Autumn, this card is absolutely stunning! I’m fascinated with the exquisite detailing and the layers of textures. Well done, my friend!
What a blush inducingly kind compliment, sweet Debi. Thank you deeply. I can’t begin to tell you how much it warmed my heart to see a comment from you here.
Layers are one of my very favourite elements to incorporate in my paper crafting projects. 9 times out of 10, if I try to create a project with minimal layers or a single layer, it feels incomplete in relation to my personal paper crafting style (even though I often adore such cards created by others). It’s so interesting, isn’t it, how we each have certain creative styles and components that we favour?
Many heartfelt thanks again. Wishing you a cozy, beautiful weekend,
🖤 Autumn
This is a stunning card.
Thank you immensely, my treasured love. Your support in all areas of this new blog of mine means more to me than words (or handmade cards) could ever fully express.
🖤 Autumn
What an absolute treasure of a card, Autumn! It’s so intricately made, you certainly know your crafting stuff. I’m loving all those layers and the depth you created with them. It simply oozes the Victorian age, a period of time that’s also close to my heart. xxx
Thank you so much, my dear fellow Victorian era adoring friend. Goodness knows that time period wasn’t (just) all gorgeous dresses and calling card visits 24/7, but there are certainly some aspects of it that were/are sublime, fascinating, and inspiring (not to mention important to the progression of humanity in various fields). I’ve been enamoured with the 19th century for as far back as I can recall and just love to bring that passion into some of paper crafting makes (as well as many other areas of my life).
I sincerely appreciate your awesomely kind and supportive comment. Many thanks again.
🖤 Autumn
Gorgeous!!! Well done! It’s so pretty 🙂
*Happiness squeal!* Thank you SO MUCH for visiting my new blog, dear Lisa. I’m touched and tickled pink by your visit.
Thank you as well for the gift of your kind words and for being such a fabulously supportive friend.
Wishing you a stellar weekend!
🖤 Autumn
It’s beautiful, Autumn!
I tried paper crafting for a while but wasn’t ever very good at it. Of course, in my enthusiasm over learning a new hobby, I bought way more supplies than I should have. Hopefully a grandchild will want to learn how some day and they’ll get some use then. lol
I was always grateful to discover the Tim Holtz products though – I use them all the time to distress other things besides paper!
Thank you immensely, dear Lynne. You are heart-touchingly sweet and supportive.
I first began paper crafting in the fall (naturally :D) of 2010, going through periods over the past (nearly) decade of crafting coupled with many stretches when doing so wasn’t feasible for a wide range of reasons (from my health to the fire and its aftermath, for example).
I know that I am infinitely happier, less stressed, less depressed and anxious, feel calmer, connect even more to my spiritual path, and have an all-around more positive mindset when I craft, so after an incredibly dark year last year (the first eight months of it at least), I vowed to do everything in my power to create more light in my/our world in 2020 (and beyond).
Launching this blog and ensuring, as much as I realistically can, that I papercraft again on a regular basis are two of the key ways I’m doing just that.
We are so often our own harshest critics. Goodness knows I often am with myself! I bet your paper crafting projects were marvelous.
It’s so sweet that you’re holding onto your paper crafting supplies should one of your grandkids wish to use them one day. Reading that made my heart beam.
Sooo true about Tim Holtz’s vast and very versatile product line. It’s hard to imagine the paper crafting industry at this point in time without the myriad items that very talented chap has designed and released into the world over the years – nor the countless projects they’ve helped others to bring into being.
Thank you again big time, my dear friend. I cannot overstate how happy I am to be connecting through blogging with you again.
🖤 Autumn
Dearest Autumn, I feel I have to correct you, because you are completely wrong – That is not a card! It is pure art! 🙂 <3 Have a lovely day, dear.
And PS: Thank you so much for your lovely message on IG, I will mail you soon.
Thank you very much, sweet Sanne. You’re wonderfully kind and supportive. I’m really looking forward to sharing many more projects and other types of crafting related posts here as time goes on. I’m already starting work on (early) spring related projects, to have completed and photographed in advance of when the season itself arrives and I pen their respective posts.
Really, are you so lovely. Thank you again.
🖤 Autumn
Autumn! I was so thrilled to see your update on your previous blog and read about how you’ve been doing since the fire. I cried for your dear kitty, and have wondered how you have been. I am so happy that you and Tony are back on your feet, and that you have blossomed into this magical creature! From your name to your new look, you feel more “you”.
Maybe we will still see some of your “Autumn” looks vs. your old “vintage” looks? You are such a creative person, I can’t imagine that you are in jeans every day!
A reminder that I’m a fellow BC-er (in Victoria) – if you are ever in my neighbourhood, if you’re ever on the Island, please drop me a line, would love to meet up or go shopping, whatever.
Really wonderful to see you, my dear! Congratulations on your newfound confidence and blossoming into a more authentic you! I am so proud of you.
Hello lovely Shelia, thank you very much for visiting here me here on Witchcrafted Life. It’s fantastic to connect with you again. I have thought of you often over the years and have continued to read your blog whenever possible in the nearly three years since my previous site was retired (how time flies!!!).
You know me so well! 🙂 My love for vintage is 100% as strong as ever and I continue to wear yesteryear fashions on a regular basis. They (and vintage repro, etc) are no longer pretty much all I wear though. I’ve allowed my wardrobe to blossom into a state that better represents the diversity of my various tastes, styles, and interests. Some of which have been with me every bit as long as my passion for vintage.
For quite some time now (post-fire) I’ve been sharing (some of) my outfits on Instagram and will continue to do so there. Occasional outfit related posts or other entries with photos of myself may appear here, too, naturally, but at present, they’re not going to the focal point of this blog.
That’s so kind of you to offer. Thank you very much! I’d love to connect with you in person one day (and in my favourite city in BC to boot). We’ve certainly overdue such a meetup, don’t you think, given how long we’ve know each other online.
Likewise, if you’re ever up in the North Okanagan, please don’t hesitate to let me know. You’re always welcome at our humble abode.
Many heartfelt thanks again. Hearing from you brightened my week immensely.
♥ Autumn
What a lovely card! I adore a good paper craft.
Thank you very much, my sweet friend. You’re making me blush! 🙂
I’ll be sharing a new paper crafting project here next week, which focuses on Imbolc.
There are so few Pagan/witchery related paper crafts (of the classic cards, layouts, tags, etc camp) online and one of the guiding reasons behind this blog’s creation was to change that by sharing many of my own such creations and hopefully inspiring others to make and, if desired, share their own publically as well.
Many thanks again. May you have a cozy, fantastic weekend!
♥ Autumn
So beautiful. I love all the details! The color combo is gorgeous and I always love a butterfly on a card!
Thank you immensely, Angie, I really appreciate your wonderfully kind comment and am with you all the way regarding butterflies on cards (and papercrafts in general). They’re such cheerful, versatile editions to our creations.
Wishing you a fabulous Valentine’s week!
♥ Autumn