Did you know that there are currently 263 days to go until Samhain/Halloween returns?
I’m one of those people for whom October 31st is so much more than “just” a single day or brief chapter of the fall.
It is #Halloween365 year-round in my house, my heart, my wardrobe, my spiritual path, and most definitely my paper crafting!
To me, themes and imagery of Halloween, Samhain, and autumn time align with my deepest self, and I am often at my happiest when I get to connect with All Hallows’ Eve in ways that are personally meaningful.
If I’m able to share those with others – be they kindred #Halloweeneveryday team members or not – I’m on cloud nine.
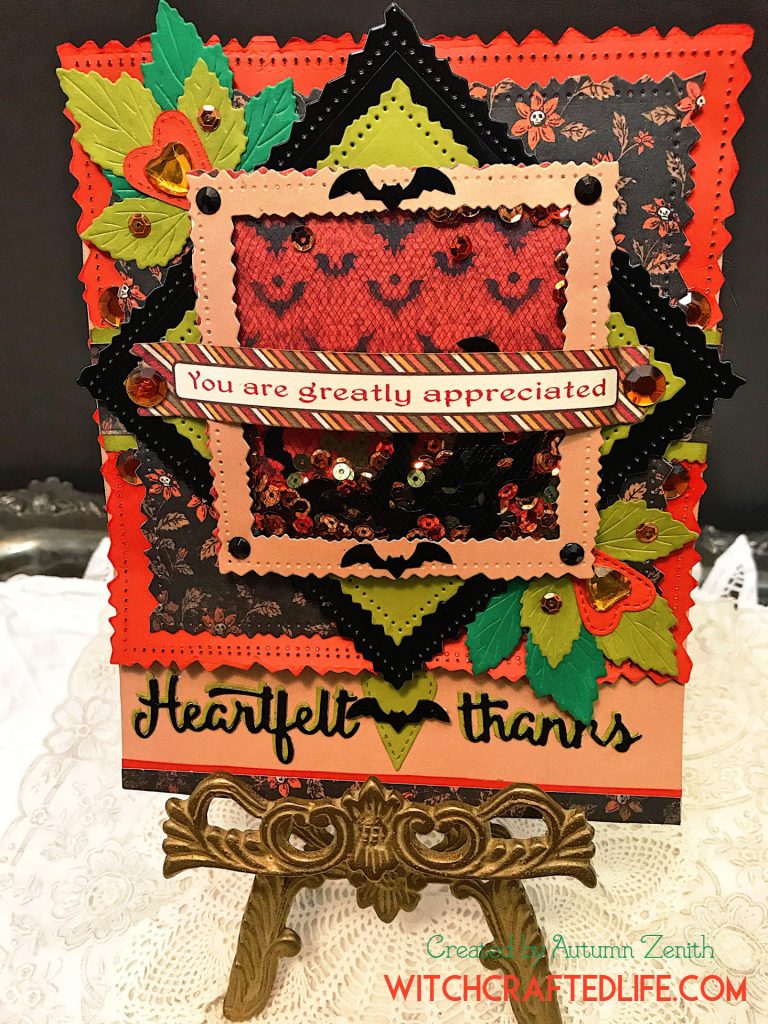
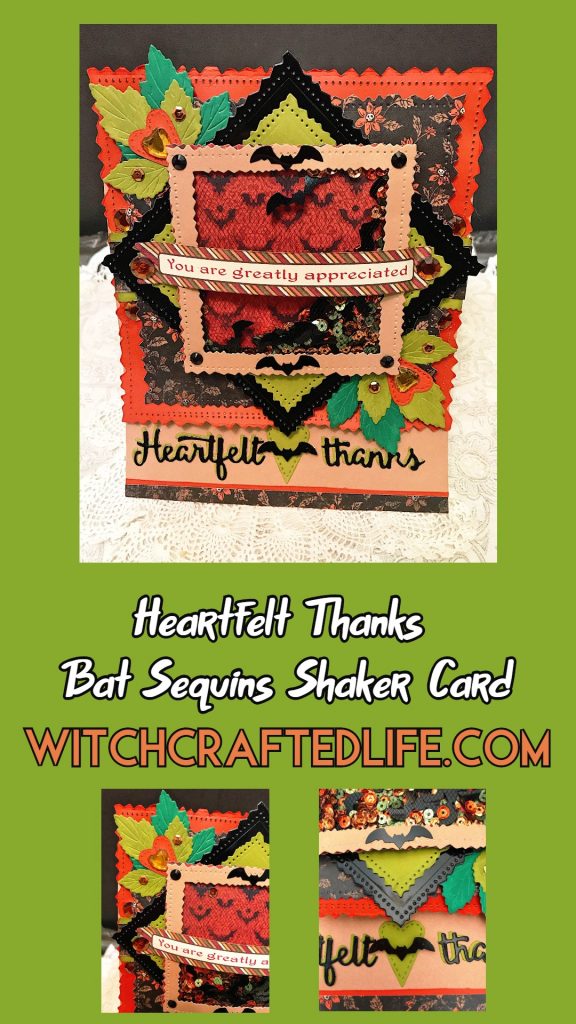
Recently I created this fun shaker card which taps into some of the spookiness of Halloween, while still being appropriate at other times of the year – especially if the recipient is a fellow Samhain adoring witch.
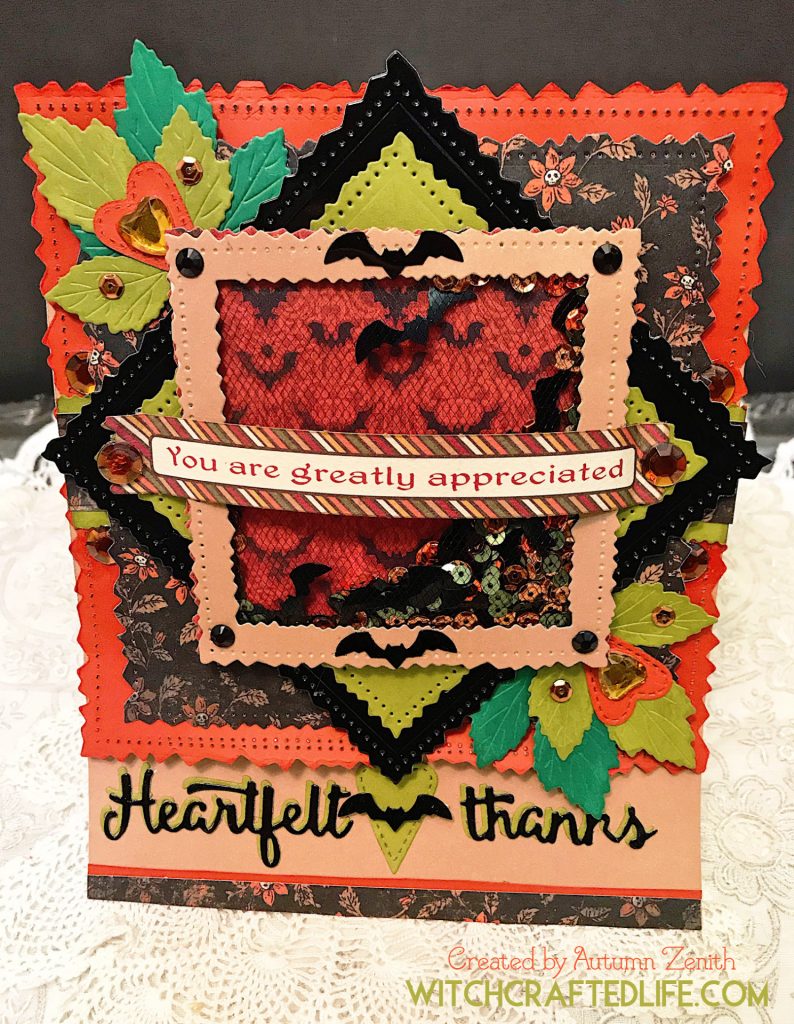
Heartfelt Thanks Bat Sequins Shaker Card
While many people are busily whipping up cute, sweet and beautiful Valentine’s Day cards, I’m busily digging through a plastic storage tower for a little container of bat-shaped sequins.
I smile to myself as this point hits me, Halloween patterned papers sprawled across my desk as, outside, it snows for the umpteenth time this winter.
I enjoy a good Feb. 14th project, too, please don’t get me wrong. At the moment though, my mind is delightfully focused – as per usual – on the end of October.
Like a lot of my paper crafting projects, the idea behind this card came about quite organically. I often pull out various supplies and let them speak to me, if you will, playing around with combinations and ideas until I hit upon one that seals the deal.
I knew that I wanted to create a thank you card with strong components of both gothic and Halloween styling and that a shaker card was the order of the day.
As is usual for me, I started by making a good-sized card base. In this instance, I used that beloved favourite of paper crafters everywhere – kraft cardstock.
The card base for this project measures just over 7 inches tall and 5.75 inches wide (excluding the portions of the design that extend beyond the card base itself.
Layers upon layers upon layers
I love layers. Seriously love them. I genuinely struggle most of the time if I have to make a project with just one or two layers.
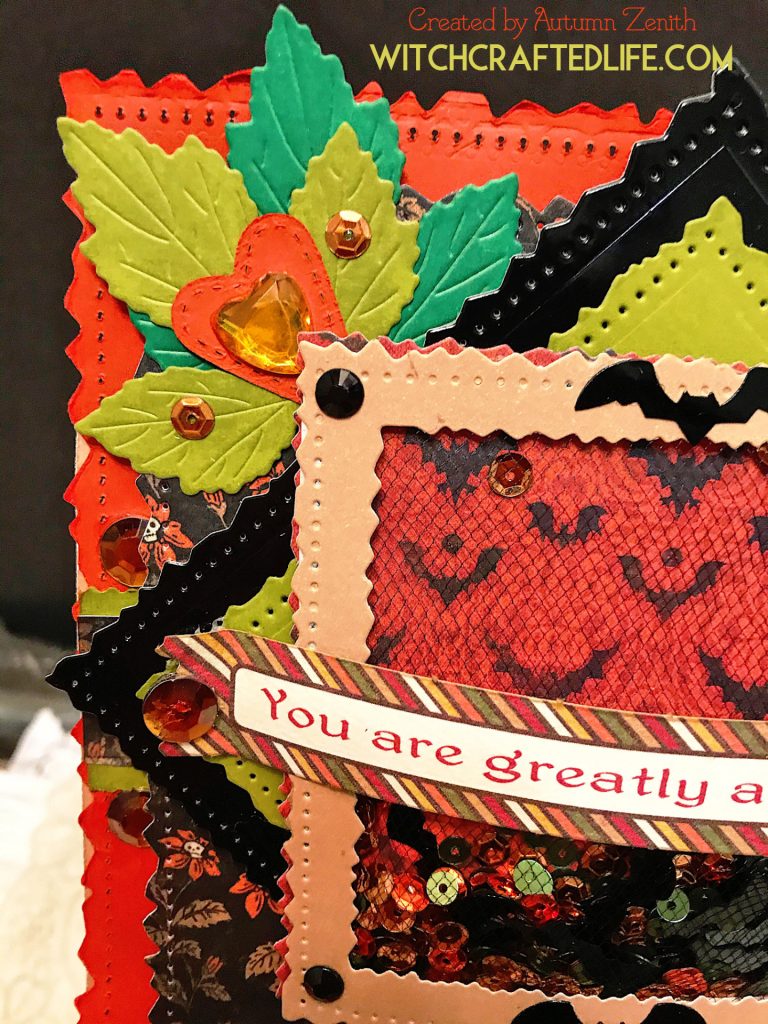
That doesn’t mean that everything I create is twelve layers deep, but chances are, there are at least a few layers to give the project a sense of depth, dimension and increased visual interest.
This bat filled shaker card was no exception.
Putting this Halloween Thank You Card Together
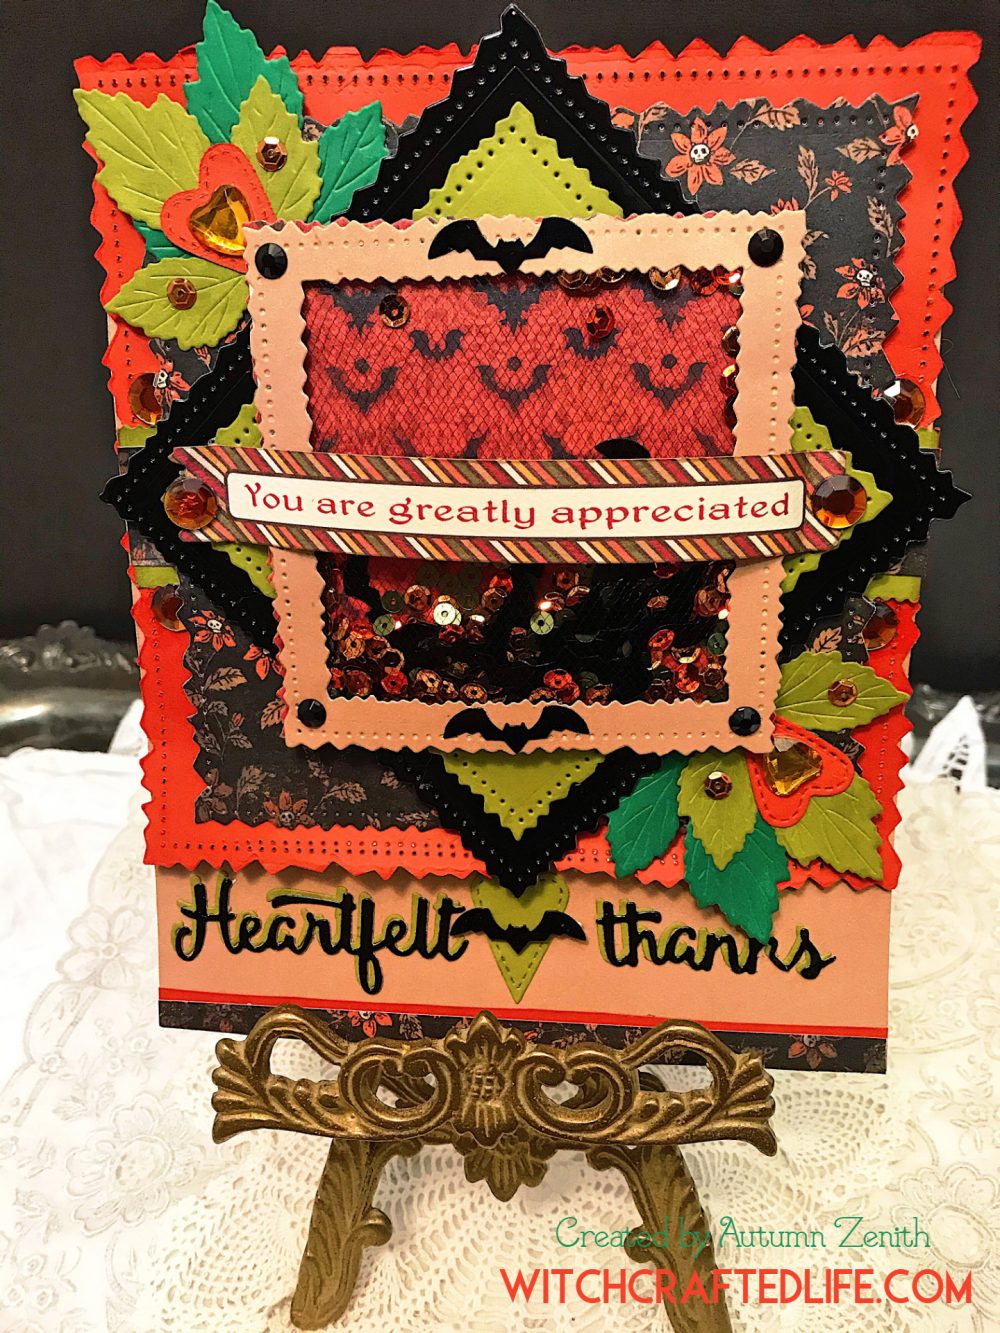
After creating my card base from kraft cardstock, I die cut two deckle-edged squares. One in dark rusty orange, the other in a fabulous Halloween floral print piece of paper from DCWV that features teeny skulls in the center of each bloom.
I then used two smaller dies from the same nested die set to cut out the middle layers here. These are the green and glossy black cardstocks you see here (if I could buy stock in Tonic’s glossy black mirror card, I happily would!).
Using the same sized die and a smaller sized die from that set, I created the kraft cardstock frame for the shaker element of this card.
Before I layered the middle layers onto the orange cardstock, I used pinking shear scissors (a nod to the deckle edging of the die cut pieces) to trim a strip of green cardstock. I topped this piece with a strip of the same skull flower paper used in the background.
Once the middle layers were in place (elevated with foam squares), I created the shaker element of this card.
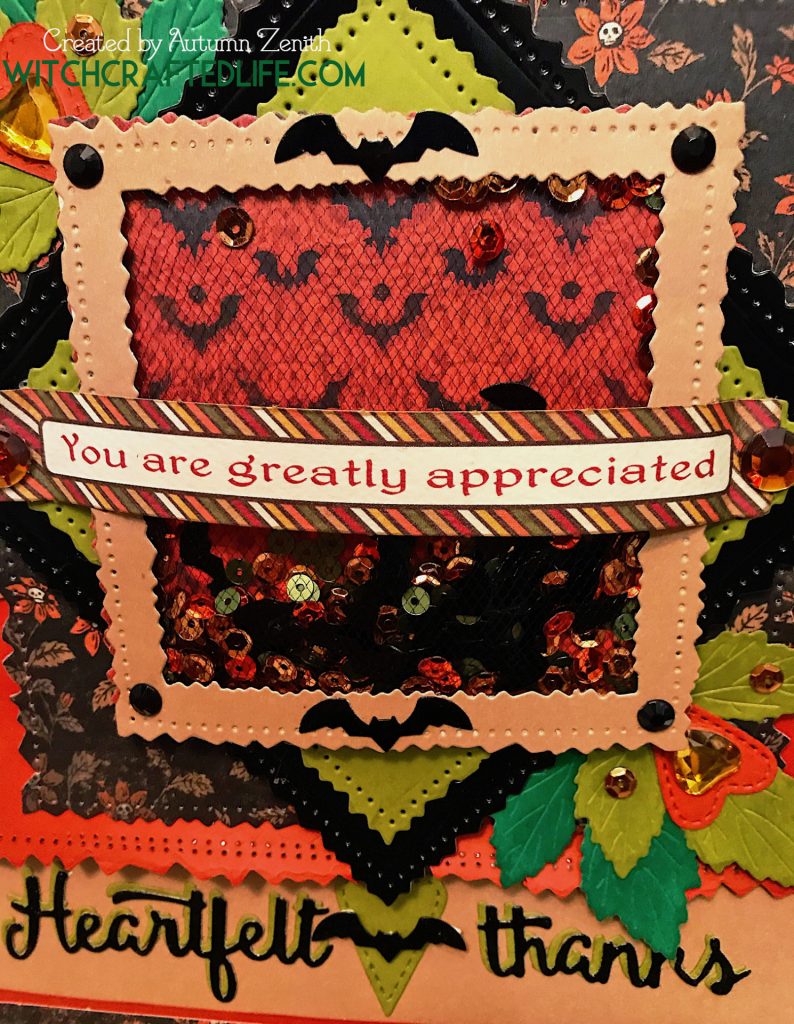
The background orange and black bat print paper that I used for my shaker is from the same DCWV Curiosities 6×6 inch mat stack.
I love using mesh, lace and tulle for shaker cards, so I opted for some finely woven black mesh as the “window” part of my spooky shaker.
Into the shaker card went a mix that I created of olive green, terracotta red, and classic gold sequins, to which I added the star of the show, black bat-shaped sequins.
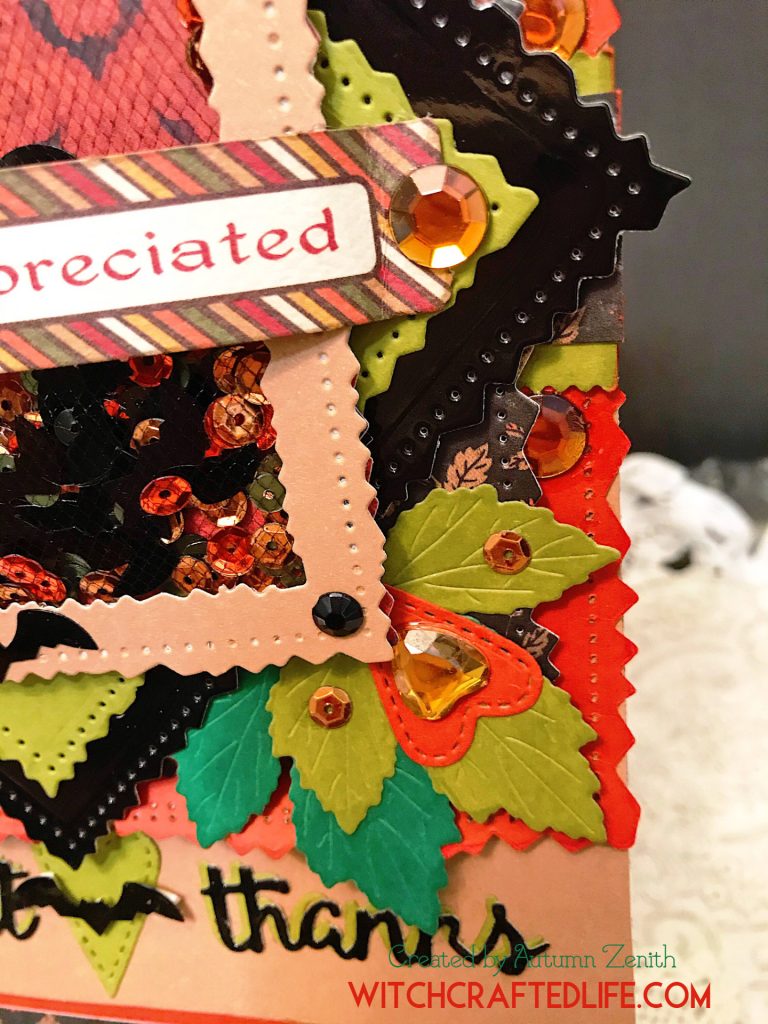
I attached the shakers window to the middle layers with foam dots. I then embellished the frame of the shaker with bat-shaped black sequins and small black rhinestones (gems), as well as a sentiment strip that was capped off on each end with an ambery gold hued rhinestone.
To give the sentiment strip a greater sense of dimension, I gently curved it in the middle before applying it to my project.
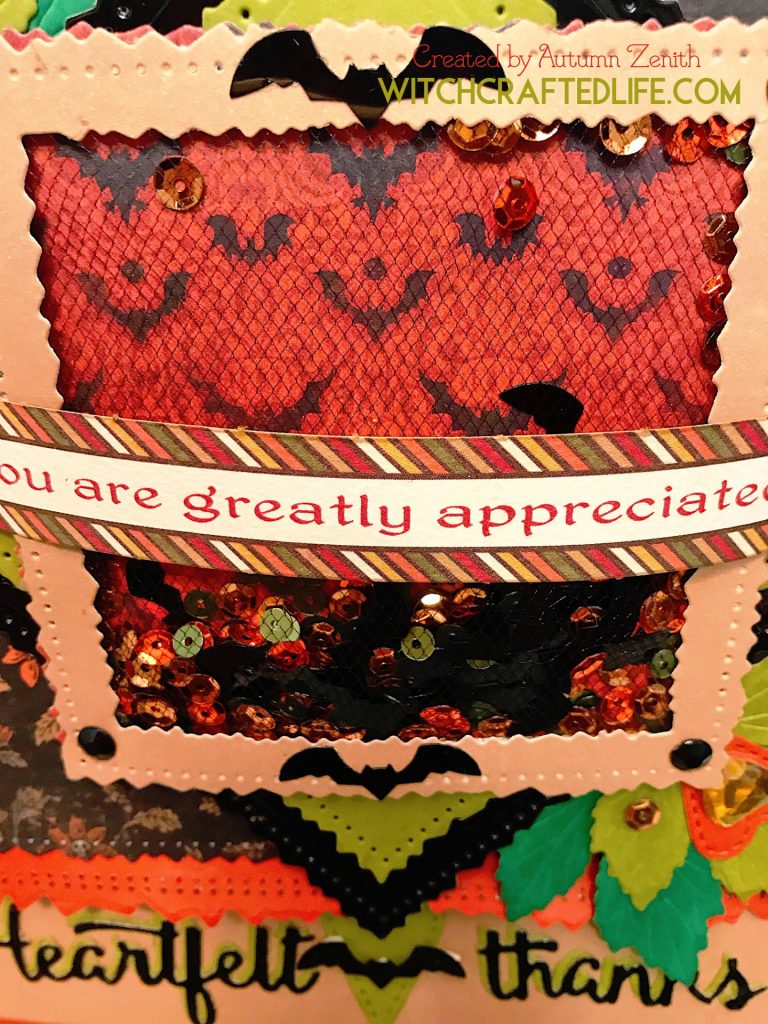
Next, I repeated the skull flower paper with a thin band at the bottom of the card. Immediately above this, I placed an even smaller band of the same dark orange cardstock I used earlier.
After that, I die cut leaves in two different colours of green cardstock along with a stitched heart die cut from the same orange cardstock I’d already used.
I ever-so-lightly inked my leaves in shades of ink just a whisper darker than their respective cardstock colours. I then clustered the leaves and hearts, topped each heart with an ambery gold heart-shaped rhinestone, tucked round rhinestones in the same colour around the horizontal strips of paper in the middle of the card, and set about die cutting the “thank you” part sentiment.
To do this, I used a “heartfelt thanks” word die and cut out two matching sentiments. One in glossy black mirror cardstock, the other in the same olive green used elsewhere on my card. I intentionally offset the two colours to create a layered shadow effect.
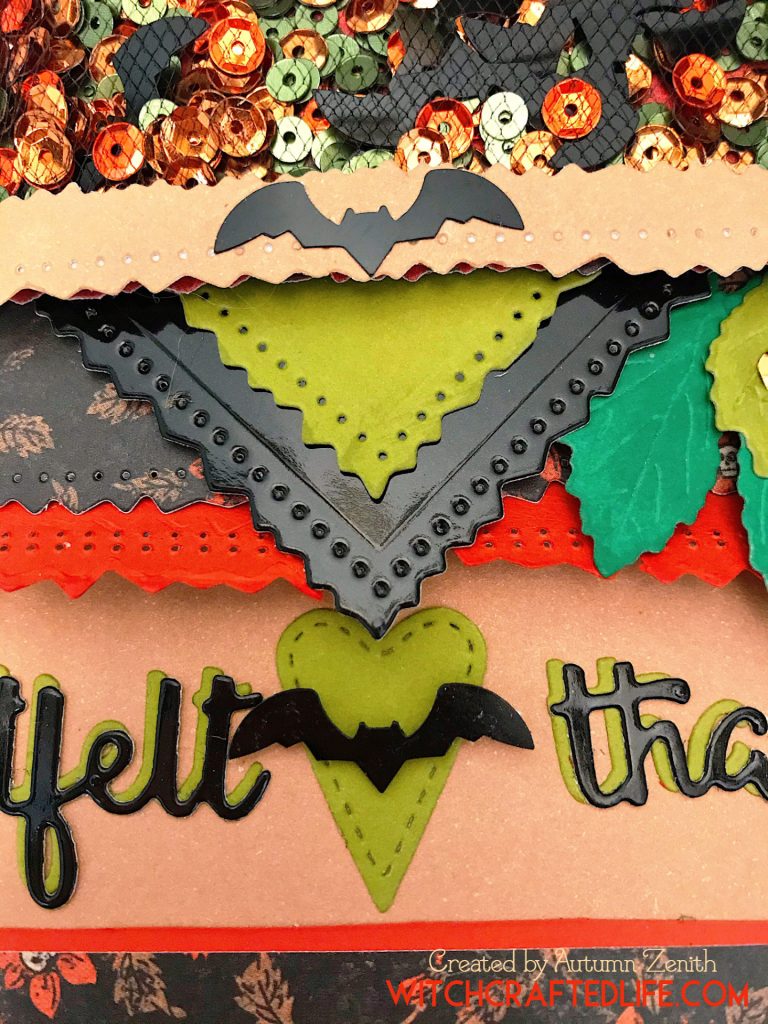
I also die cut a stitched heart from the same green paper, which I placed between the two words and topped with one final bat sequins.
For one final hit of sequins, I placed individual orange and gold coloured sequins on four of the green leaves, alternating (diagonally) the colours on the top and bottom sets of leaves (which, I had arranged in the same way, with alternating colours on both sets).
I created my message space inside the card and with that, this festively fall time inspired make was complete, ready and waiting to fly like a bat in the night to its recipient.
Card making tips and ideas from this project
-Use glossy (and/or metallic) papers and cardstock in selective areas to add sheen and really help a project pop.
-Ink or otherwise colour, such as with pencil crayons or markers, your die cuts for greater depth and, in some cases, to help them look more lifelike.
-Repeat the same sequins that you used in your shaker elsewhere on your card.
-When working with bold, eye-catching colours, ground them with a neutral shade. In this case, I used kraft, but white, cream, light brown, or even black could have worked here as well (had I gone with black, I likely would have swapped the glossy black cardstock for a different paper or cardstock).
-Turn square-shaped dies into diamond-shaped ones by rotating the angle of the square when you adhere it to your project.
-Not all leaves need flowers and vice versa. While we often associate the two as going together like peanut butter and jelly, either can look spectacular in its own right – especially if you use two or more colours to help them stand out all the more.
-Curve your sentiment strips. Whether they’re premade or handmade, cardstock, paper, vellum, cork or another type of pliable material, curving your sentiments lends a great sense of dimension to your make.
-Use a patterned paper as the background for your shaker – especially if you’ve primarily, or solely, used solid colours elsewhere on your project.
Patterned paper from smaller sized pads, such as 6×6 inch and 8×8 inch pads, with their inherently smaller sized prints often work especially well for the relatively modest sized amount of space available behind your sequins or other shaker elements (this background are is also a fun spot to place part, or all, of your sentiment – provided it can be read when the card is at rest).
-If you don’t have glossy paper or cardstock, but want the look for your sentiments or other elements of your project, top them with clear embossing powder (Wow Clear Embossing Powder is a good option), Glossy Accents, or a similar clear glaze product that dries to a translucent finish.
Products to help you recreate this Bat Sequins Shaker Thank You Card
-Cardstock in kraft (you could use taupe or light brown instead), dark orange, olive green, and medium green.
-Glossy black cardstock – I used Tonic Studio Glossy Black Mirror Cardstock
-Bat and skull flower print papers – I used two prints from the 6×6 inch DCWV Curiosities Mat Stack
-Sentiment strip – I used a die cut piece from Gracious Elements Die Cuts by Authentique
-Corresponding ink in a shade just slightly darker than that of your cardstock leaves – I used Morocco and Pistachio from Tsukineko’s Memento line of ink pads
-Ink to edge some of the paper and cardstock layers – I used Cottage Ivy and Toffee Crunch from Tsukineko’s Memento line of ink pads
-Pinking shears or pinking edge decorative scissors – I used Fiskars Paper Edgers in Mini Pinking
-Set of deckle-edged square shaped nesting dies
-Thank you sentiment mental die (or use stamps, stickers, rub-ons, or sentiment die cut pieces instead)
-Leaf-shaped metal dies
-Stitched heart-shaped metal die
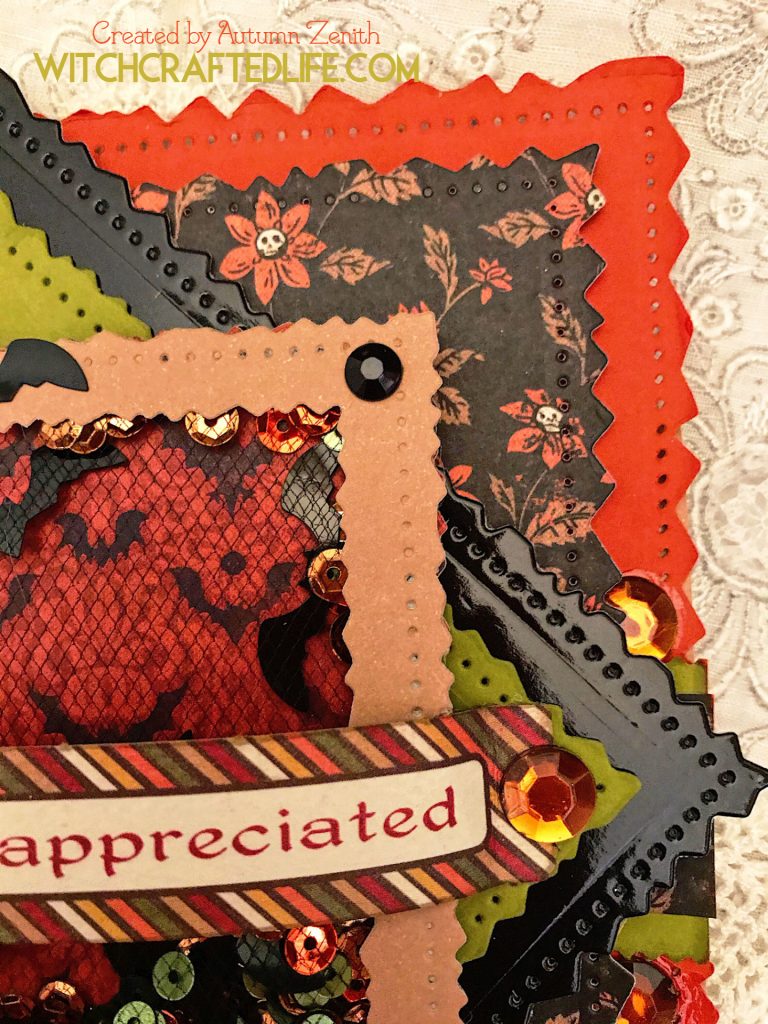
-Round and heart-shaped dark golden yellow rhinestones (gems) – mine are from the “Crafts” brand sold at Dollarama stores
-Small black rhinestones (gems)
-Black tulle
-Green, orange, and gold round sequins
-Black bat shaped sequins
-Dimensional foam, pop dots, or similar to elevate some of your layers
-Adhesive, such as a tape runner, of your choice (I often use my Scotch Tape Glider)
Halloween cards, not just for Halloween
Naturally, there are some recipients who would be more welcoming of an October 31st themed card in the final weeks of winter than others.
I personally feel it is important to be respectful of peoples’ taste, beliefs and interests (if such information is already known to you) when creating projects that you’ll be giving away.
Many individuals live for Halloween and if you fall into that camp, chances are some of your nearest and dearest already know this about you and may quickly understand why there’s holding a bat themed card before the Easter Bunny has come calling yet.
If you have people in your life who adore fall, Halloween and/or Samhain, consider adding a fabulous touch of autumn to their day outside of October by creating a sweet, spooky, silly, or otherwise sensational All Hallows’ Eve related make for them at this point in the year.
Naturally, you can replicate or take inspiration from this design and use other types of materials here as well. This same general design could be used for a ton of different occasions – Valentine’s Day included.
All cards are card maps unto themselves.
And if you didn’t want to go this overtly Halloweeny, you could use a small dose of October perfect products instead. Say pumpkins, a scarecrow, a black cat, bats flying across a full moon, bare-branched trees, a Victorian-style gate, or a pair of pointy-toed witches boots, for example.
If you prefer to make and give Halloween cards when jewel-toned leaves are falling, that is completely okay, too. You could either put together a card like this now and tuck it away for later or save the project idea in your inspiration file or on Pinterest to create come autumn.
Crafting is a year-round activity that grants us the ability to connect with any holiday or special occasion that we desire whenever the urge strikes.
If you want to make Christmas or Yule cards in June, go for it! Canada Day or Independence Day cards in November, why not?
Or, as in this case, Halloween paper crafting projects in February. Have at it!
Life is too short and the giving of cards to those we care about too important not to create what we want, when we want – no matter the current season.
Show me your paper crafting makes!
If you make a project based on or inspired by this card – or want to share any of your other handmade crafts with me – please use the hashtags #WitchcraftedLife and #WitchcraftedLifeMakes on social media so that I see your beautiful creations.
Project share
Pin the image below – or any other in this post – to Pinterest, pop it into your Instagram Stories, post in on Twitter or Facebook, or share it anywhere else you wish to help yourself find it again and to inspire others at the same time.
Cool. Nice job. Halloween is my favorite holiday, too.
Thank you very much, Ally! Isn’t Halloween fantastic? It’s a huge part of my life the whole year through and I just love that crafting allows me to engage with it all the more, even when it’s not fall time.
I look forward to continuing to share in our mutual passion for All Hallows’ Eve with you all throughout the year.
And on the holiday front, may you have a stellar Valentine’s week, my friend!
♥ Autumn
ONCE again: WoW♥️👌🏻
Love the way you express your inner self by being creative..i really am a Spring person, but i deeply feel the fall, too: it‘s refreshing air after a Long hot summer, the stunning colors and the mood around nature slowly preparing for it‘s rest..
Sending you some heartfelt greetings from Southern Germany😘
Josephine
@josephine.gondemott
What an amazing card, Autumn. I’m loving all the layers, the gorgeous colours, and of course the bat shaped sequins! xxx
Thank you immensely, dear Ann – you’ve got me blushing darker than the rust-hued cardstock that I used here. 🙂
Creating this card and post gave me a great idea (humbly) for a new hashtag that I plan to bring into being and will be posting about here in that not too distant future ( which focuses on Halloween related crafting the whole year through).
♥ Autumn
I think you already know I love this card! 🖤 Where did you find the bat sequins, or did you make them yourself? I’d love to find some of those to sew on some clothing!!! lol
You’re fabulously sweet and supportive, dear Lynne. Thank you so much! I’m delighted to know that this shaker card stuck a chord with you as well.
Thank you for asking about that. The black bat sequins are from AliExpress.com, though I’ve seen similar ones over the years on Etsy, eBay, the website Sophie & Toffee, and various sites and shops that sell nail art supplies.
Oodles of hugs,
♥ Autumn
This is so lovely, Autumn. I’m not much of a crafty person, but I LOVE details, the more the better! I just adore all the details you put into these cards – the eye travels and takes in more and more. I also like how you describe it, so that I can go back and go, “oh, yes, I see the added ink on the leaves, how perfect!”
Sorry to hear about all the snow!! Sending you a hint of pink blossoms against the deep maroon tree branches – girly but also kinda gothy? Lol! Hope you are well, my dear!
Thank you deeply, dear Shelia. Truth be told, the past few days have been a bit rough. My sweet DH, Tony, had emergency kidney surgery in Vancouver last week and is not in the best place on the health front right now (he’ll be having another operation, albeit most likely closer to home, this time at the hospital in Vernon, in a few weeks time), but thankfully we’re both remaining in high spirits and hoping that come gorgeous days of spring that you mentioned, he’ll be in a far more positive place again on the health front.
Your compliments and support about my paper crafting makes are incredibly touching. As much as I admire those with a restrained approach who create stunning minimalist or single layer cards, by and large, that’s not my personal style and I tend to go to town on the details, layers, and embellisments. Knowing that you enjoy seeing them as well is sincerely motivational to me and so I really must say thank you, wholeheartedly, again.
Big hugs & the very merriest of Valentine’s week wishes,
♥ Autumn
This card is amazing, Autumn. Oooh, those layers!!! I adore layers upon layers- whether in my choice of clothing or in fabulous cards such as these. Like you, October is my favorite month and I love the Halloween season. I cannot wait to see what you create next!!
Thank you so much, my beautiful fellow autumn adoring soul.
Many cheerful high fives for layers! I’m with you there completely and have been reflecting lately on how I think that physical layers are a strong outer representation of the multiple layers of who I am and how multiple interests/passions/characteristics/etc coexist within myself at all times.
You’re so sweet! This month is not unfolding how I’d foreseen it going in the slightest, but if possible, I hope to have another project share to post here before February is over. Then, in March, I’ll be aiming for some fresh, exciting new springtime makes.
If there’s ever a theme or type of card, scrapbook page, tag, etc that you’d be keen on seeing an example of here, please don’t hesitate to ask and I’ll happily try to make one to post about.
Thank you again deeply.
♥ Autumn
Fabulous shaker card love all the layes and brilliant little bat sequins
Carol x
Thank you so much, Carol. I wholeheartedly appreciate your lovely comment.
Aren’t those bat sequins the cutest? I highly suspect they’ll appear here again in future paper crafting makes (thankfully I’ve still got plenty left at the moment).
I really appreciate your kind words and hope that you have a beautiful Valentine’s week.
♥ Autumn
A fabulous Shaker card, lots of super details and great colours.
Thank you for visiting my blog and becoming a follower.
Pauline – Crafting with Cotnob
x
You’re sincerely welcome, Pauline. Thank you very much for your own lovely comment.
I sooo wish that WordPress currently had an equivalent system to Blogger’s follower widget. I blogged (on different subjects) on Blogger for many years and really miss having that widget here on WordPress now.
Many thanks again & have a fantastic week!
♥ Autumn
Will you come finish my scrapbooks for me already? Haha!
My sweet friend, I would joyfully do so in a heartbeat if only we lived closer to one another (blast this gigantic continent of ours! :D).
If there’s ever a handmade card or tag (or even a LO) that I could make and send you for pretty much any occasion you’d like or need one for, please don’t hesitate to let me know. I’d be delighted to create an original piece for you.
♥ Autumn
Great card and lovely Halloween vibe. I love the skull flower paper – I would use it for a gothic dolls house wallpaper!
Thank you very much, dear Naomi. Seeing your comment here made my eyes light up like a Beltane bonfire.
That’s a stellar idea! I’ve long dreamed of having a gothic/Halloween themed dollhouse and will definitely keep your excellent suggestion in mind if the opportunity to start one does ever come my way.
Big thanks again! I hope that your month is going positively and that you have a terrific 3rd week of February.
♥ Autumn
I adore Halloween one reason is the magic in the air and the excited childlike energies!
I’m in love with this stunningly beautiful bat shaker card!!
I think it would be amazingly awesome to be thanked with this card. I’m inspired to attempt to create something as beautiful!
Hello my sweet friend and fellow Halloween lover, thank you very much for wonderful comment and for visiting my blog. Both mean a lot to me.
I’m with you completely regarding the magick the permeates the air around Halloween/Samhain and the childlike wonder that the season houses. No other chapter of the year exudes either to the same degree for me personally.
That is so touching of you to say! Please feel free to share your own gorgeous make with me if you create a project inspired by this card. I’d be elated to see it anytime.
Thank you again. I hope that you have a cozy, fantastic weekend.
♥ Autumn
How incredibly symbolic of Fall; the layering technique on your enachanting card is mot unlike the layering of leaves blanketing the earth during this season when the veil grows thin.
How eloquently said, Melanie. Thank you for your beautiful comment and compliment. I adore that this card stirred such imagery and thoughts in you.
Fall is (by a wide margin) my favourite season and the changing, tumbling leaves are amongst the elements that I adore more about that chapter of the year. I just love channelling that their timeless beauty and appeal in many of my seasonal makes.
Many thanks again. Wishing you a relaxing, awesome weekend.
♥ Autumn
Your cards are art, one can easily see all the time and love that went into making it.
I’ve just made a big bunch (120 in total) of Christmas cards, much more simple than this one of course. I use white cardboard as card base, then various cut outs of old magazines which I decorate with glitter glue. The glitter glue is cheap and has such a lovely three dimensional effect. I also have a few plastic rhinestones and pearls, but I am trying to keep it simple. Paper crafting is cosy and fun. Have a nice day, dear. 🙂
I literally said “wow” aloud as I read about your hat doffingly impressive Christmas card making, dear Sanne. Not only is that an impressive number of cards to make point-blank, but it is all the more incredible that you’ve done so this early in the year. You are seriously an inspiration to paper crafters everywhere! 🙌
What beautiful cards – and what lucky recipients who will be on the receiving end of your handmade creations. That is 120 homes that will be filled with even more festive cheer and love next holiday season.
Thank you so much for your heart-touching compliments. As much as I admire cards that more minimalistic or lowkey, most of the time my own personal style is to spend hours (or even days) creating a single card (or tag, scrapbook page, etc) that is usually teeming with layers, details, embellishments and so forth. That style of paper crafting comes naturally to me and as I’ve long learned across the board in life, it’s generally best to go with your creative instincts.
You’re already inspiring me on the Christmas making front. If I start creating mine (in years when I’m making, not purchasing, cards) before November, I usually feel like I got a decent headstart. 😄 Perhaps – especially now that I have this blog – I’ll begin them even earlier than that. I’ve not made Christmas cards since before the fire and would absolutely love to send some out again this time around.
How right you are about paper crafting being wonderfully cozy and fun. I also find it to be deeply cathartic and a great way to counterbalance some of life’s many stresses and worries.
May we both have oodles of time to create this spring!
♥ Autumn
You can’t beat a card with heaps of layers – I love the little bats you’ve used to decorate the frames!
Thank you very much, Claire. What a sweet, wonderfully nice comment.
I’m with you there completely! Layers, details and embellishments are my paper crafting style to a tee. I swear, I almost get antsy if a project I’m working on is flat (or nearly so). It’s rather funny in a way, really. 😄 We all have our own fabulous crafting styles and it’s safe to say that “understated” rarely applies to my own approach to paper crafting design.
Many thanks again. I sincerely appreciate your visit and hope that you have a sunny, fantastic month of March.
♥ Autumn