A certain unmistakable magic swirls through the air. Christmas carols waft from stores and open front doors, as – to quote the beloved song, Silver Bells – shoppers rush home with their treasures.
In endless dwellings around the globe, preparations for tomorrow’s feast are being planned or started. Stockings, if not already hung (by the chimney with care) will go up before midnight.
Young and old alike turn their eyes skyward, still believing that maybe, just maybe, they’ll catch a glimpse of Santa Claus and his team of reindeer.
Twinkling lights provide a warm ambiance to the cups of eggnog, cut-out sugar cookies, thick slices of classic desserts such as panettone and stollen, festive appetizers, and mugs of hot cocoa that are often heartily consumed throughout the final days of December.
Christmas is upon us and for those who celebrate this holiday – be it religiously or secularly – there is often much to delight in and be thankful for come the return of jolly old St. Nicolas.
I adore the classic elements of Christmas, including its telltale colour palette. The darker, deeper and more old-fashioned the hues involved, the merrier I am.
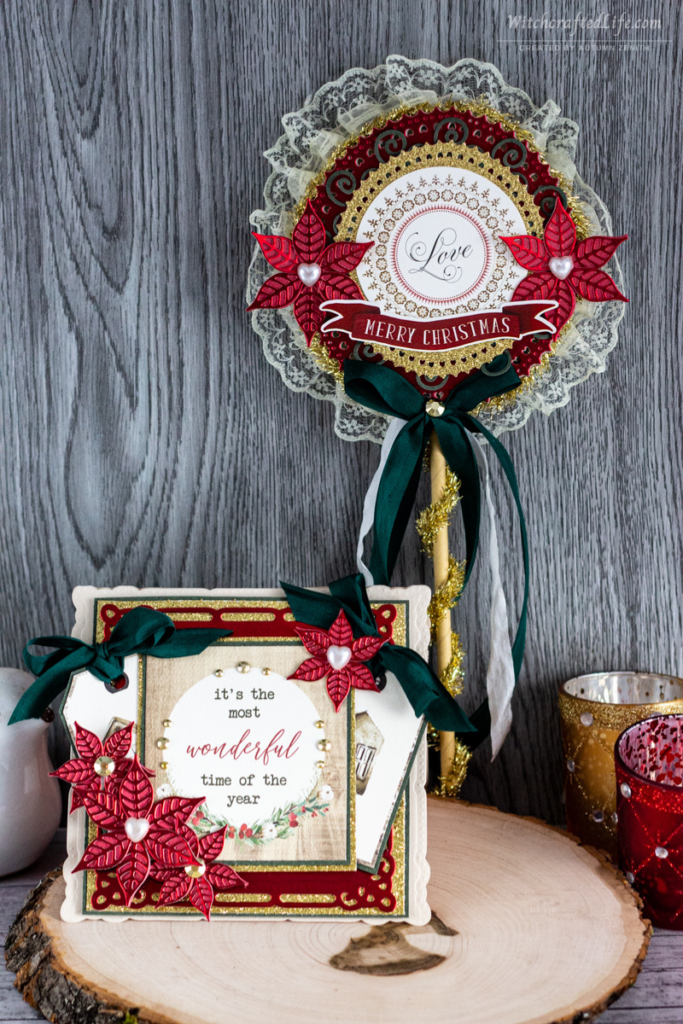
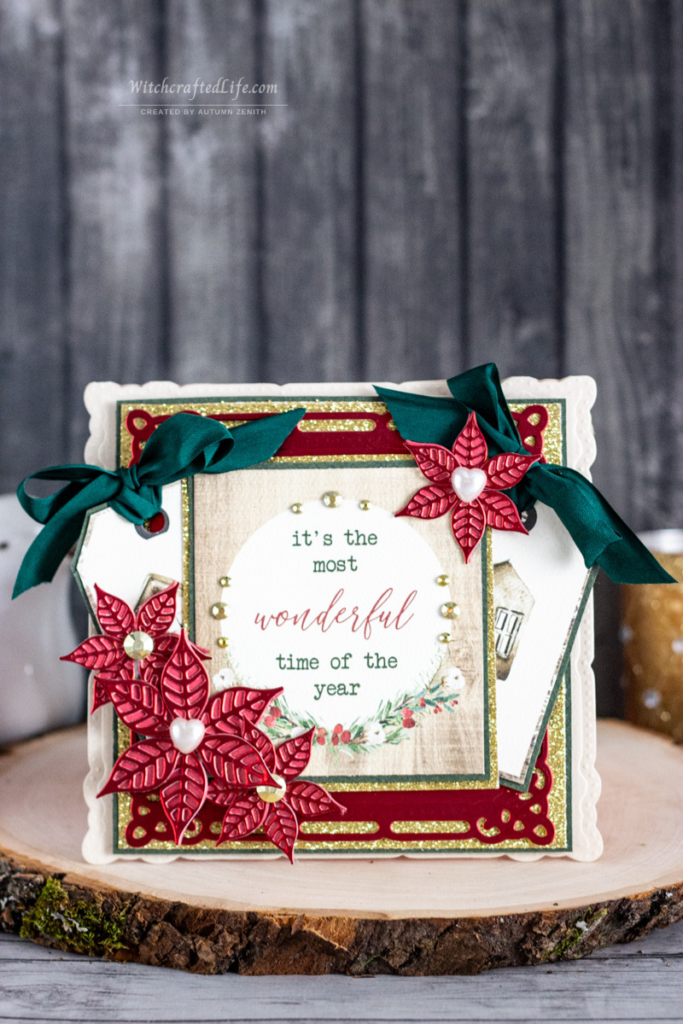
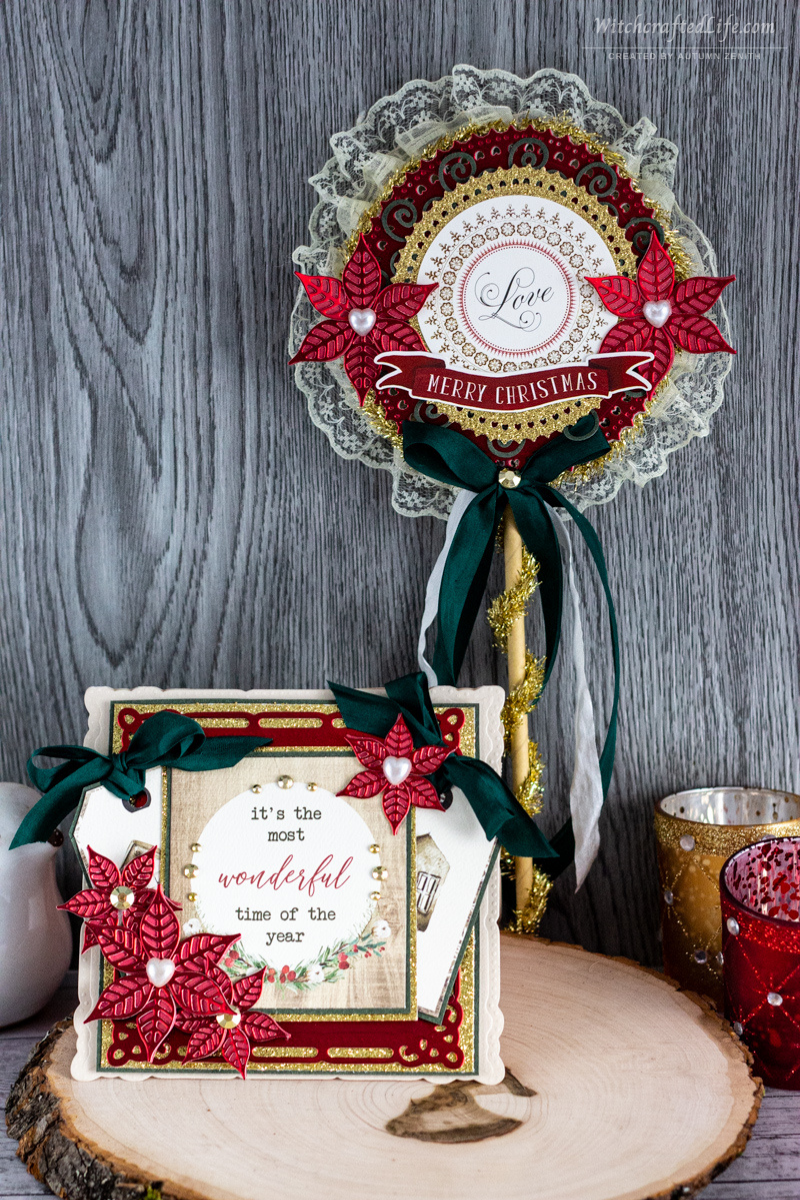
It was to this timeless holiday season colour scheme that I turned when making the delightful Christmas card and matching Christmas rosette wand featured in today’s post.
Year after year, I never tire of crafting (or decorating our home) with the colours – deep red, dark green, cream, and gold – that these projects feature.
They, along with a few other colours, epitomize the colour scheme of December and never fail to get my creative juices (err, wassail? 😃) flowing.
Timelessly elegant Christmas Card with Matching Rosette Wand
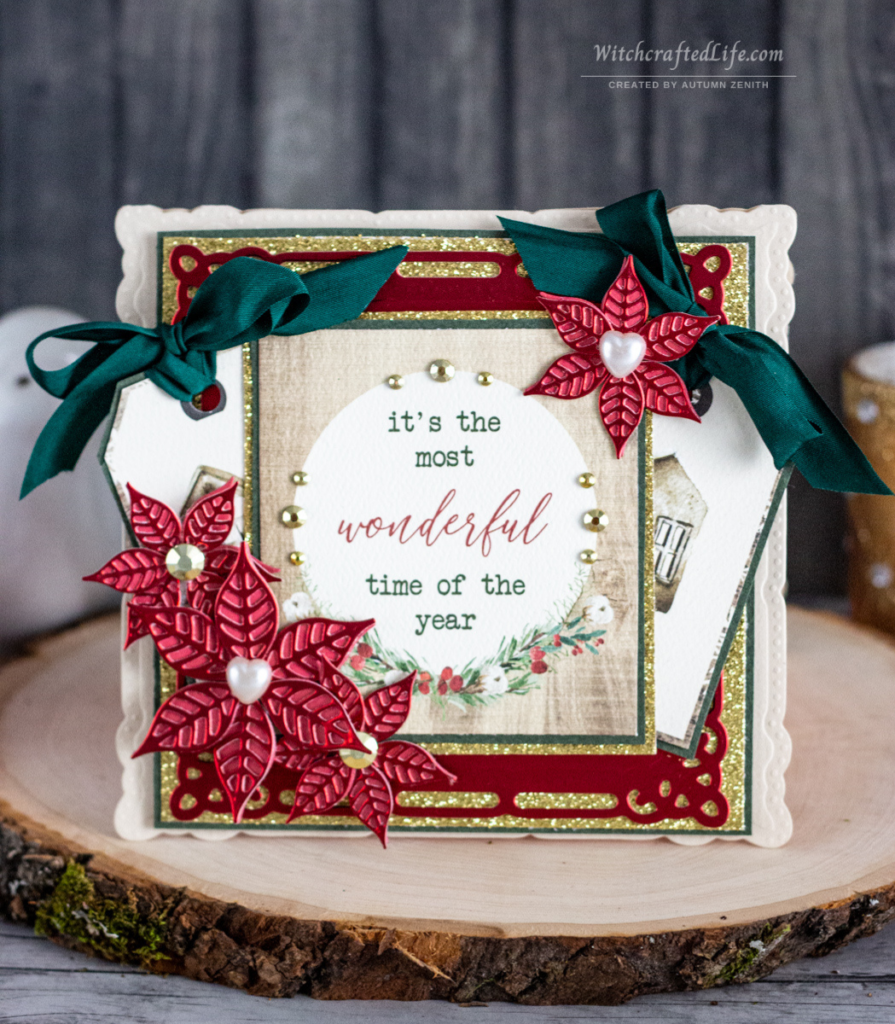
By the standards of many of the cards I make throughout the year, this festive Christmas greeting is on the smaller side.
Not tiny by any means, but not particularly large either. The reason for that is that I cut the card base with a shaped die and as my Sizzix Big Shot can (like most manual die cutting machines) only accommodate dies up to a certain width.
I have an unceasing dream that one day I will be able to add an electronic die cutting machine that works with larger/wider dies to my craft supply arsenal (say, for example, the magnificent Crafter’s Companion Gemini Machine that cuts up to 9 inches x 12.5 inches – swoon!).
For now, though, my trusty workhorse of a Sizzix Big Shot does the trick for most sizes of dies and I am sincerely grateful that it’s still going strong after nearly five years of frequent use.
Anyhoo, all that to say, given the smaller small size of this card base, I had to scale down the other cardmaking elements involved here accordingly.
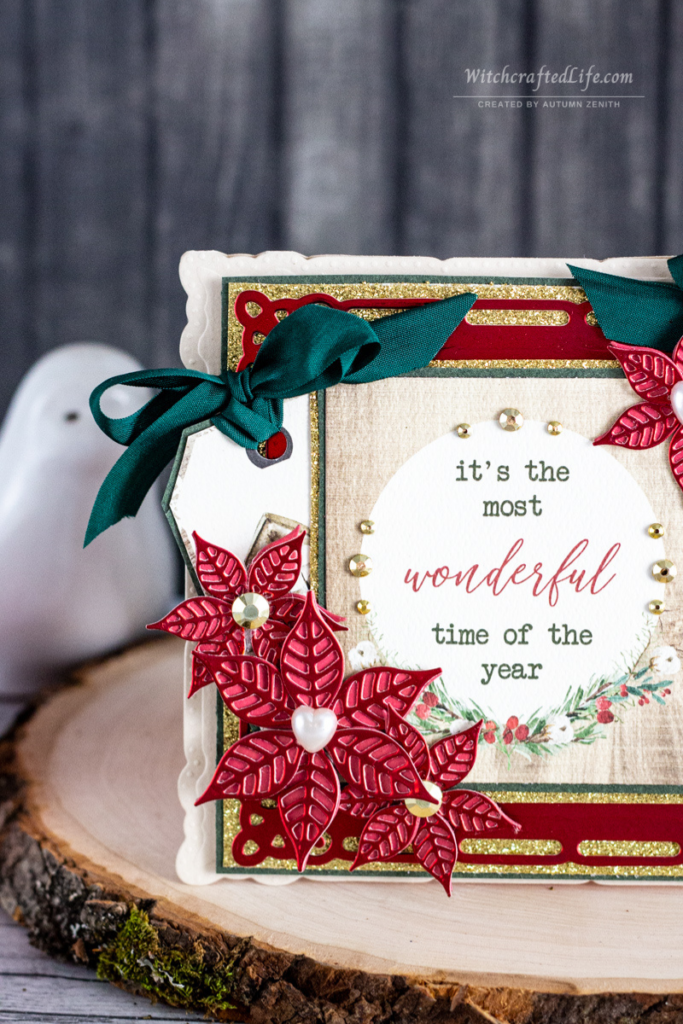
Ultimately, I was still able to work with various die cuts, layers, trims, and embellishments, so I didn’t feel like my usual crafting style was comprised or altered.
It was actually the matching Christmas rosette wand that I envisioned in my mind before the card itself took shape. And while I created the card first, I did so thinking about how I wanted the wand to look when all was said and done.
Happily, the two came together splendidly and were scarcely sooner completed than gifted to a very dear friend.
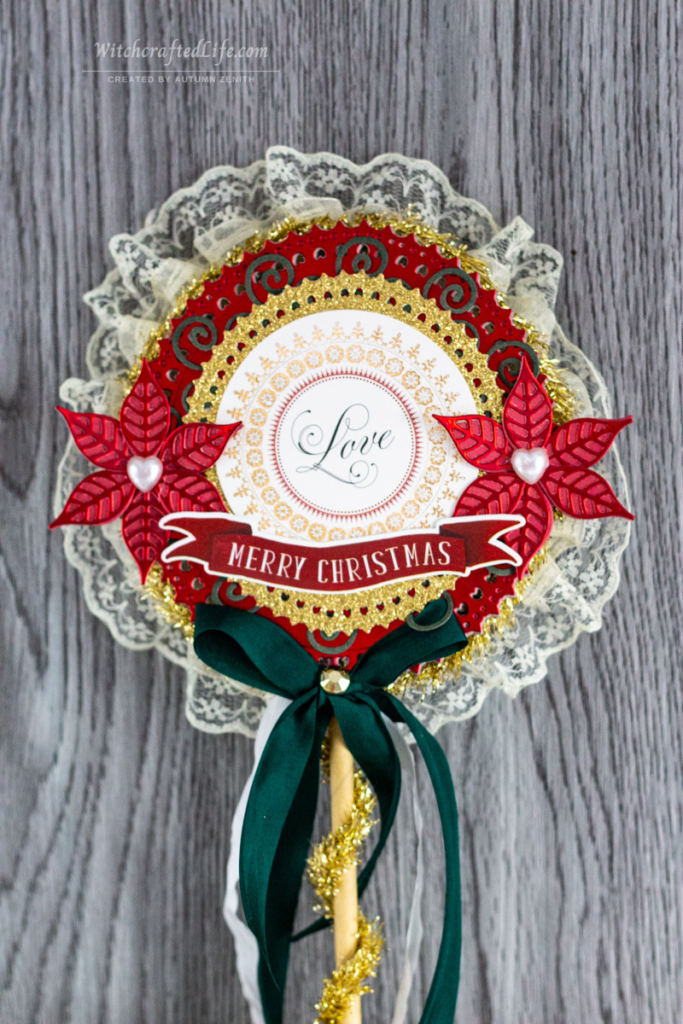
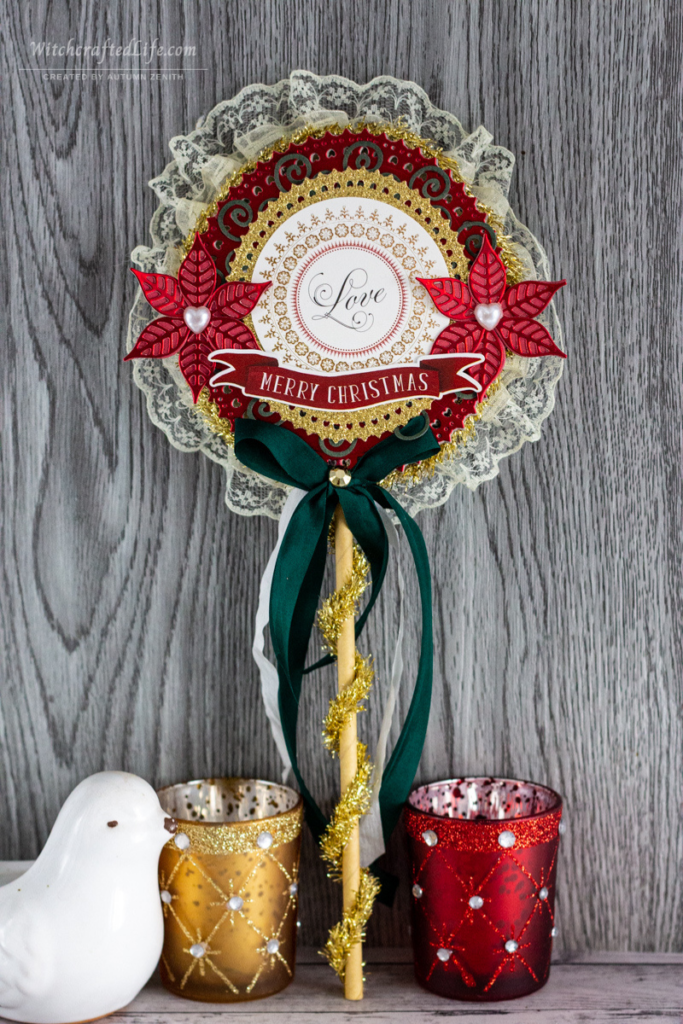
The “love” sentiment on this handmade wand could certainly be used romantically. However, in this case, it is meant instead to capture both the love that many of us have for Christmastime as well as the feelings of platonic love and appreciation shared between good friends the whole year through.
This particular wand – the general style of which is also known as a lollipop wand – does not house an actual paper/cardstock rosette or one made from a cupcake liner, as wands (including the Darkly Romantic Valoween Wand I shared here last February) of this nature frequently do.
Instead, the ruffled “rosette” element comes from the pleated lace that encircles the largest layer of this charming Christmas rosette wand.
I adore making wands. Each time I do so, I am reminded of this fact and find myself feeling tempted to whip one up to accompany most of the cards I create throughout the year.
That doesn’t always happen of course, but I hope to make at least a few fresh new rosette wands in 2022 and to share them, in the process, with all of you.
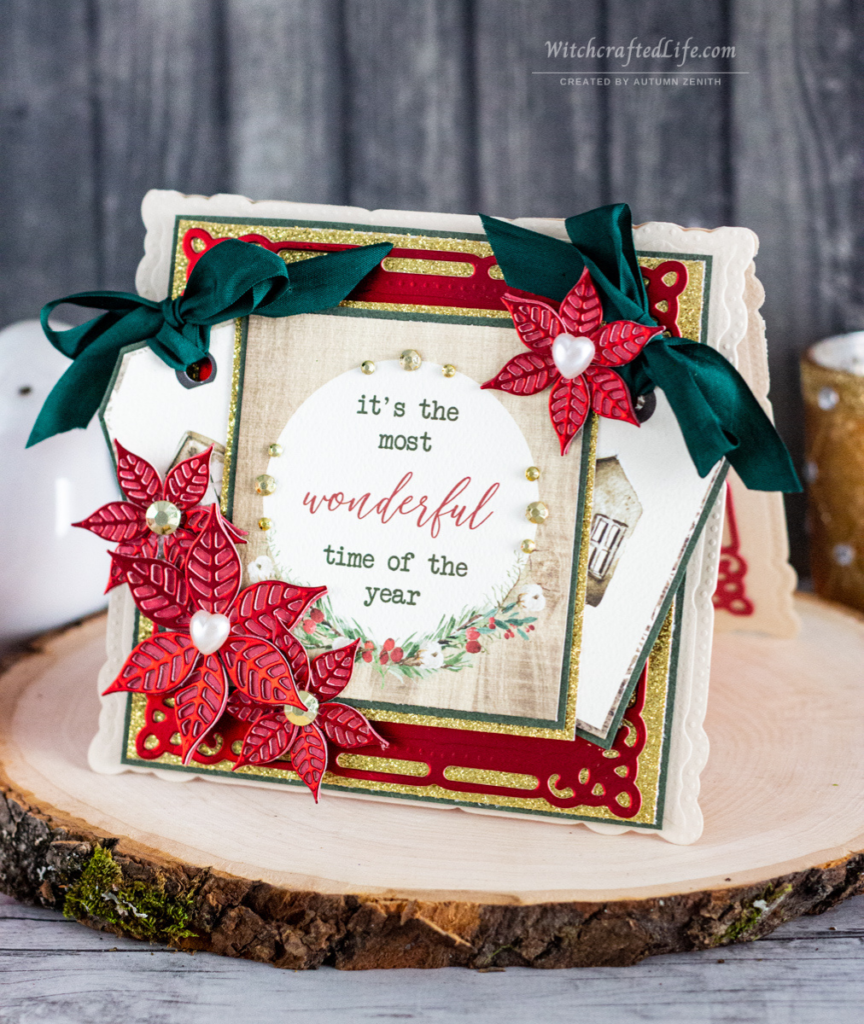
Naturally, it is too close to Christmas to make many holiday season 2021 craft projects right here and now.
That said, should you wish to get a jump start on next December, alter the sentiments used here to New Year’s appropriate ones, or adapt these general designs for other occasions, read on for a complete list of products used and detailed step-by-step instruction on how to create both of these Christmas papercrafts.
Products used to make both the sophisticated red, green and cream Christmas card and its matching Christmas rosette wand
(Note: When a product has the letters RW – for rosette wand – in brackets after it, that means it is only used on the rosette wand. Where this is not indicated, the product is used either on the card alone or on both projects.)
-Thin chipboard (that can be successfully run through your die cutting machine; RW)
-Smooth or lightly textured cream or ivory cardstock
-Light/pale red cardstock
-Pine, forest, or hunter green cardstock
-Red mirror/metallic cardstock – Scarlet Organza Mirror Cardstock from Tonic Studio
-Gold glitter cardstock – Premium Glittersilk Cardstock from Darice
-Christmas themed cut apart tags – Christmas Gift Tags from Carta Bella
-“It’s the Most Wonderful Time of the Year” sentiment piece – Christmas 3”x4” (cut apart) journaling tags from Carta Bella
-Ornate square (or rectangle) shaped frame die set (ideally the largest-sized die in this set should measure at least four inches in both width and height)
-Set of at least two double-layered poinsettia dies (or use two sizes single-layered poinsettia dies, if you don’t have a similar-looking poinsettia die to the one that I used here)
-Decorative (or plain) edged oval die set (RW)
-Ornate spiral (multi-arm, so to speak) die (RW)
-Layered poinsettia die (or a single layer poinsettia die – either works great here)
-Die cut “Love” sentiment piece – Jolie Collection Titles, Tags, and Quotes from Anna Griffin (RW)
-“Merry Christmas” sticker – ‘Twas the Night Before Christmas Volume I stickers from Echo Park (RW)
-Pine, forest, or hunter green seam binding (ivory or cream could look really nice here as well)
-Cream or ivory seam binding (RW)
-Gold tinsel trim – Old School Vintage Tinsel Trim from Pink Paislee (RW)
-Cream or ivory ruffled or pleated lace (RW)
-Small cream coloured heart-shaped “pearl” flatback embellishments
-Small gold coloured gems (these ones don’t have a specific product name on them, but are from the Michael’s line, Studio G; RW)
-Kraft (or similar shade) paper drinking straw (RW)
-Glue gun and glue sticks
-Dimensional foam, pop dots, or similar to elevate some of your layers
-Adhesive, such as a tape runner, of your choice (I often use my Scotch Tape Glider)
How to make a timelessly elegant Christmas card
Begin by die cutting your card base with cream or ivory cardstock and the largest size of ornate frame die in your die set.
To cut out a card base with a die, fold your card in half and place the die so that the top of it juts out just slightly past the folded area (this helps to ensure that there is an actual fold at the top, not just that you’ve cut out two matching individual die cut shapes).
Leave the card folded, use low-tack washi or drafting tape (or similar) to hold your die in place and run the card base through your machine with both layers remaining folded so that the die will simultaneously cut through the front and back sides of the card.
If you have never cut out a shaped card this way before, practice a time or two with scrap paper to get the hang of it. Once you have done mastered this technique, cutting out shaped cards (and tags, too) this way is usually a breeze.
Cut a piece of dark green cardstock slightly smaller than your card base. Adhere.
Cut a piece of gold glitter cardstock ever-so-slightly smaller than the dark green cardstock layer. Adhere.
Use the second largest die in your nested frame die set to cut a frame from red metallic/mirror cardstock. Adhere to the gold cardstock layer.
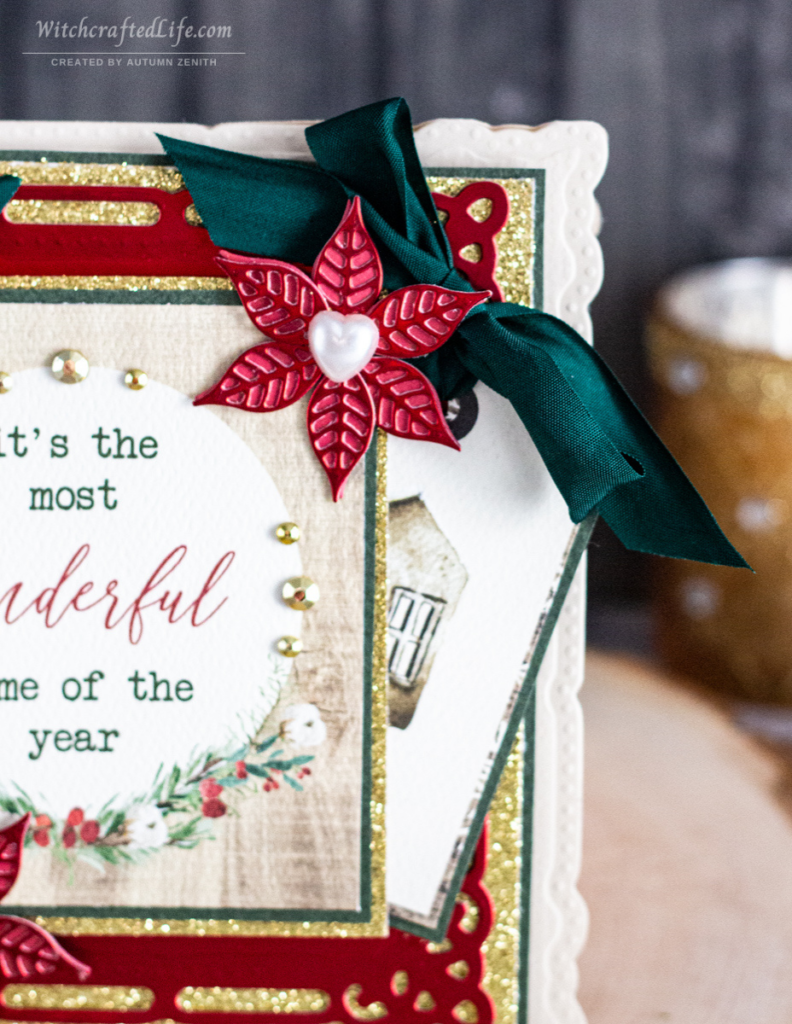
From the Carta Bella Christmas Gift Tags paper, cut out two tags that each have a small house illustration on them.
Back each Christmas tag on dark green cardstock and fussy cut around them to leave the slenderest of dark green cardstock borders on all sides.
Using a handheld hole punch, an anywhere hole punch, or an eyelet setting tool that makes holes, punch a hole through the “grommet” section of both cardstock-backed tags.
Thread dark green seam binding (or dark green ribbon, if you don’t have any suitable seam binding) through the holes that you just punched. Tie a single layer bow in each piece of seam binding.
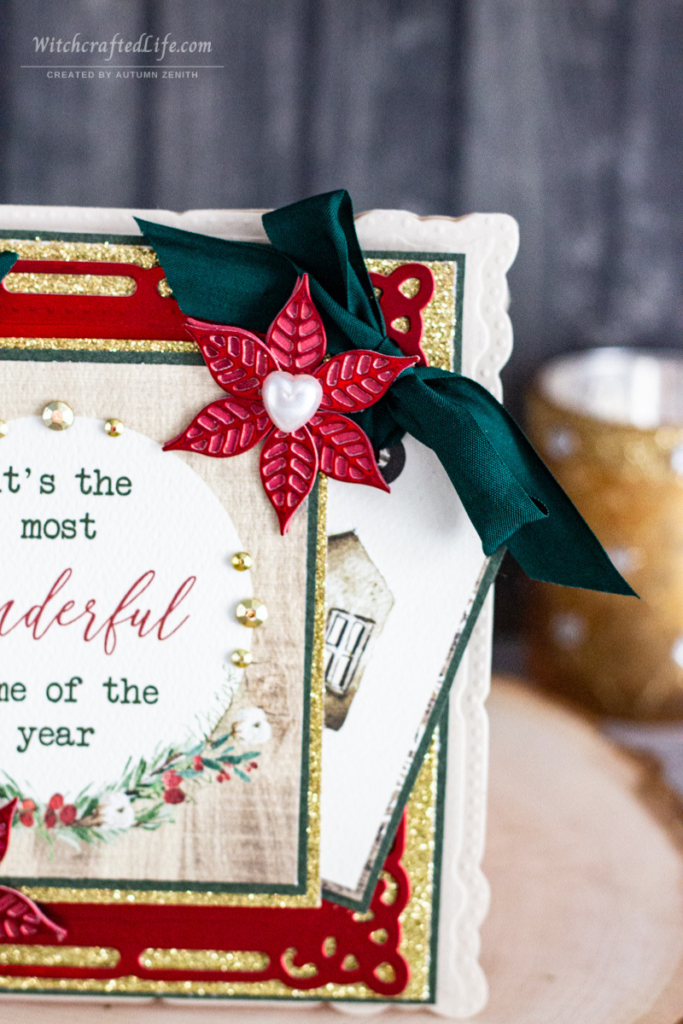
Angle tags so that the top of each one extends out past the edges of the cream card base just a wee bit. Adhere to card base layers.
Next, take the Carta Bella Journaling Tags paper and cut out the “It’s the Most Wonderful Time of the Year” sentiment square.
Cut a piece of dark green cardstock ever-so-slightly larger than the sentiment square. Adhere sentiment square to dark green cardstock.
Cut a piece of gold glitter cardstock a touch bigger than the dark green cardstock piece. Adhere dark green cardstock to gold glitter cardstock then attach that gold cardstock to the previous base layers of this handmade Christmas card.
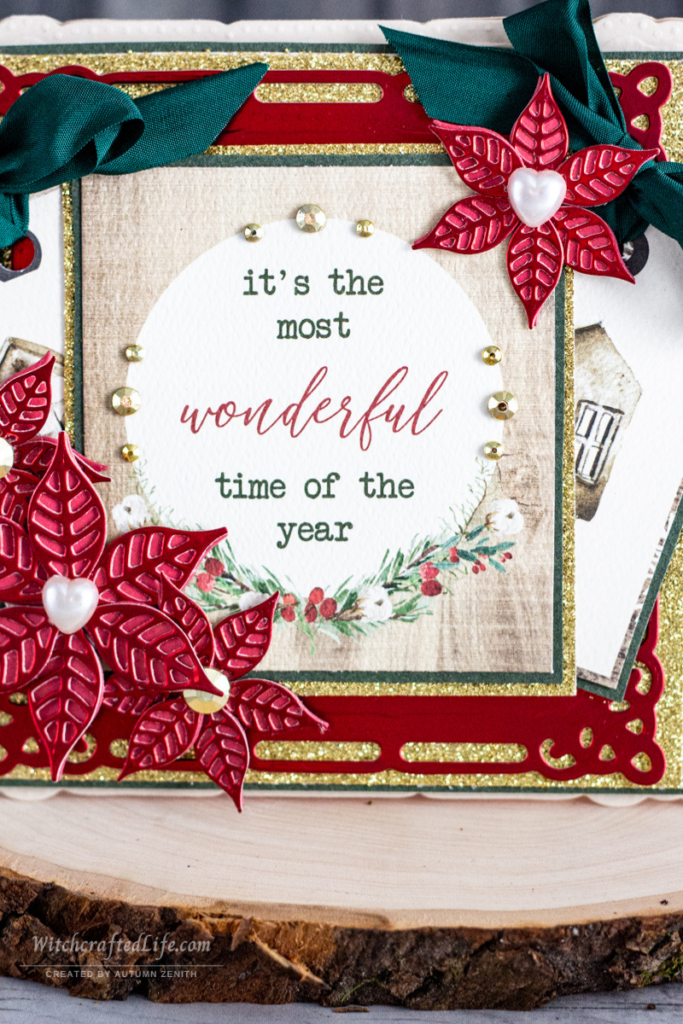
Place two sizes of gold gems around the left side, right side, and top of the circle in which the sentiment itself is written (as shown).
Use light red cardstock and die cut enough shapes so that you have three small and one large six-petaled poinsettia flower bases.
Then use the red metallic/mirror cardstock to cut enough shapes so that you have three small and one large six-petaled poinsettia top layers (these are the open design top piece layers of the poinsettias).
Adhere top layers to bottom layers then assemble poinsettias into six-petaled flowers. Adhere them two small and one large poinsettia to the bottom left-hand side of the central sentiment panel, and one small poinsettia on the upper right-hand side of the central sentiment panel.
Top the two small poinsettias on the bottom left-hand side with gold coloured gems.
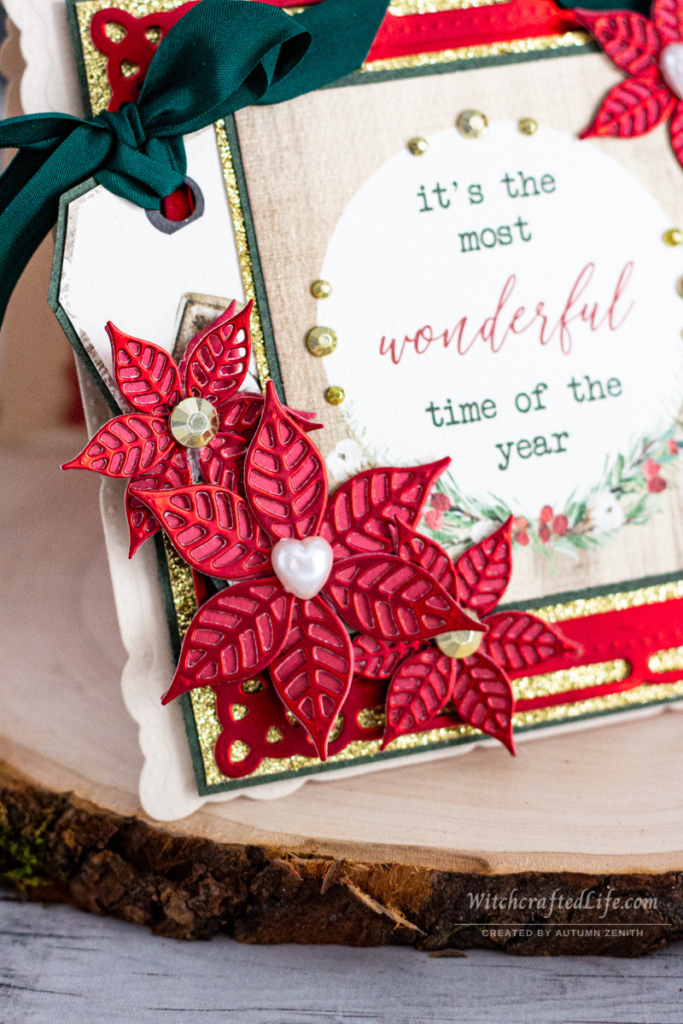
Top the large poinsettia and the small poinsettia on the upper right-hand side with cream coloured heart shape pearl flatback charms.
And just like that, you have a sophisticatedly beautiful holiday greeting to share with someone special in your life.
Read on to find out how to make the coordinating Christmas rosette wand. ❤️
How to make a timelessly elegant Christmas rosette wand
Start by cutting out one oval-shaped piece of thin chipboard with the largest size of nested oval dies.
Cut two identical pieces of red metallic/mirror cardstock with that exact same die.
Position the kraft coloured paper drinking straw in the bottom center of what will now become the backside of your rosette wand. Adhere it in place with hot glue or another type of very sturdy adhesive.
Once the adhesive for the straw is dry, adhere one of the red ovals you just cut out before the last step to the front and one to the back of the chipboard oval rosette base.
Measure out a length of ruffled cream/ivory lace that will fit around the outer edges of your wand head base.
Adhere lace around the edge of the wand head base, attaching it on the BACK (not the front) of this piece. I used – and recommend using – hot glue here, though a sturdy liquid adhesive would likely work as well.
Measure out a length of gold tinsel trim that will fit flush with the cream/ivory lace that goes around the wand base.
Adhere gold tinsel trim around the entire perimeter edge of the wand head, on the front side of the wand.
Die cut an intricate spiral shape from dark green cardstock (a similar-sized doily die cut would look great here, too). Adhere to red metallic/mirror layer on the front of the wand.
Die cut two identical smaller-sized oval pieces (from the same nested oval die set) from gold glitter cardstock.
Adhere one of these oval pieces to the back of the wand and one to the front.
When giving my paper crafts as gifts, I usually like to include a small tag with a handwritten sentiment such as “Handmade with 🖤 by Autumn Zenith” on it.
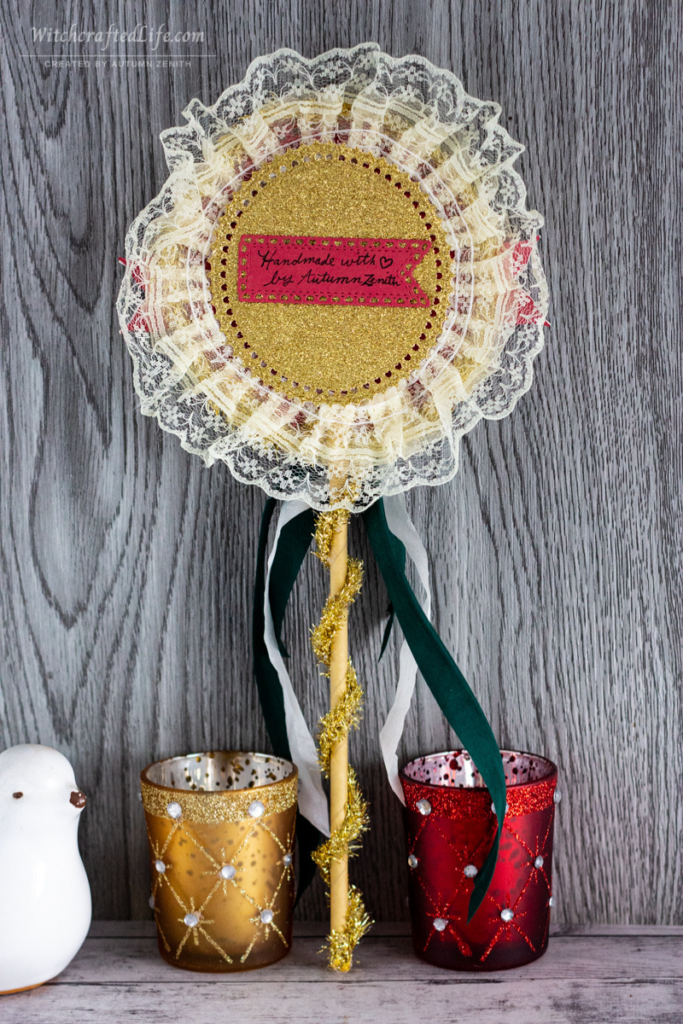
If you wish to do something similar, cut out or use a premade small tag or banner-shaped piece of cardstock. Adhere this tag to the back of the wand (As this is an optional step, I did not include a small tag or banner-shaped die in the supplies list above.)
The back of the wand is now complete. On to the rest of the front! 😊
Take the Anna Griffin “love” sentiment die cut piece and adhere it in the centre of the gold glitter oval.
Next, die cut enough base layers from pale red cardstock, and enough top layers from red metallic/mirror cardstock, to make two small six-petaled poinsettias.
Adhere top and bottom poinsettia layers together and then adhere these flowers to so that one appears on each side of the sentiment piece, as shown.
Top each handmade poinsettia with a cream/ivory coloured “pearl” heart-shaped flatback embellishment.
Adhere the Echo Park “Merry Christmas” banner-shaped sticker near the bottom of the sentiment piece, allowing the edges of this sticker to overlap both poinsettias a little bit.
To determine how much gold tinsel trim you will need to wrap the paper drinking straw, do a test run and arrange the angled placement of the tinsel as desired. Once this has been determined, cut tinsel to that length.
Use a little bit of hot glue (or very strong liquid adhere) to start looping the gold tinsel around the drinking straw. Once you reach the top of the straw (where it meets the head of the wand) hot glue gun the tinsel in place in place beneath the ruffles/folds of the lace.
Use the dark green seam binding to make a single-layer bow with somewhat long tails.
Cut one piece of cream/ivory seam binding and one piece of (the same) dark green seam binding. You can either make the same size as each other, or have one be longer and the other shorter, as you wish.
Fold them in half and attach to the wand base beneath the lace in the center of the wand, as shown.
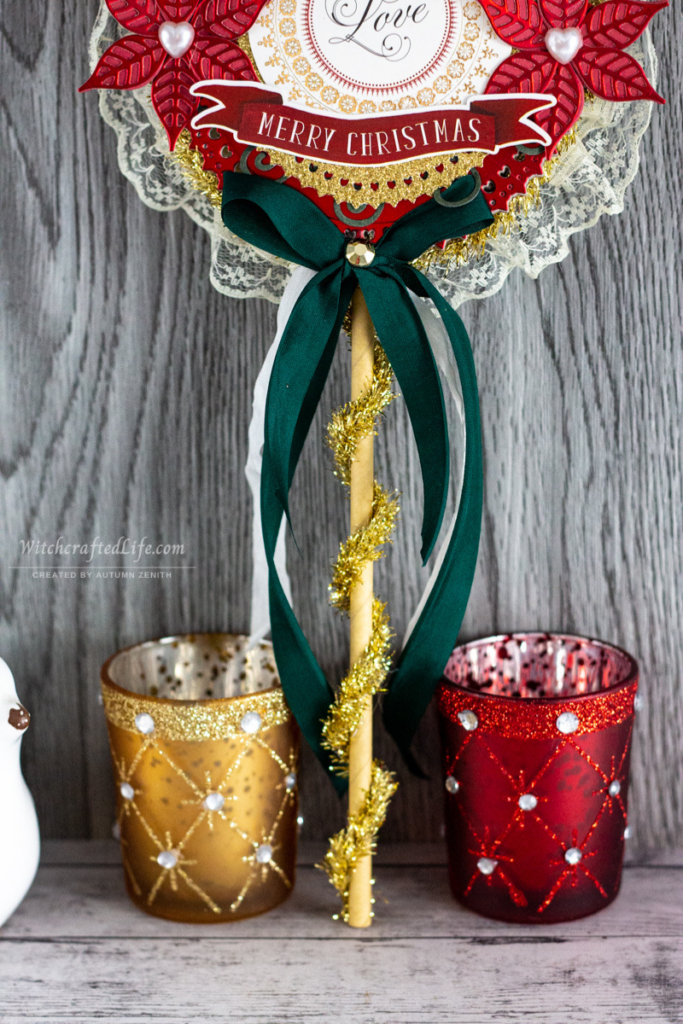
Lastly, adhere the green seam binding bow you just made to the center of these seam binding “streamers” and top it with a single gold coloured gem embellishment.
I know that it might seem like there is fair number of steps involved with making this elegant Christmas lollipop wand, but I assure you that it came together both easily and fairly quickly for me (under two hours, even with die cutting and assembling the poinsettia factored in).
This wand is filled with the enchanting spirit of the holiday season and can be given as a solo gift on its own or combined with either the matching card or another Christmas card of your choosing.
This rosette wand is a gorgeous (if I may say so myself 😊) piece that works splendidly as seasonal home décor, too, should you wish to keep it for yourself or make multiples. Retaining and giving them away as you please.
It’s the most wonderful time of the year (or at least one of them 🥰)
Not everyone celebrates Christmas and not everybody who does so loves it with all their might.
It should go without saying, but both of those things are 100% okay.
For some, this month houses the observance of a single holiday or sabbat. For others, it may hold multiple special events depending on a person’s beliefs and culture.
Personally, December is home to Yule, Christmas Eve, Christmas Day, Boxing Day, and New Year’s Eve and I really enjoy celebrating each of these special events annually.
For me, fall and Halloween + Samhain is the most wonderful time of the year. That said, I adore and appreciated December’s many special occasions, too (including those, such as Hanukkah and Kwanza, that I do not observe).
They help to make Christmas and Yule time one of the best and most special periods of the whole calendar.
A ton of people who observe Christmas rank it as their favourite holiday – my mom and sister both included.
It is easy to see why. We’re flush not only with the happiness and excitement that can often accompany Christmas itself, but also the anticipation and wide-eyed optimism that January 1st has a natural ability to instill in a fair number of us.
This really is a magical point in the year and one which never fails to spark happiness, merriment, and nostalgia for both myself and countless others.
To all those celebrating Christmas – or any other December special event – this year, may you have an incredibly safe, cozy, happy, and meaningful holiday season full of all kinds of festive happenings that bring your heart contentment. 🎅🏻🤍🎄

That’s a pretty card. Merry Christmas!
Thank you so much, Ally! For a multitude of reasons (my health being one of the most prominent), I did not get to make nearly as many winter holiday season projects as I had hoped to this year. Thankfully though, four (thus far) – including the two creations featured here – have been able to spring to life so far this snowy season.
Between Imbolc (at the start of February) and Valentine’s Day (or as I tend to celebrate it, Valoween 😊), plus winter in general, hopefully, a wee number more will be able to come to fruition as well.
I have been thinking of you and Robin often through the festive season and really hope that you’re both enjoying a relaxing, joy-filled, and memorable Christmastime.
Big hugs & the happiest of New Year’s countdown wishes,
🖤 Autumn
What a gorgeous card and matching wand!
Thank you deeply, sweet Celeste. Truth be told, save for the Creepmas (red, white and black ghostie adorned Christmas card) project that I shared here earlier this month, I feared that I would not get any Christmas related projects up this year.
Fortunately, though, I was able to make this card and matching rosette wand happen, photograph them shortly thereafter, and pen this post all before jolly old St. Nicholas returned. I’m so happy that was the case and hope to share at least a couple more winter related projects here before spring comes-a-calling again.
Big thanks & the very merriest of New Year’s wishes!
🖤 Autumn
Both the card and the rosette wand are gorgeous, Autumn! You are so talented at this!
As for Santa Claus, we do not really have that tradition here. What we do have is Sinterklaas (St. Nicholas) who comes down the chimney on Dec. 6th to deliver presents to any children who have been good. It’s very obvious that this is where Santa Claus’s roots lie 🙂 That doesn’t mean we do not celebrate Christmas and that presents aren’t involved 🙂 I hope that you and Tony had a wonderful Christmas day, Autumn! xxx
What an awesomely touching and encouraging compliment, dearest Ann. Thank you wholeheartedly (really, it means so much to me).
I adore learning more about how different corners of the world celebrate (if, in fact, they do observe) Christmas. That’s very interesting regarding how Sinterklass arrives on December 6th. It must be oodles of fun for the young and the young-at-heart alike to be able to start the Christmas season so early in the month.
When does it typically wrap up for most folks in your country? Here in Canada, save for those who observe Epiphany, the season tends to wind down a day or two after January 1st.
Personally, I love keeping our decor out a bit longer than that though – especially since there aren’t too many more holidays ahead of us in the remainder of winter (save for Valentine’s Day – and, for myself and others who observe it, the Pagan sabbat of Imbolc/Imbolg at the beginning of February).
My heartfelt and very grateful thanks again, sweet Ann.
🖤 Autumn
Both the Christmas card and the matching rosette wand are so beautiful. Your choice of colours reflects the Christmas tradition perfectly. I love the lace on the wand, that’s such a nice touch. You’re so creative!
Happy holidays to you and your family!
Thank you abundantly, sweet Ivana. While I’m the first to put a dark/spooky stamp (quite literally sometimes in the context of paper crafting) on the Christmas season, I also have a perpetual fondness for the classic colours and imagery of this meaningful chapter of the year as well – especially if they channel an 18th, 19th, or early 20th century vibe.
I was striving for a sense of the timelessness inherent to Yule, Christmas and New Year’s while creating these two festive projects and hope that it shone through here.
Many sincere thanks again, my dear. May you have a cozy, joy-filled countdown to New Year’s.
🖤 Autumn
Your Christmas decorations are stunning! Like your color combination. The metallic poinsettias are amazing (I will be CASing those) Thanks for the inspiration Autumn. Best wishes for the New Year. Hugs, Donna
Thank you deeply, sweet Donna. I’m touched and tickled pink (or would that be poinsettia red in this case? 😊) that you’re keen to CAS the festive blooms here. That is surely one of the nicest and most rewarding compliments a paper crafter can possibly receive.
If you give making similar poinsettias a spin and you blog about it, I really look forward to seeing your own take on this layered Christmas flower approach as well.
Many hugs & wonderfully happy New Year’s countdown wishes,
🖤 Autumn
Happy Yule, Autumn! What a gorgeous card that is – it evokes the 1950s to me. I think it’s the poinsettia leaves and the classic colours that remind me of decorations my grandparents had.
Here’s to the days getting longer and hopefully warmer! Brr! Sending you slightly warmer temps from the coast!
Thank you deeply, my dear friend. I adore that this card conjured up vintage vibes for you.
While I no longer blog primarily about mid-century related topics, my passion for the past is as strong – if not stronger – than ever and both consciously and subconsciously, I delight in wearing vintage elements into many of my papercraft projects.
Your warmer temps are wholeheartedly appreciated. Thank you so much!
Tons of hugs & wishes for a cozy, fantastic January!
🖤 Autumn
Your projects are incredibly detailed and so lovely! I love the tags behind the card front, and those little heart-shaped pearl gems in the centers of the flowers look so sweet! I’d never seen a wand before, and the one you made is beautiful! What a special, unique gift! I hope your Christmas was a good one for you and my wish for you in the new year is that you have good health, happiness, and much love too. May the world be a better place for all of us in 2022.
Sweet Carol, you are tremendously kind. Thank you very much for your super sweet and supportive words about these festive makes.
Wands are such a blast to make – and there’s pretty much no limit to the themes you can apply to them. I’d highly recommend giving wand making a spin if the idea appeals to you (beyond my written instructions here, there are lots of great YouTube videos on paper wand making that can be a big help when one is new to this type of project) – and if you do, please don’t hesitate to share snaps of your own gorgeous creations with me anytime.
Our Christmas was really lovely (low-key with a great meal and plenty of festive cheer – just as I like my holidays to be). Thank you, my friend. I sincerely hope that yours was as well.
Warm-as-hot-cocoa hugs & the absolute happiest wishes for a safe, positive, creativity-filled 2022 from my heart to yours.
🖤 Autumn
Thank you for sharing this spectacular card and matching wand. I am so glad you had time in the end to make it and I hope you enjoyed your celebrations. You made me smile by saying how small your card is due to the constraints of your die cutting machine, as I have the opposite problem. I simply cannot make large cards my norm is A6 or A2 and once in a blue moon I might stray to a square 6×6 or a 7×5. I also love that you explain the detail of how your cards are put together. Your wand with its lace edge is just fabulous. Wishing you a very Happy New Year. I hope it proves to be happy and healthy for you xx
Hilary, you are such a lovely, supportive soul. Thank you very much for the beautiful holiday season gift of your heart-touching comment.
Isn’t it fascinating how we’re each drawn to different sizes of cards (and LOs, tags, etc)?
From day one of my paper crafting, I have found myself pulled towards larger projects. Honestly, I wish they made cardstock, paper, and so forth later than 12×12 (once in a blue moon you’ll find a product that is, but it certainly is not the norm), as I would definitely make even bigger projects, if I could.
Of course, there are things like canvases, wood veneer pieces, posterboard, etc if one does want to go much beyond 12×12, but it would be handy to have at least a few items on the market that came in a bigger size (scrapbook albums perhaps above all else, IMO – especially for those like myself whose 12×12 pages often include elements that extend past the borders of our LOs).
It really means a lot to me that you enjoy the step-by-step instructions that I include here. I don’t usually write them down as I’m making a given project, but rather look at my snaps of such after the fact and jot them down from a mix of memory and simply looking at how the different layers are arranged. (I do try to write down lists of all the supplies that I use in the moment though – that would be a lot trickier, IMO, to recall down the line from memory.)
Thank you again very much, lovely lady. I hope that your January is off to a positive start and that it unfolds into a really lovely, safe, happiness and creativity-filled year for you and your family.
🖤 Autumn
A beautiful card and matching wand Autumn, they are both so elegant.
Wishing you a Happy New Year.
Pauline – Crafting with Cotnob
x
Thank you sweetly, dear Pauline. That is so lovely of you to say.
I must say, the holiday season spirit is lingering with me big time this year (so hence why a lot of our decorations are still up) and I think I might use it to help me get a jump on a project or two for next December soon if I can – possibly including another Christmas wand.
Many hugs & the happiest of wishes for a terrific 2022,
🖤 Autumn
Thank you for kind wishes. I hope you’ll enjoy a lovely NYE celebration at home. All the best in 2022!
You are wholeheartedly welcome, dear Ivana. Thank you with a sincerely grateful heart for the bevy of support and sweetness you blessed my blog with throughout 2021. It is greatly appreciated.
I know that, like myself, you had a really tough go of things on various fronts last year (2021). May each day of 2022 be sweeter and kinder to you than the last, and may we both experience even just moderately more stable health again soon (fingers beyond crossed!).
🖤 Autumn
Beautiful makes in wonderful traditional Christmas colours,so many elements and details to explore Best Wishes for 2022
You are tremendously kind, dear Meg. Thank you very much for your blush-inducingly sweet words about this pair of festive projects.
Every time I make a paper wand, I fall even more in love with them and am hoping to whip up some new ones throughout 2022 (blogging them here as I do, naturally :)).
Warm hugs, cozy January wishes, and blessings of wellness, happiness and creative inspiration coming your way for each day of the fresh new year.
🖤 Autumn
The most wonderful time of the year and you did it justice with this most wonderful project set! I lean towards non-traditional colours for Christmas, but admire those who can can make the traditional red /green/gold colour combo work. Well done!
Hope your larger Gemini machine wish comes true this year.
Thank you deeply across the board, my dear friend.
Adding a Gemini (or even a Vagabond – basically any large cutting format electric die cutting machine, really) to my life in 2022 would be a dream come true.
It would also be a big help to me physically, as I often struggle to exert the strength needed to manually die cut (and emboss, etc) at times due to some of my medical conditions.
It’s a tall order though, so I’m not holding my breath – but you just never know. The year is young after all and there’s still plenty of time for this dream to potentially come to fruition. 😃
Many thanks again, Trina. I really look forward to continuing to connect with – and be inspired by – you and your gorgeous projects throughout 2022. ❤️
🖤 Autumn
These are definitely elegant and oh so beautiful!! Either piece is a stand alone work of art, but the matching set truly is swoon worthy!
I was over the moon to open my Christmas package containing this lovely duo. And reading now each step that goes into creating it, makes it all the more special.
Thank you beyond words, Autumn!
From the bottom of my heart, dearest Debi, you are endlessly welcome.
I adore that each Christmas season now gives me an opportunity to make a festive project (or two) for you, my sweet friend.
It warms my heart more than the return of springtime sunshine to know that you enjoyed these pieces. I adored creating them and am so pleased that they reached you safe + sound.
May this year bring an abundance of wellness, serenity, joy, and reasons to smile your way.
🖤 Autumn