You will have to experiment and try things out for yourself and you will not be sure of what you are doing. That’s alright, you are feeling your way into the thing. ~ Emily Carr
The card in today’s post is definitely one that I feel falls under the header of what (fellow) British Columbian and world-renowned early 20th-century artist Emily Carr was speaking about in the quote above.
I’m not going to lie, this isn’t my absolute favourite card I’ve ever made. However, I do not dislike it and the more time that passes since I created it, the more this spring themed project is growing on me.
Thus far, I don’t have a lot experience when it comes to using pencil crayons with stamped images – let alone ones on black cardstock.
In setting out to do so here, I knew that I wanted to go for a soft, chalkboard-like look to the way the pencil crayon colour lay on the black cardstock. Happily, I feel like that was achieved.
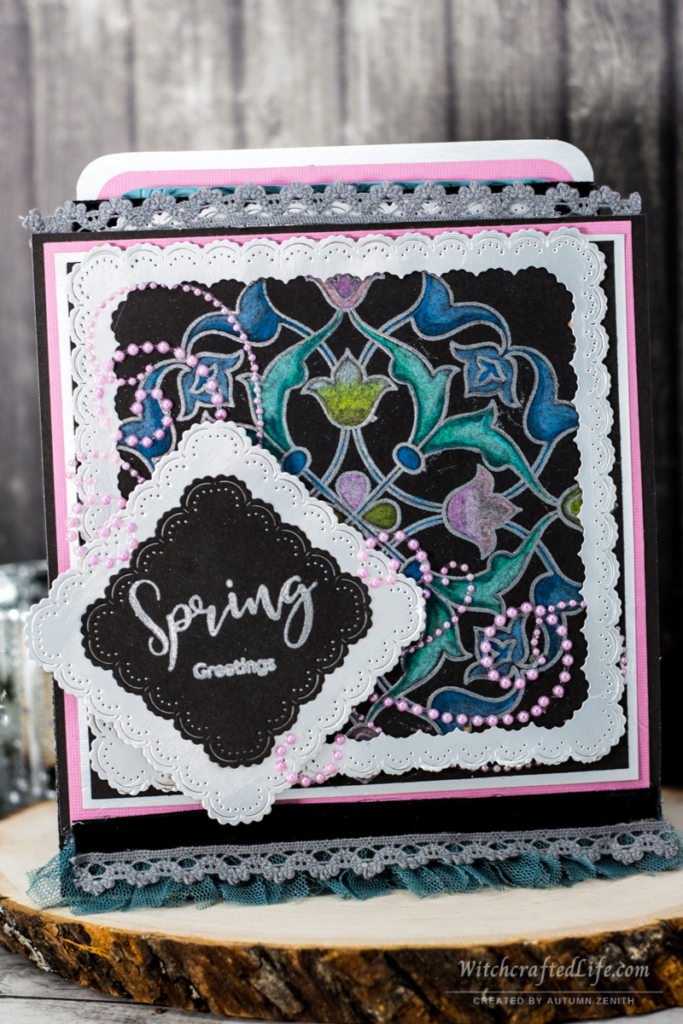
The inspiration for this card lay in springtime itself (with the colour palette here tapping squarely into Springoween) and in various Victorian design elements.
Make no bones about it, I am not saying this card is not authentically Victorian looking. It most certainly is not. But it was inspired by various styles, colours, and textures of that era.
Actually, when all was said and done and I stepped back to look at this card (something I do with all of my paper crafting projects, as I find it helps me gauge if I need to change and/or add anything before calling a given project complete), I was struck by how it looked both a bit 19th century and somewhat 1980s at the same time.
Hey, why not? 😄 I adore both of those time periods and am all for a fun, creative merging of the two.
This card was an experimental one for me and that’s totally okay. Not everything we create is destined to be our personal favourite, but that doesn’t mean we can’t learn and grow (our skills) from it. Nor, just as importantly, that our recipient won’t appreciate the end result just as much as if it was our all-time favourite make.
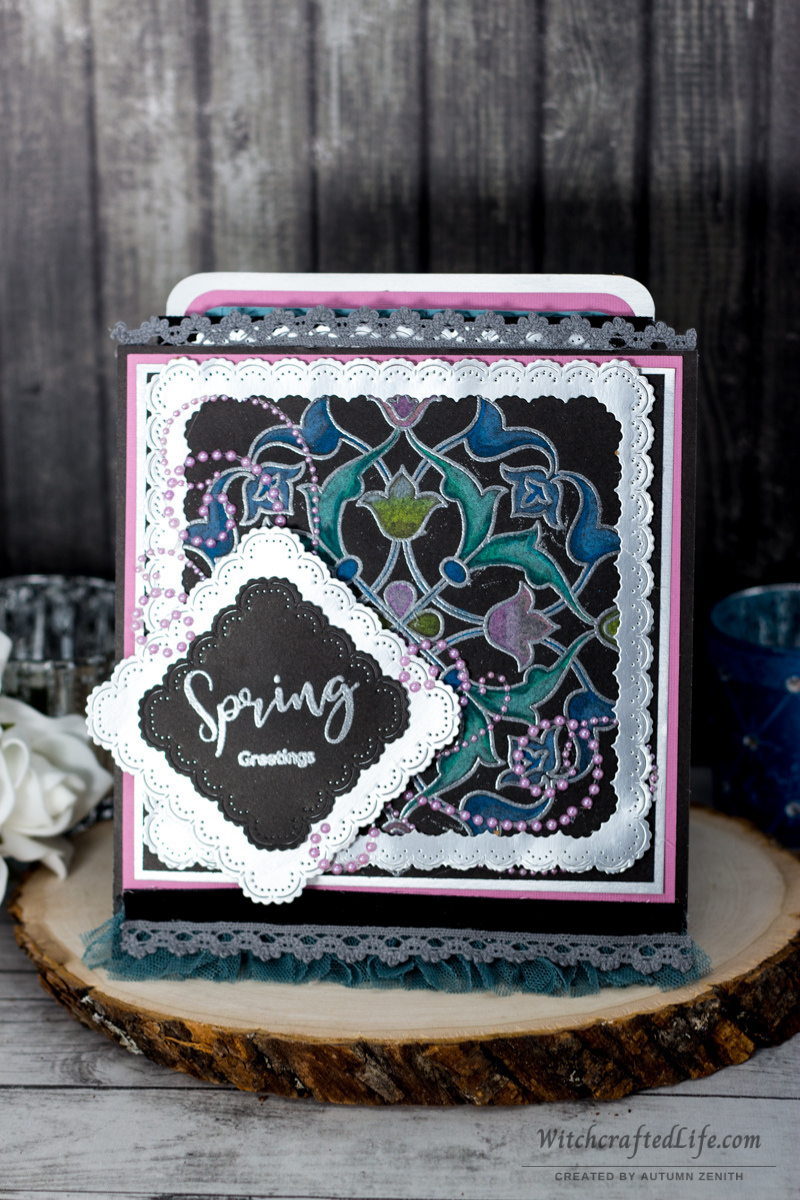
Victorian Inspired Pencil Crayon on Black Cardstock Spring Greetings Card
On top of the inspiration mentioned above, the stunning Arabesque Medallion Stamp from Altenew (a wonderfully kind gift from a fellow paper crafting friend in the States) was a jumping-off point for this card.
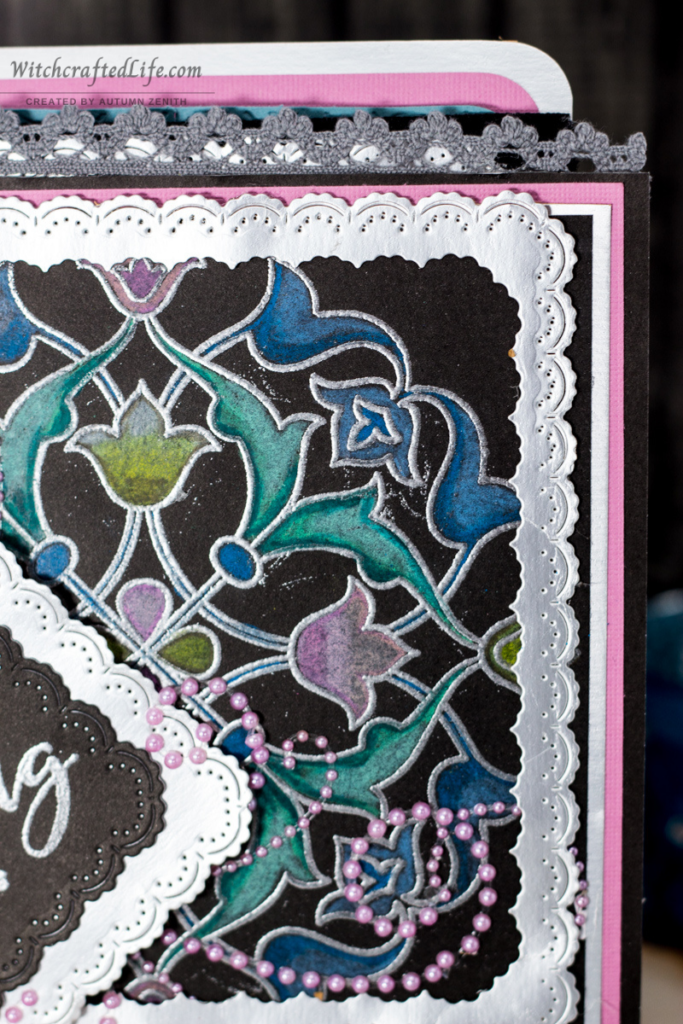
The flowers in its design s struck me as being perfect for spring and were all but begging to be coloured with pencil crayon. Who am I to argue? 😊
The sentiment stamp that I used here is not part of the Altenew Arabesque set. It is from a run-of-the-mill quality AliExpress spring-themed stamp set.
Unfortunately, as with many fine/small sentiment stamps (especially inexpensive ones), the size and intricacy of the stamps that I used for the embossed sentiment have a somewhat blurry end result. This is particularly noticeable in the portion of the sentiment that says “greetings”.
I’m not wild about that fact, but it looks a touch less pronounced in person, so I can live with it. I just wanted to mention that point here so that you don’t think my photos themselves are out of focus. 😄
And, in the same vein, I am aware that despite prepping my black cardstock, a little bit of stray silver embossing powder stuck to the cardstock surrounding the Arabesque Medallion Stamp design.
Not much though, luckily, which is great. And honestly, in an appreciated bit of happenstance, it actually seems to help telegraph the look of chalk on a chalkboard all the more.
Also in person, the tulle trim and the colour of the (pencil crayon coloured) leaves in the stamped image are closer in tone than they rendered in these photos.
As I wanted to ensure that the stamped image remained the star of the show on this card, I didn’t embellish it nearly as much as I do many of my other cards.
Instead, I opted for numerous layers of cardstock, three different trims, and a pretty pink pearl flourish.
Even with the colouring, this card was quite quick to make (about three hours from start to finish) and I did sincerely enjoy colouring on black cardstock.
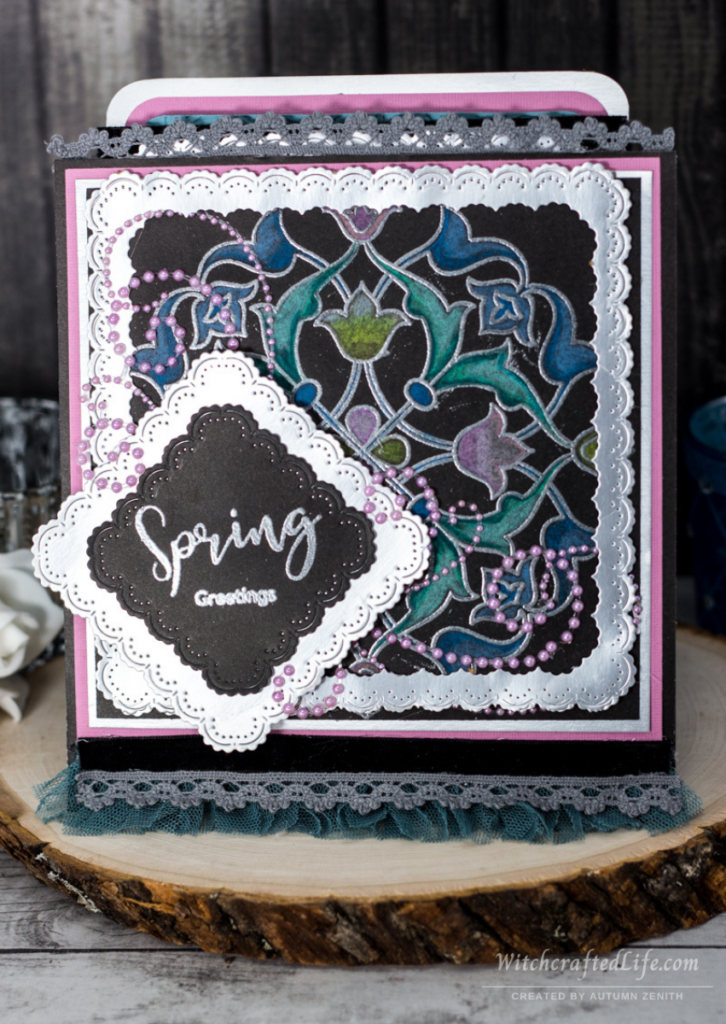
While not the first time I’ve done so, it’s been a number of years since I last partnered the two and this project helped to remind me of just how enjoyable an act that can be.
(Note: I did not use a colourless blender pencil, gamsol, or any other blending products with my pencil crayon colouring here. I simply laid down and lightly overlapped, in some areas, the colours and left them at that to heighten the chalk colouring look I was aiming for.)
Products used to make this elegant stamped and embossed spring card
-Black cardstock
-Pinky-light purple cardstock
-Light blue cardstock
-White cardstock
-Silver metallic cardstock
-Nested scalloped edge rectangle shaped die set
-Corner rounder punch – 10mm Corner Rounder Punch from X Cut
-Assorted colours of pencil crayons (I used Prismacolor Premier Pencil Crayons on this project)
-Large floral medallion design stamp – Arabesque Medallion Stamp from Altenew
-Springtime sentiment stamp
-Watermark (or other embossing suitable) clear ink – Watermark Stamp Ink Pad from Versa Mark
-Silver embossing powder – Silver Embossing Powder from Ranger
-Heat embossing tool
-Pink pearl flourish – Self Adhesive Pearl Flourish from Zva Creative
-Dusty teal-grey coloured tulle trim – Trendsetter Designer Trim from Webster’s Pages
-Grey crochet trim – Artsy-licious Kohl Splendid Ribbon from Chatter Box
-Narrow black velvet ribbon – Artsy-licious Kohl Splendid Ribbon from Chatter Box
-Dimensional foam, pop dots, or similar to elevate some of your layers
-Adhesive, such as a tape runner, of your choice (I often use my Scotch Tape Glider)
How to make a springtime card using coloured pencils on black cardstock
Begin by making a card base from black cardstock. Cut successively slightly smaller pieces of pinky-purple, black, white, and black (again) cardstock, respectively. Adhere together and then adhere to the card base.
Cut pieces of white, pinky-purple, and light blue cardstock a little smaller than the width of your card base. Round the corners of each of these pieces, then adhere them one on top of each other. Adhere this layer to the back of your card base (aka, the back of the card).
If you wish, you can then cut a larger piece of cardstock or patterned paper of your choosing to cover the back of the card and (somewhat) camouflage where the cardstock is attached.
Alternatively, you could place the rounded corner layers beneath the first cardstock layer on top of your card.
Next, cut a piece of black cardstock slightly larger than the Altenew Arabesque Medallion Stamp.
Prep the black cardstock for embossing by using an embossing bag or similar antistatic tool.
Stamp the Arabesque Medallion Stamp in watermark ink. Top with silver embossing powder and heat emboss.
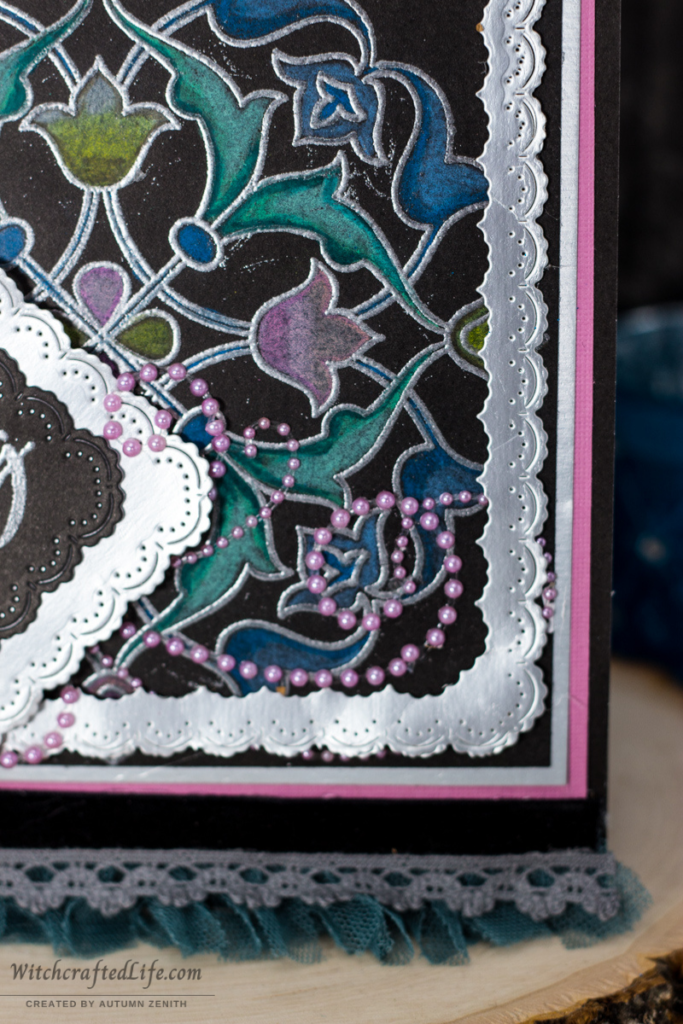
Using a selection of at least two different shades (one lighter, one darker) per colour, select pencil crayons in springtime-y shades of blue, pinky-purple, yellow, and green.
Colour in portions of the stamped and embossed Arabesque Medallion Stamp design as shown in the photos throughout this post, or however you desire.
Once you have completed your colouring, die cut a frame from silver metallic cardstock that leaves most, or all, of your stamped and coloured image visible. Adhere the frame to that piece of black cardstock and then attach the two combined layers to your existing cardstock base layers with foam squares, foam tape, or dimensional pop dots.
Adhere a pink pearl flourish to the lower left-hand side of the card design.
At the top of the card base, adhere a piece of silver metallic cardstock die cut with the same frame die that you used to surround your coloured image (you only need to die cut one of the four sides of the die here) and a strip grey crochet trim.
Towards the bottom of the card base, adhere a piece of grey-blue tulle trim topped with a strip of narrow black velvet ribbon and a piece of the same grey crochet trim.
Using two of the smaller sizes from the nested die set, die cut a piece of black cardstock and a piece of silver cardstock. Adhere together. Position both so that they create a diamond shape, as shown.
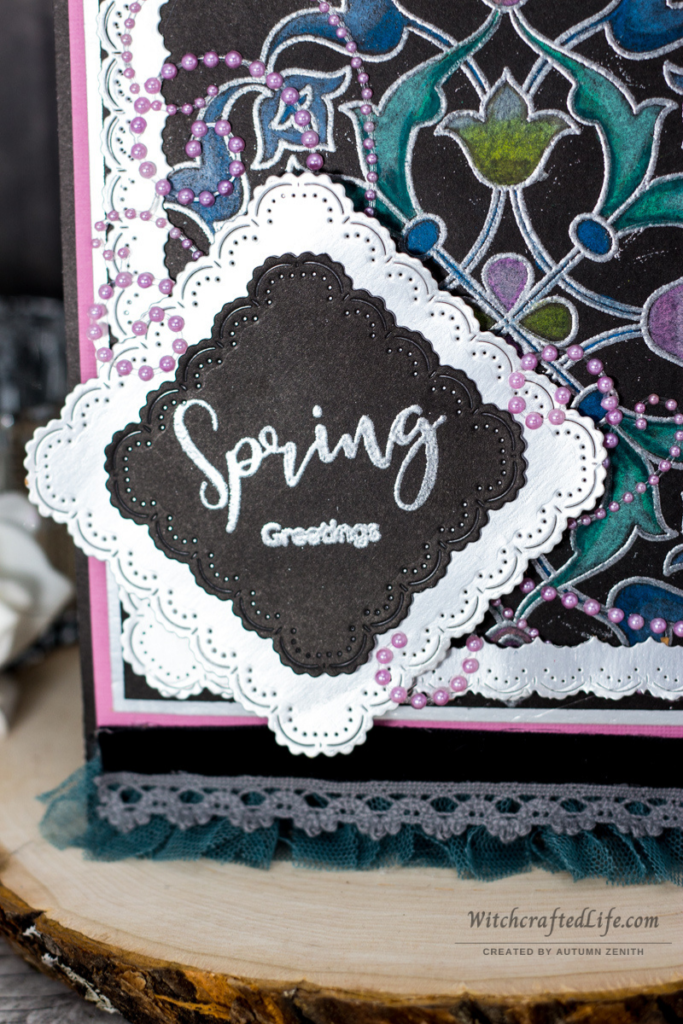
Prep the black cardstock for embossing, stamp your sentiment using watermark ink, and emboss with silver embossing powder.
Attach your sentiment “diamond” to the lower lefthand corner of your card using dimensional foam or a similar dimensional adhesive.
If you wish, arrange some of the pink pearl flourish so that it overlaps with the sentiment piece.
And there you have it, one eye-catchingly unique springtime card design created using a stamped and coloured image on black cardstock.
Making springtime cards while the sun shines
Much as the classic expression “make hay while the sun shines” reminds us to seize and utilize the moment, so too does each season encourage us to celebrate it with creative projects of all types.
I’ve felt even more pulled towards creating springtime cards this year than I have in ages. However, as the current season is starting to wind down, I’ll soon be shifting my paper crafting focus to summer and fall makes.
And, honestly, it wouldn’t hurt to get a jump on my winter holiday season projects, too – though I might be getting ahead of myself a tad there! 😄

And, while I’m at it, this summer I’m planning to embrace Emily Carr’s words all the more and dip my toes into the pool of experimentation on a regular basis.
Why not hop in with me? The water is warm and, at the end of the day, even if an experiment is a total write-off, chances are you learned something and may have developed some of your paper crafting skills further in the process.
That is a win in my books, regardless of how your project turns out. (Plus – and trust me on this – we are often far harsher critics of our own skills and projects than most others ever would be of our work.) 🌼🖤🌼
It might not be the absolutely favourite card you’ve ever made, but I think it’s gorgeous. It looks like a miniature stained glass window! xxx
Thank you deeply, sweet Ann. 💗
I really appreciate your kind words and touching comparison to a stained glass window. Both myself and my mom (as well as my paternal grandma) are massive fans of stained glass, so your impression of this card means all the more to me. 🙏
🖤 Autumn
That black background of this card is really lovely, Autumn!
I always love your use of beautiful colours, textures and layers – sort of reminds me of how I dress but on a card, although I don’t do it anywhere near as beautifully as you’d o! Lol!
Thank you for sharing the secrets of your success, such a reflection of your generous and delightful spirit!
I hope you are doing well in gorgeous Canada and I always send love and blessings (doubly so with it being almost new moon and a solar eclipse on top of it!).
Winter is well and truly upon us here … only going to be a chilly 12°C tomorrow and rainy as well …
Donna 🧚🏻♀️❤️🐝
https://donnadoesdresses.com
My darling friend, you are (way!) too kind to me and my paper crafting projects. Thank you with a sincerely touched and abundantly appreciative heart.
Please do not sell your magnificent sartorial skills short for a second. You are an immensely skilled and stylish dresser whose diverse and expertly composed ensembles never fail to inspire me on multiple fronts (crafting included).
Truth be told, some things (particularly pertaining to my health) have not been terrific lately (so hence why I’ve been almost completely MIA from IG for the past few weeks and counting), but there have been positives in the mix as well – including the return of sunny weather and nature walks, when my health permits.
On your beautiful side of the globe, the seasons are shifting in a markedly different direction and the world is falling under winter’s powerful siren’s song. Two very different seasons, yet they share certain points (such as being extremes) in common and are united by the polarity that comes with being on opposite sides of the year (and globe, for that matter).
I hope that this winter is a serene, safe, highly meaningful, and very enjoyable one for you, dearest Donna.
Thank you again for always brightening my day in the loveliest of ways.
🖤 Autumn
This is so pretty, Autumn! I like how it looks like a ceramic tile.
Thank you deeply, my sweet friend. That’s such a cool impressive to get from this card. Now that you mention it, I see as much, too – and the ol’ gears are turning a mile a minute as I dream up ideas for projects that purposely channel the look of ceramic tiles. Thank you very much for the fab inspiration! 😘
🖤 Autumn
I like the 80s vibe. You are always inspired. Happy June!
And you, dear heart, are always sweeter than maple syrup. Thank you very much!
I hope that things are going positively on your end as we get ready to experience the seasonal changing of the guards this week, and am sending the sunniest and happiest of Summer Solstice wishes your way! 💛
🖤 Autumn
Like you, I’m typically my own worst critic when it comes to my creations. Remember, it’s only you that sees the creation as you’d intended it to be. I see a wonderful blend of colours on black and am inspired to try pencil colouring on black myself. I love the look! And the pink gem flourishes really add a wonderful touch!
The Emily Carr quote you started with is perfect for me – as is a great portion of your post. I’m currently giving a major facelift to a small camper trailer. I’m certainly experimenting and not sure what I’m doing! Thanks for unknowingly boosting my confidence!
That is a wise and very beneficial reminder, dear Kate. Thank you deeply. You are absolutely right that so often we’re especially harsh critics of our work because we envisioned a given project turning out one way, when in fact it went in a different direction or the end result wasn’t quite what we had in mind. Yet, chances are, no one else would ever be the wiser if we didn’t say as much. Hearing this means a lot to me. Thank you again.
How exciting that you’re revamping a trailer. That sounds like a really cool and inspiring project. If you would ever like to bounce ideas off of someone, please know that I’m just an email away anytime.
Wishing you nothing but the best with your camper project.
Big hugs,
🖤 Autumn
Your card is gorgeous! The coloring on black card stock is beautiful, I’ve colored on kraft card stock but not on black, I’ll have to give that a try, thanks for the inspiration!
You’re wholeheartedly welcome, Donna. I’m touched to know you found the idea of colouring on black cardstock inspiring.
Thank you very much not only for this lovely comment, but for each and every thoughtful message that you leave here for me throughout the year. They are sincerely appreciated and never fail to brighten my day.
🖤 Autumn
What a gorgeous card! I definitely detected notes of Victorian aspects. And the floral design reminded me of a stained glass window. In fact, it is very similar to the stained glass hanging in my home.
And, those pink pearls! Just stunning.
You did a beautiful job, Autumn.
You are such a sweet, awesomely supportive soul, Debi. Thank you immensely. 💗
As a huge fan (as are both my mom and paternal grandma) of stained glass, the comparison that you made here touched my heart all the more – and has got me thinking that I should whip up a project that sets out to intentionally emulate the look of that stunning art form. (The ideas are flowing, let me tell you! 😊)
🖤 Autumn
What a gorgeous card Autumn! I love that embossed image against the black cardstock and your coloring with pencils is beautiful, the scalloped square dies are so elegant, love them too!
Tammy x
Thank you immensely, sweet Tammy. I really appreciate your kind, supportive words about this (for me) experimental project. I learned a lot in making it and feel more confident now going forward with both embossing and colouring on black cardstock.
Big hugs & the sunniest of wishes for the Summer Solstice,
🖤 Autumn
A wonderful quote Autumn and so very true. Your card is beautiful, the soft pencil colouring goes perfectly with the pretty lace details and I like the combination of die cuts, crochet, tulle and velvet. the combination of different textures create a very delicate Victorian feel.
Pauline – Crafting with Cotnob
x
Thank you sweetly, dear Pauline. I am bolstered by your kindness and touched to know that so many aspects of this card caught your eye.
The more time that passes, the more it grows on me. 😊
Colouring on black (and other darker colours of cardstock) is such a fun technique. I felt my skills grow with this project and feel more confident regarding the next time I approach it (ditto for heat embossing a large stamped image).
Many hugs,
🖤 Autumn
I love this stunning card. Love the wonderful stamping and the crochet detail. Have a wonderful day. Thank you so much for the sweet comments on my blog. Hugs Anesha
You are wholeheartedly welcome, dear Anesha. Thank you deeply in turn for yours as well. It is always a joy to connect with you and your own inspiring creations.
I hope that things are well on your end as we head into summer and that the coming season is a time of serenity, happiness, and plenty of great crafting sessions for you.
🖤 Autumn
I always laugh when I see the term pencil crayons used. As a fellow Canadian, I know exactly what you are referring to, but I’ve had US crafty friends who were so confused. Once I explained pencil crayons are what they call color pencils, it was all fine. 😂
Wonderful spring card. For your first time colouring on black cardstock, you did fantastic! I’ve never used gambol either when I colour with pencils, but I hear it makes colouring easier and quicker. Who knows, maybe that I will be my next experiment. 😉
Hope you are enjoying your summer.
Hi lovely Trina, thank you very much for your wonderfully kind words about this springtime card.
So true! I lived in Ireland for a couple of years (eons ago now) and got quite used to pencil crayons being called colouring or coloured pencils there. I still switch between names for them sometimes, but at the end of the day, to this Canadian lass, they will always be pencil crayons.
I have a small bottle of gambol that I bought online from the states probably about three years ago now. I haven’t cracked the seal yet, but want to deepen my pencil crayon colouring skills a bit more, so am thinking I’ll play around with it a touch later in the year.
Thank you again for your visit. It’s always a joy to hear from you, my friend.
Many wishes for a sunny, fantastic first weekend of summer!
🖤 Autumn
Love the pencils on black – might have to try that – so thank you for the idea and inspiration! Love Emily Carr’s quote – thats so true. Its good to try new things even if afterwards we decide its not for us. Emmax
Wisely said, dear Emma. I completely agree and strive to put the age-old adage “nothing ventured, nothing gained” into practice on a regular basis.
Thank you very much not only for this terrific comment, but for each and every one that you have shared with me here as of late. I sincerely appreciate your time and kindness.
Many heartfelt hugs coming your way,
🖤 Autumn
This card has such a lovely, soft stained glass window meets iron scrollwork gate look about it that for some reason brings to mind some sort of illustration that might accompany an old ghost story. I very much get the aspect of not being entirely pleased with a project or having it be a favorite, but, as you more than aptly pointed out, sometimes the experimentation is just as fun!
Thank you sweetly, my dear friend. I adore the impressions you get from this card and definitely see a stained-glass quality to it as well.
As a general rule, I tend to be harshed on my own projects (or outfits, etc) that I’m not wild about in the moment and immediate aftermath of such. That was the case here and while I still wouldn’t call this card my fave I’ve ever made by any means, it has grown on me a fair bit since it first came into being. 😊
I hope that your July is off to a fantastic start. It’s been a memorable one on this end for many reasons, including (on the positive happenings front) my b-day last week. Happily, I had a wonderful birthday and am still in high spirits from how enjoyable that day was.
Oodles of hugs,
🖤 Autumn