Once, long, long ago in the early days of my foray into papercrafting, while traipsing around the pages of eBay late at night (as one does 😄), I found a listing for a package of oversized, acid-free cardstock.
As someone whose paper crafts are rarely small in size or lacking in dimensional elements, I had been on the prowl for just such a product since the day I completed my first scrapbook page (in the fall of 2010). Therefore, as you might guess, I snatched it up immediately.
I got through that package fairly quickly and I was not able to locate another one afterwards.
Now, more than a decade on, the name of the company that manufactured it has long faded from my memory (as has the precise dimensions of that cardstock pack; it *might* have been in the range of 15×18 or 16×20 inches, but please do not quote me there!).
Every now and then, I still deep-dive on the ol’ interwebz, trying to see if I can find scrapbooking friendly (aka, acid-free and, ideally, lignin-free) cardstock and have yet to unearth much that fits the bill.
If having a given project be archivally safe is less of a concern, there are a few – mostly white and cream coloured – options out there. For example, Strathmore JAM Legal Cardstock comes in at 8.5 x 14 inches.
Even there, while you gain two inches on one measurement, you drop back down to letter size on the other. This means that the total dimensions of this product are not all that different from standard twelve-inch cardstock.
At the time of writing, Amazon also has some white and cream legal size cardstock options available as well. However, they are a bit lower weight than Strathmore’s offering and are the type of cardstock often employed for use as restaurant menus.
Handy as having sheets of cardstock larger than the industry standard (biggest size of) 12×12 inches can certainly be, what I wish existed even more is oversized scrapbook page protectors – and in turn, scrapbook albums themselves.
That way, I would not have to get creative all the time when it comes to how to store the layer + dimension loaded 12×12 inch scrapbook pages that I adore making.
I swear, if I ever have the incredible opportunity to either launch my own papercrafting line or partner with an existing one, oversized scrapbook albums will be one of the very first things I try to bring to market!
Right here and now, though, I do not have any cardstock (or albums) larger than 12×12 inches in my stash. Thus, when I need to go wider than that – or than the max width of a folded sheet for a card – I need to adhere two or more pieces of cardstock together.
Objectively, I don’t make too many projects that exceed standard scrapbook layout, card, and slimline card sizes, but it does happen occasionally.
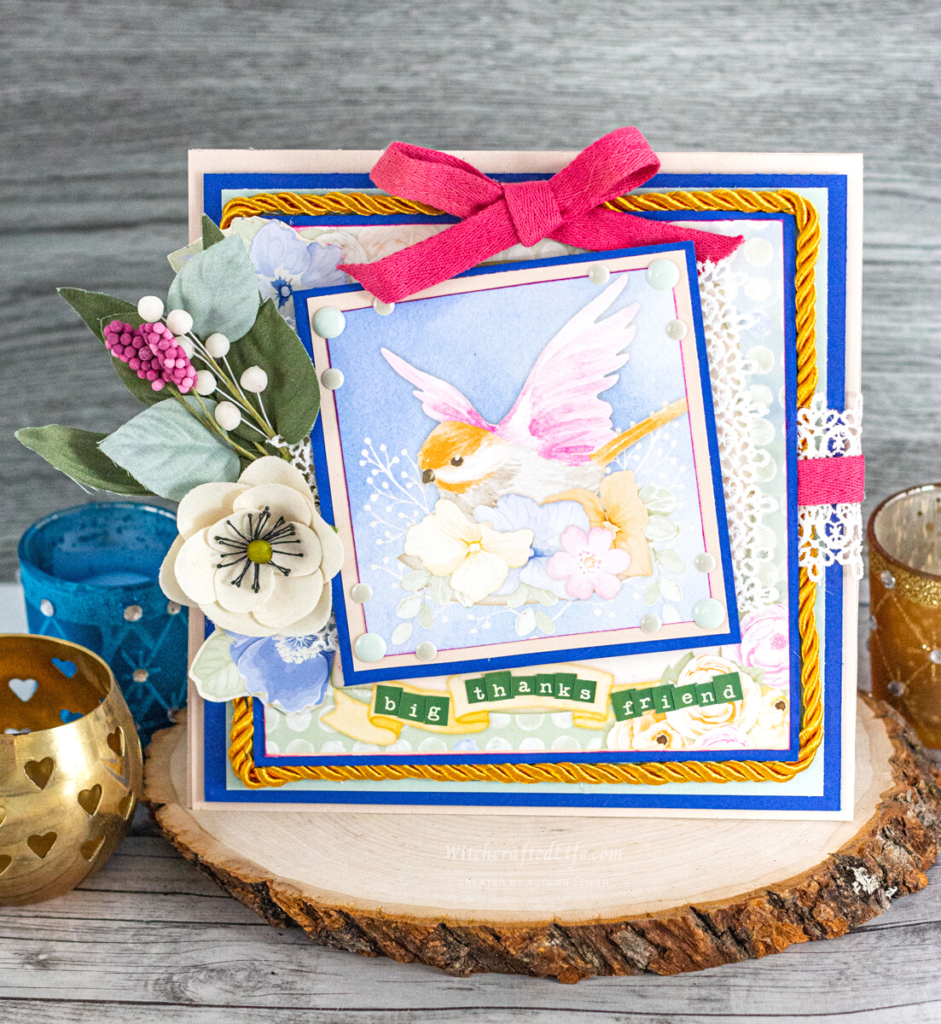
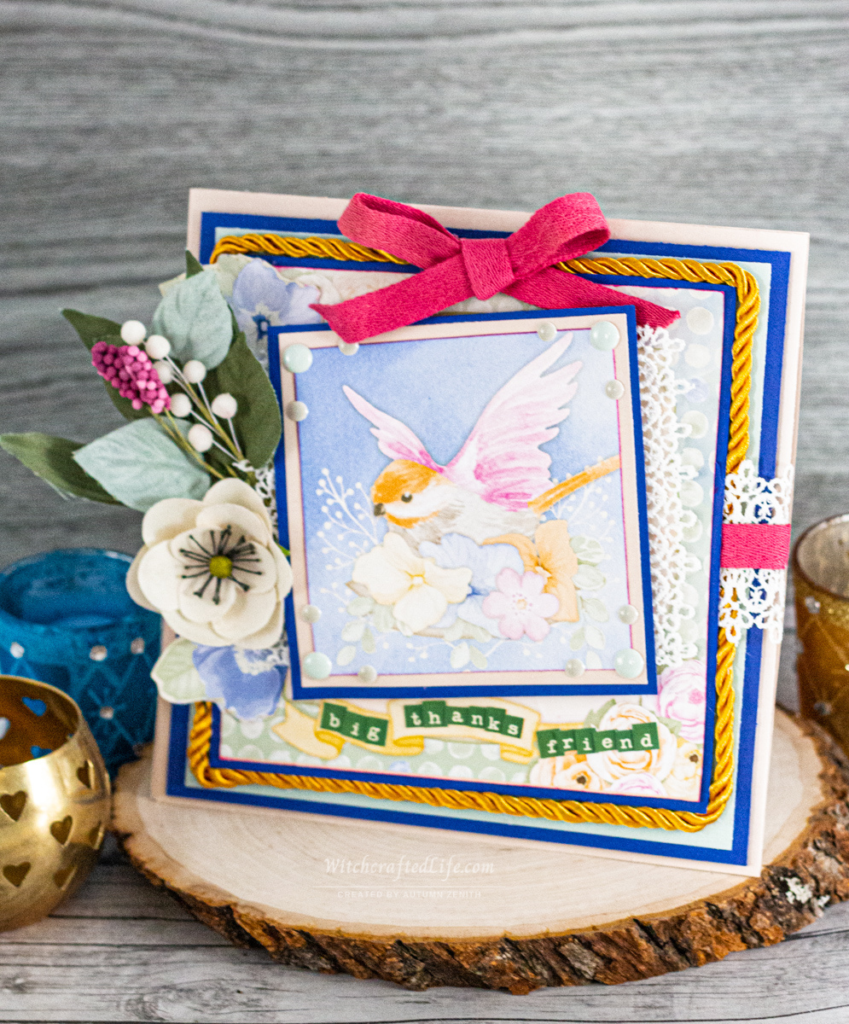
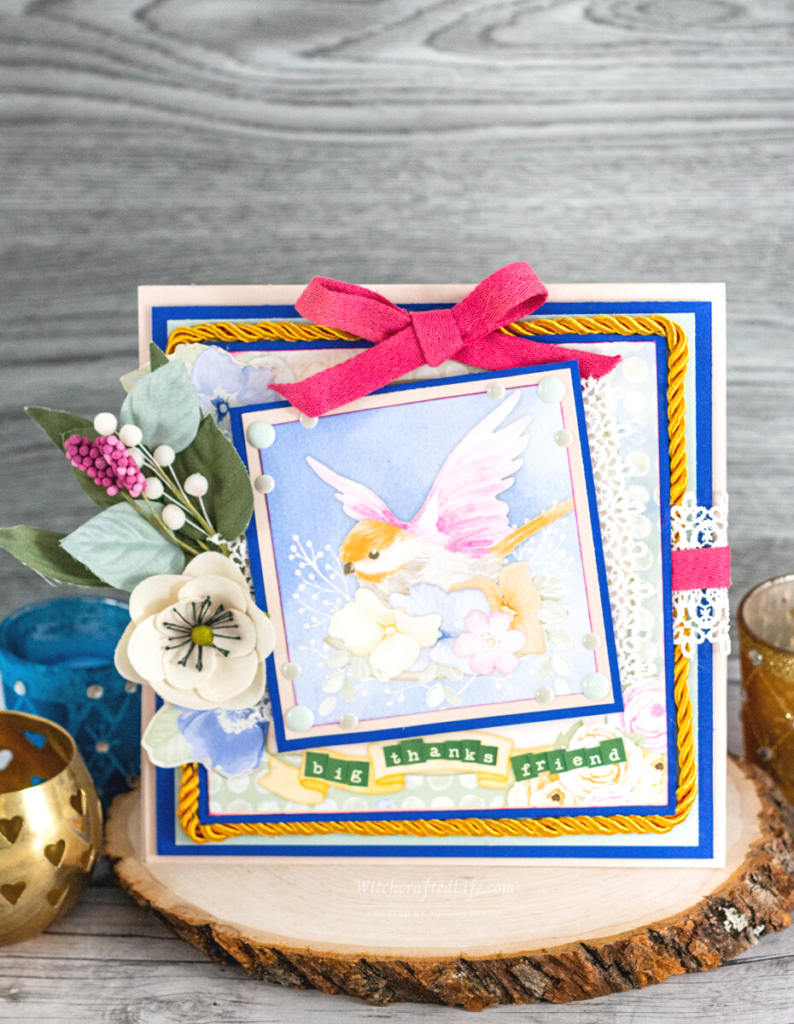
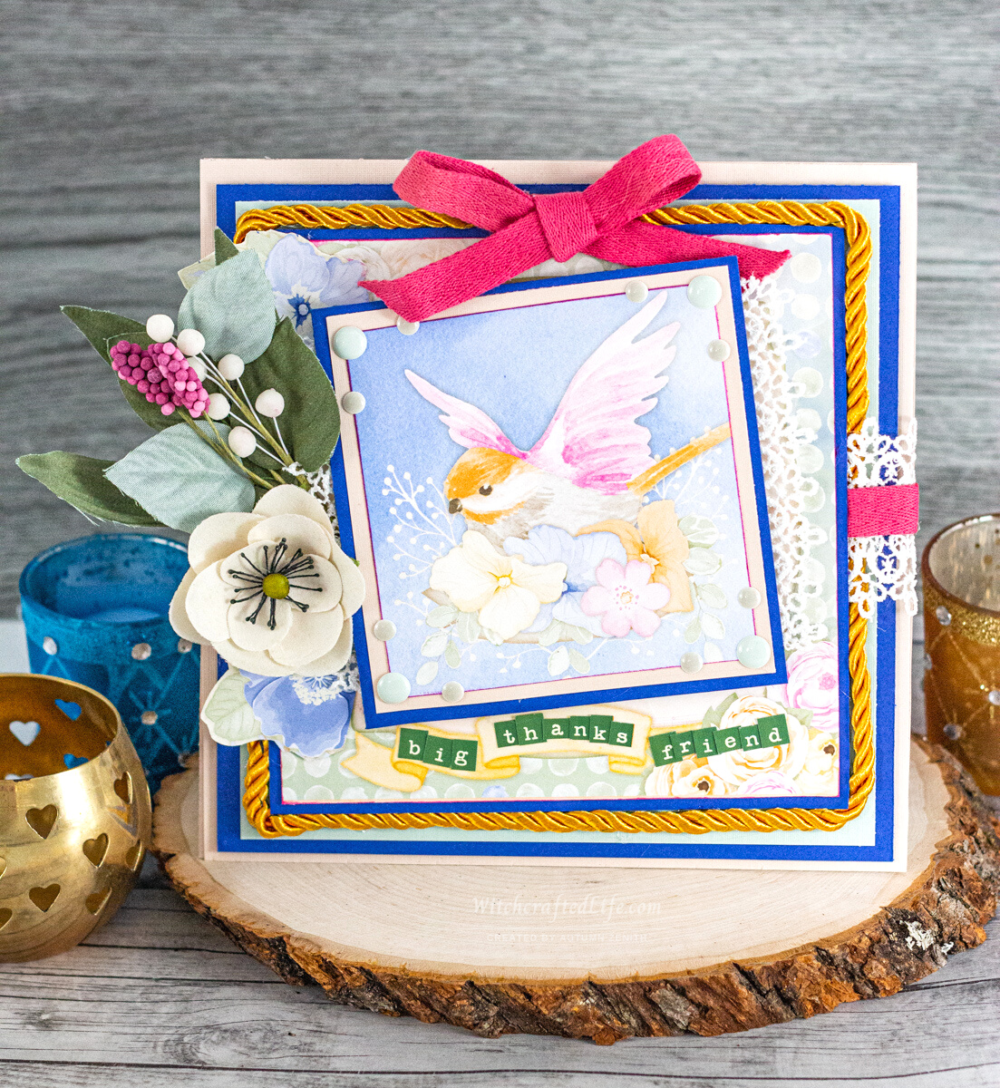
Case in point, the delightfully springtime-y thank you card at the heart of today’s post.
I am huge on both being grateful and expressing gratitude, so when someone else does something kind, caring, generous, or otherwise thoughtful for me, I truly love to express my appreciation to them.
Sometimes, even if you factor in oversized slimline cards (such as my Sweetly Spooky Oversized Slimline Springoween Card), standard sizes of homemade cards just do not feel large enough in my books – especially when one is keen to present a visual representation of their abundant appreciation.
That was precisely what I was aiming for when creating this card to send along to a dear friend who showers me with kindness on a regular basis.
And thus, this oversized thank you card was born. 💗
Charming Springtime Bloom and Bird Oversized Thank You card
The method that I generally employ when creating oversized cards with dimensions that exceed those that a single piece of 12”x12” cardstock can be folded into, is to determine what size I want my card to be and then cut matching sized pieces of out of two (or however many are required for a given project) pieces of cardstock.
So long as their sizes match up, it is not strictly necessary that you use identical sheets of cardstock for each, as one piece will be for the front of the card and the other one serves as the back of the card.
That said, I do tend to use the same cardstock for both sides. Mixing it up can be lots of fun too, though, especially with holiday season greeting cards. Think red on one side, green on the other for Christmas or black and orange for Halloween.
Once the matching pieces have been cut out, I line them up so that one is evenly placed on the other and then adhere about 1/8th to 1/4th of an inch from the top of one piece of cardstock and attach it to the other.
You can do this with various products, such as the following:
-Glue sticks
-Liquid glue that isn’t too runny or likely to warp your cardstock
-Tap runner adhesive
-Adhesive dots and squares
-Staples (Tim Holtz’s Tiny Attacher stapler works awesomely in this context – and many others, too, of course!)
-Stitching (thread, embroidery floss, etc)
-A row of small brads or eyelets (If they are going to be visible, try to match them with the other colours used on your project.)
This is one of those rare times when I don’t reach for dimensional adhesive, however, as I usually want the top edge of my card to resemble a standard folded card top. I find that things such as dimensional glue dots/foam and hot glue can make achieving that look trickier, so typically skip them in this instance.
Utilizing this approach, you could make a card as big as 12×12 inches if you wanted! Or, theoretically, larger still if you overlapped the edges of two or more pieces of cardstock just a touch and adhered them together to achieve whatever dimensions you were after.
For my oversized springtime thank you card, two matching pieces cut from sheets of 12×12 inch cardstock were plenty.
Much like myself, the recipient of this greeting is someone who loves to live closely in tune with both nature and the seasons. As it is headed their way soon, I went full-on springtime with my choice of colours, images, and embellishments.
I have a few skeins of twisted cord trim in my papercraft stash that I have been itching to start working with. A card this big and bold seemed like the ideal time to do just that, so once I had selected the papers I would be working with here, I partnered them with a suitably coloured twisted cord.
I am delighted with how using this type of trim to create a border for my card turned out and highly suspect that I will utilize it again not only for cards, but also on things such as scrapbook pages and tags.
If you have – or wish to pick up – some twisted/braided trim of your own, I highly recommend giving this embellishment technique a go!
Just make sure that you have sturdy adhesive on hand to hold it in place. Unlike above, now is the time to bust out your trusty glue gun – or you could use a powerful liquid adhesive such as E6000 (doing so in a well-ventilated workspace, of course).
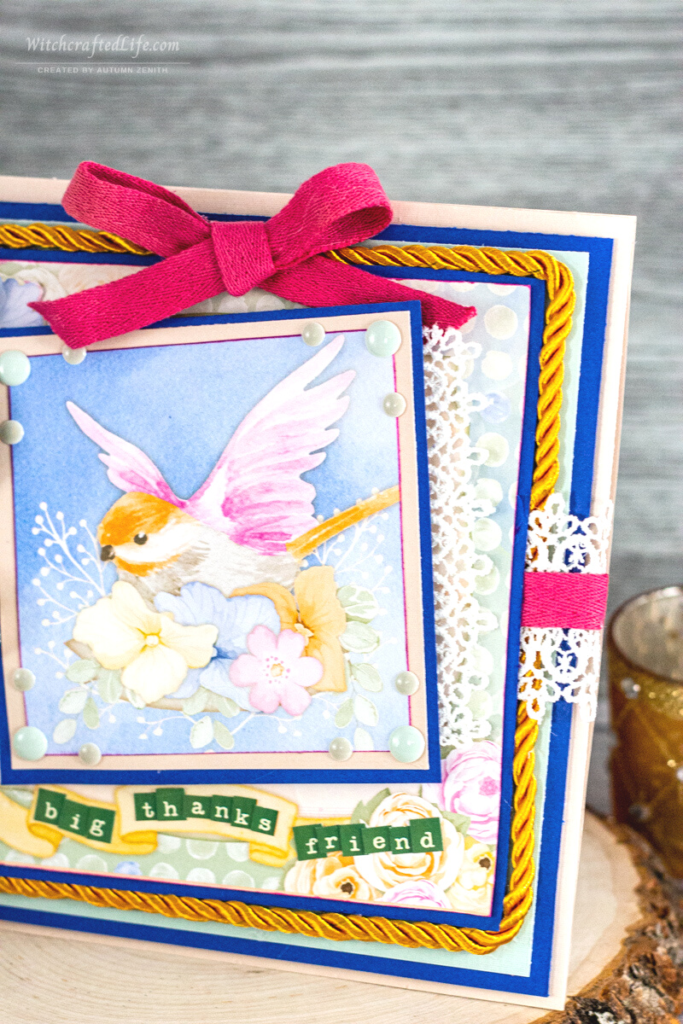
The Bo Bunny floral print piece of paper that I used behind my central bird image here had a delightfully pretty scrolling banner as part of its illustration. I utilized that as the spot for my sentiment – extending the letters a bit beyond it on the right-hand side, as that part of the banner is covered by flowers in that paper’s design.
This too was a fun technique (utilizing a printed banner image) and change of pace from stamping and/or die cutting a banner and using it in much the same capacity.
While there are numerous layers and embellishments here, I didn’t want the overall card design to read as (in my books at least! 😄) too busy. Plus, given that it was going to be posted out, I wanted to use materials that would hold up well for this card’s lengthy journey through the international mail system.
Despite the fact that I love it, I do not work with royal blue very often in my paper crafting. As a result, I was quite a happy camper regarding getting to do so here. 💙
Clearly, my latest strong interest in utilizing blue in my cards (which took hold last fall and can be seen in some of my seasonal projects back then, such as this Chicly Spooky Multi-Window Halloween Ghost Shaker Card) is still going strong. I do not mind one iota.
Blue, with its countless hues, is an extremely versatile colour and one that I have rarely met a soul who did not like (with plenty of folks listing it as their fave colour, point-blank).
It is also an ideal match for spring and summertime projects, as it can call to mind everything from perfectly pristine blue skies to the twinkling waters of our favourite beaches.
For the elegant white crochet-style trim/lace that appears here in two areas, I utilized the trim as a whole for the central piece and then cut it down the middle and attached one half to each side of the bird image.
This is a terrific approach to take with suitable trims/laces when you want two different widths of the same product (and/or simply don’t want to “waste” trim by obscuring it with other layers/embellishments).
I was thrilled with how this sweet, beautiful springtime thank you card turned out and hope that the person I am giving it to will delight in its seasonal charm as well. 🐤
Products used to make an extra big springtime thank you card
-Pale peach or pink cardstock (cream or ivory could easily be used here instead, if desired)
-Royal (or cobalt) blue cardstock
-Light aqua, turquoise, or baby blue cardstock
-Raspberry pink or dark pink ink – Classic Stampin’ Spot Magenta Madness Ink from Stampin’ Up
-All printed papers used in this project – Harmony 12”x12” Paper from Bo Bunny
-Green mini alphabet stickers – Tiny Type Stickers from Cosmo Cricket
-Floral spray/sprig (from Prima; product does not have a specific name on its packaging)
-Cream/ivory coloured paper (or fabric) flower
-Pale green and grey enamel dots – Classic Enamel Dots from Forever in Time
-Twisted gold coloured trim (the one used here is from the “Crafts” line that is sold at Dollarama)
-3/4th inch to 1+ inch wide white crochet/lace trim that can be cut in half horizontally and still have each part remain intact
-Dark pink twill ribbon – Vicki B. Wraps from Bo Bunny
-Strong adhesive such as a glue gun or E6000 to adhere the twisted trim in place
-Dimensional foam, pop dots, or similar to elevate some of your layers
-Adhesive, such as a tape runner, of your choice (I often use my Scotch Tape Glider)
NOTE: This project does not require any dies or embossing folders, so it is a great option for those who do not have – or don’t always want to use – a die cutting machine.
How to make an elegant, shabby chic bird and flower themed card
Begin by making an oversized card base from pale peach or pink cardstock using the method described above.
Once it is assembled and ready to work with, cut a piece of royal blue cardstock a little smaller than the overall size of your card front. Adhere to card front.
Cut a piece of light aqua, turquoise, or baby blue paper a whisper smaller than the previous layer. Adhere.
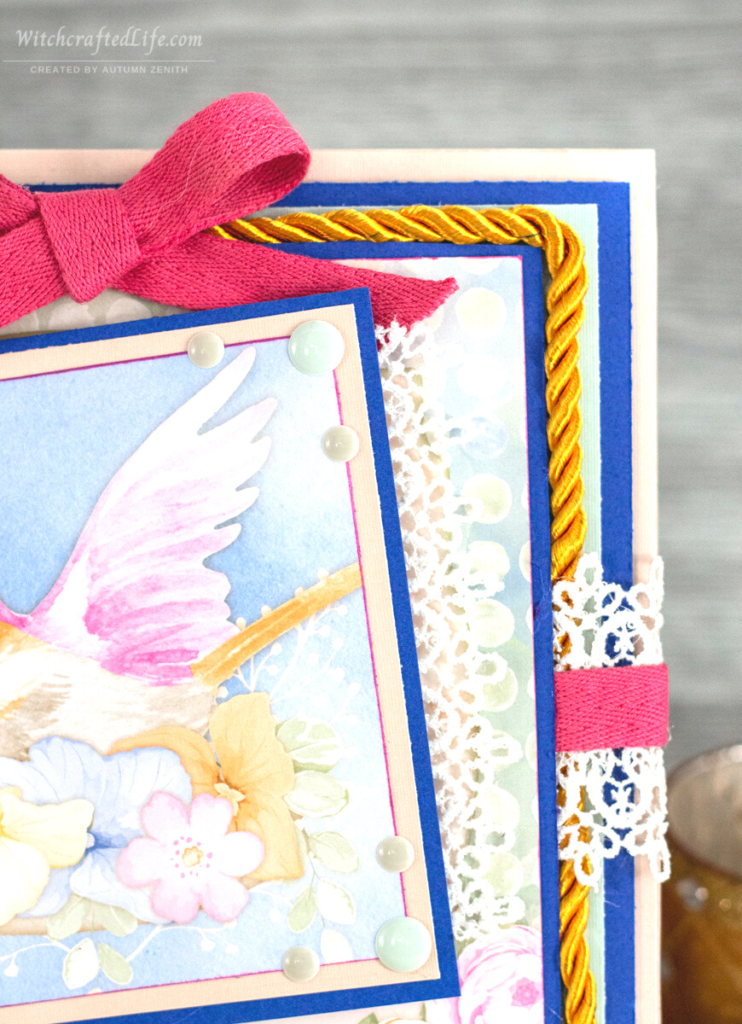
Next, take your twisted trim and working in small segments at a time adhere it in place to create a border right near the edges of the last layer of (blue) cardstock.
Once the adhesive has dried, cut a piece of white crochet style trim/lace and run it across the middle of your card design. Adhere in place.
Top this piece of white trim with a piece of dark pink twill ribbon (or another dark pink ribbon of your choice). Adhere to the white trim layer.
Then, using the same royal blue cardstock as earlier in the project, cut a piece that is a tiny bit smaller than your previous layer, ensuring that it fits snugly within the twisted cord frame that you just created.
Attach this piece of royal blue cardstock to the previous layer using the dimensional adhesive of your choice.
Cut a piece of Bo Bunny “Harmony” paper a little smaller than the latest royal blue cardstock layer. Ink the edges of this piece of paper with raspberry pink or dark pink ink. Adhere overtop of the trim layers.
Important note: If using the same paper that I worked with here, make sure this piece includes the scrolling banner area of the design.
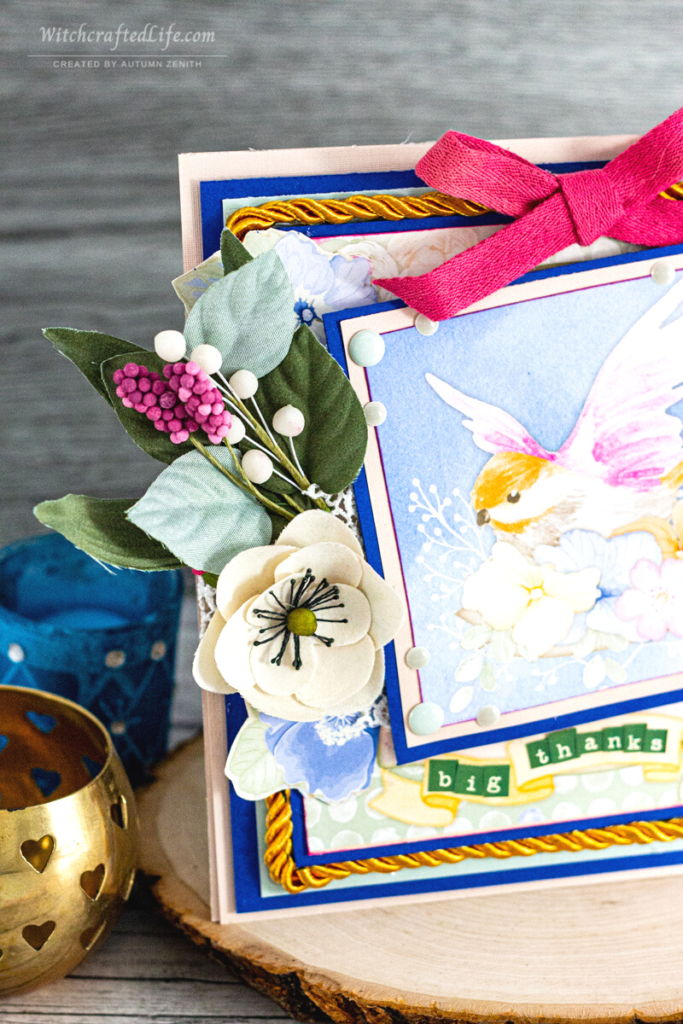
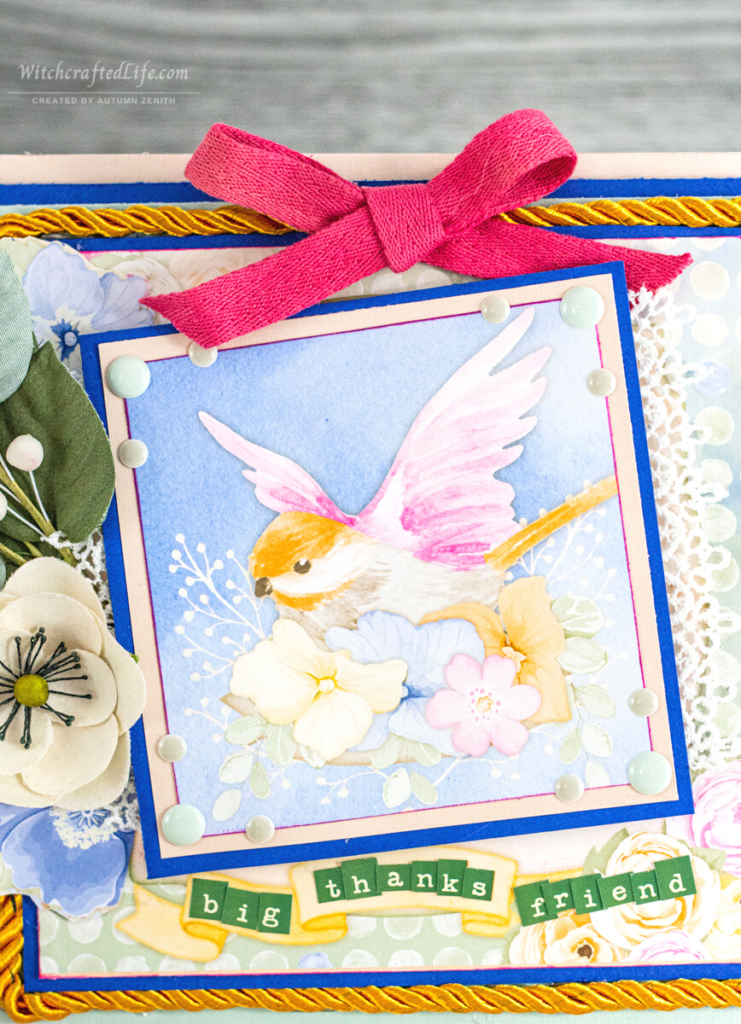
Cut your central bird image out of Bo Bunny paper. Ink its edges with the same raspberry/dark pink ink used above.
Mat this central image with the same pink cardstock as your card base, followed by the same royal blue cardstock used earlier.
Cut a piece of the same white trim used before in half horizontally down the middle. Adhere even-sized pieces to both the left and right-hand sides of the mat stack you just created.
Position this (now) trim-adorned stack at a bit of an angle and adhere it down to your previous layers using dimensional adhesive.
Use tiny green alphabet sticker to spell out your sentiment on the banner portion of the Bo Bunny paper.
Attach a dimensional flower and leaf spray along the left-hand side of the central image, then attach a cream/ivory/light beige hued paper flower immediately below the spray.
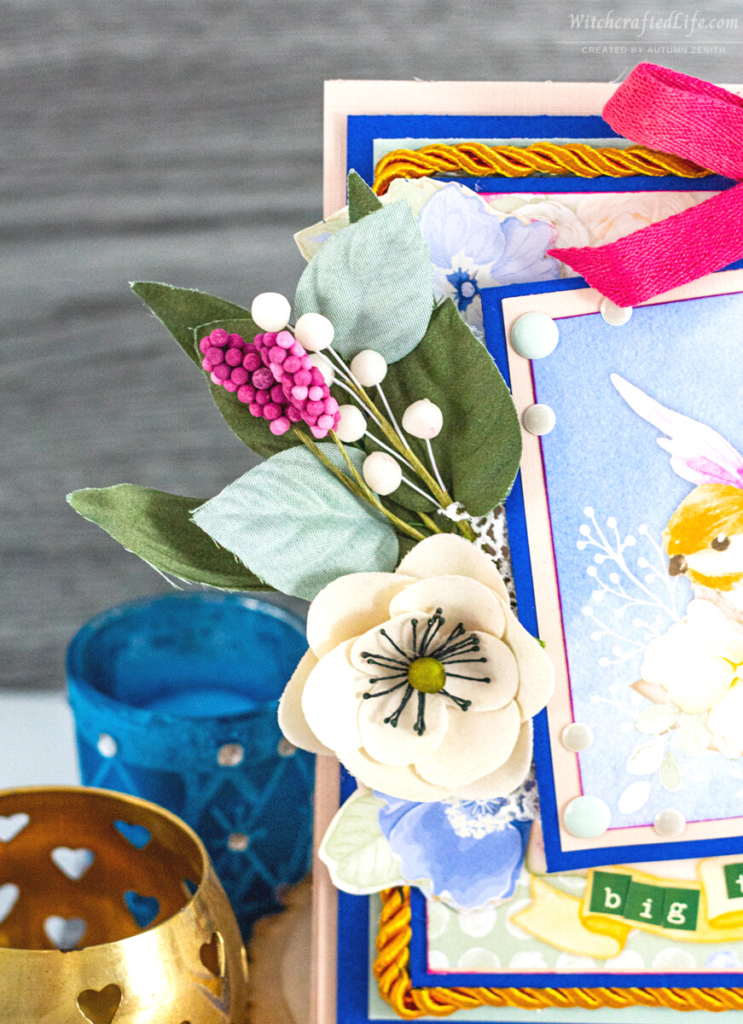
Fussy cut two blue flowers and their leaves from the same Bo Bunny “Harmony” paper. Adhere one flower to the top and the other to bottom of the floral cluster area.
Adhere two different sizes of matching pale green and grey enamel dots around the corners of the bird image piece of paper, as shown.
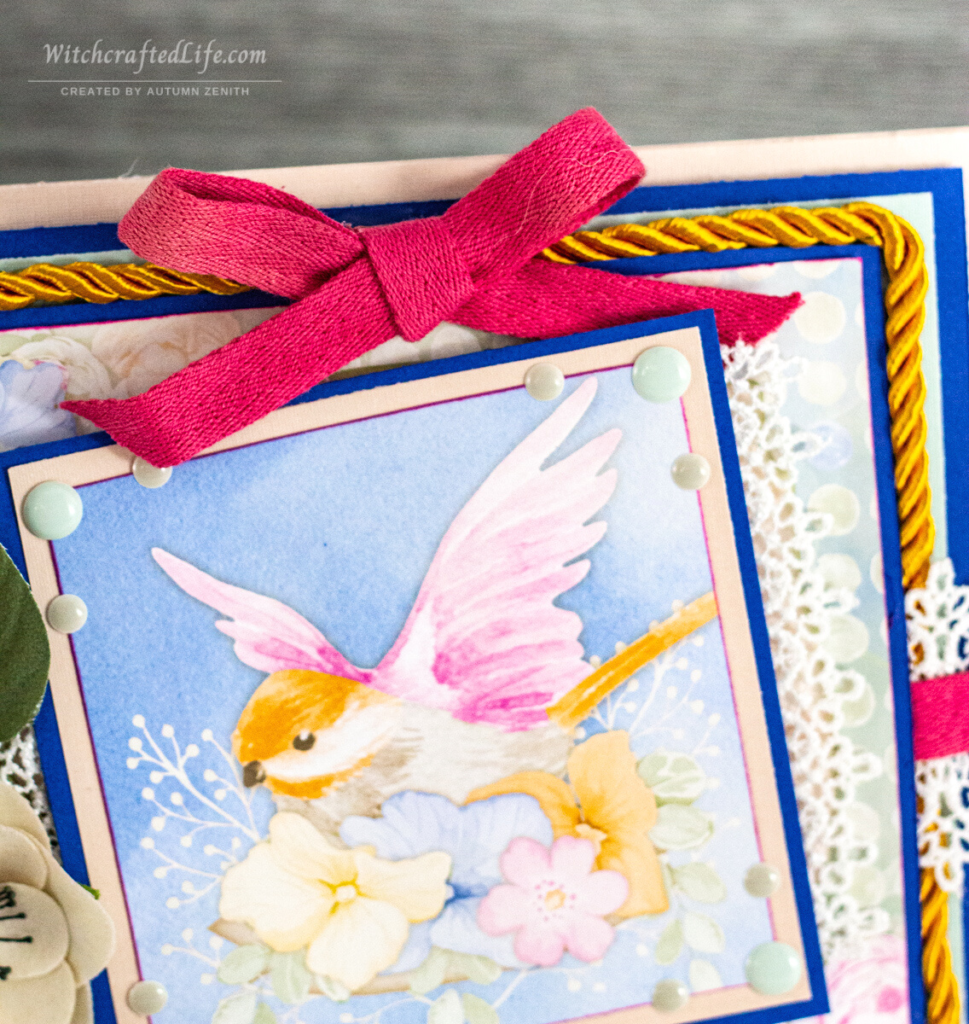
Lastly, create a bow out of the same dark pink twill trim used earlier and adhere it (using a glue gun or other study adhesive) to the middle of the top side of the twisted gold trim layer.
Voila! One splendidly seasonal oversized card that can be used to convey your thanks or, by swapping out the sentiment for another, a wide array of different occasions.
In particular, I think this card would excel for Ostara, Easter, Beltane, Mother’s Day, baby showers, bridal showers, weddings, and birthdays. It would also be very appropriate for a thinking of you/missing you/just because card or even – perhaps forgoing the bow in that instance – as a sympathy card as well.
The birds are chirping, the blooms are blossoming
Little-by-little these glorious telltale signs of spring’s return can be heard and seen all the more with each new day.
It is safe to say that humans have been using the seasons to inspire creative works for countless centuries now.
This is wonderfully alive and well still in the 21st-century and as crafters (and/or witches/Pagans), we know there are few easier or more enjoyable ways to celebrate a given season than to make a project inspired by it.
Much as with my recent Ostara card, this oversized thank you card taps directly into the spirit (and colour palette) of spring to convey an upbeat, beautiful sense of the season.
Spring is often the shortest-lived season in our area. Therefore, I try all the more to work with elements that express its revitalizing loveliness and ingrained optimism during those few, all too brief weeks before summer’s blazing heat comes barreling back into town.
And I am certainly not alone on that front. It is such a joy, as The Wheel of the Year turns ever onward, to see and be inspired by the seasonal projects created by many of my fellow crafters (be they paper crafters or otherwise).
A lot of folk rank spring as their favourite season. Much as with the fall, I am sure that is part of the reason why there are scores of springtime craft projects created each year as sunshine, warmth, and countless fresh flowers fill our lives again.
If you have not done so lately, I encourage you to let spring inspire some of your creative happenings.
Chances are, if you do just that, you will soon want to give Mother Nature herself an oversized thank you card in appreciation for all of the magnificent inspiration she delivers your way this season. 🥰
What is the biggest-sized card you have ever made? Do you find that springtime helps to inspire some of your creative projects as well? 🌼💛🌼
Lovely happy Easter/ Spring/ Flower vibes! Your creativity is always an inspiration!
That is a tremendously encouraging and beautiful thing to be told, sweet soul. Thank you with the most appreciative of hearts.
I am, indeed, on a bit of a spring colour palette kick at the moment. Goodness knows this season usually lasts about as long as it takes to swap out the snow boots for sandals in our closets here in Canada, so I say, why not dive headfirst into the chipper, vibrant shades of the season? 😃
Sunny hugs & the loveliest of wishes for a terrific remainder of April.
🖤 Autumn
I really had no idea of all the technicalities involved in papercrafting!
Your card is super sweet and I’m sure the lucky recipient will be more than thrilled with it! xxx
What a terrific comment, dear Ann. Thank you very much!
So true! Granted, some people prefer more of what is called in the papercrafting world a “CAS” (which stands for “clean and simple”) style but a fair bit of the time, there is a good deal of techniques that go into this art form.
And, I would argue, all the more so for those who are heavily into mixed media papercrafting (including art journaling).
As spring finally starts to emerge here once again, I am taking full advantage of its beautiful colour palette and letting it inspire more of my projects as the season goes on – including the two WIPs at I have on my desk at the moment (both of which I eagerly look forward to completing and in due course, sharing here).
Many thanks again, my sweet friend. Wishing you a relaxing, sun-kissed month!
🖤 Autumn
This card is stunning! Gorgeous images and the flowers and other embellishments are stunning.
I like making 5×7 cards for certain occasions but have not ventured into this size. I like the idea as it can be used as a decoration by the recipient (if you can bear to give it away). Great post, Autumn.
You are blush-inducingly kind, dear Donna. Thank you very much for the beautiful gift of your kindness.
Soooo true regarding the difficulty involved with bringing ourselves to part with some of our projects. I usually find that if a given card, tag, etc is made with a particular person/couple/family/etc, I have an easier time doing so than when that is not the case.
Happily then, though, one has the option all the more of holding onto their own creations and displaying them, if so desired, around the house.
I usually have 2 – 4+ of my papercrafting makes on display around our house at any given time and find that routinely seeing some of my fave projects really helps to spur on my creativity when creating others.
Big hugs & many appreciative thanks again,
🖤 Autumn
This card is simply gorgeous Autumn! I adore all of the gorgeous layers and beautiful elements you used to create it. Your friend is going to absolutely love it!
Thank you sweetly, lovely Celeste. Your wonderfully kind words warm my heart like the returning springtime sunshine.
And speaking of spring, I am really vibing with the season’s colour palette at the moment. The two WIPs that are currently on my desk both tap into these very hues and will (hopefully!) be both completed and blogged about here in that not-too-distant future.
Scores of hugs coming your way,
🖤 Autumn
What a lovely card, Autumn! I can really appreciate all the work you put into these, and I like all the details as you point them out – it helps me see even more how much thought and planning these deceptively simple cards take.
Thank you for the swatch of lovely comments, my dear friend. I am a bit swamped right now due to work obligations and have chosen to stop answering comments (I never go back to check the ones I leave on others’ blogs) and instead focus on leaving my own comments on blogs.
I’m so glad you’re pleased with your jacket so far. I plan on doing a bunch more work on it this coming long weekend.
You are beyond welcome, my cherished friend. I get that 110%, believe me!
Your blog is – and will no doubt always remain – one of my very favourites. I adore seeing not only what you’ve been sporting lately, but also hearing about various things that are transpiring in your life as of late.
As I was catching up most recently on your newest posts, I was struck by how reading + seeing multiple weeks of your entries in one go really felt like we were having an in-depth, multi-topic conversation in person.
Thank you tremendously for your own fantastic comments and for the gift of sharing your time with me. Both are appreciated beyond measure – as is, really and truly, the incredible jacket you are creating for me.
Immense hugs,
🖤 Autumn
Wow, another stunning card. Love the colours and your textures. You are so good with mixing your textures and colours. Anesha x
Aww, lovely Anesha, what an awesomely kind and motivational comment (compliment!). Thank you deeply!
I have been enamoured with colour + the art of colour combinations since early childhood and love to weave those interests into as many areas of my life as possible. Perhaps nowhere more so, though, than when it comes to my crafting.
Many thanks again coupled with a rainbow’s worth of hugs,
🖤 Autumn
Such a beautiful color palatte and so cheerful!
One thought on oversized cardstock, though weight might be an issue, is to check bookbinding supply sellers; frequently the paper used for binding comes in larger sizes to be cut down or is intended to be used as endpaper, which needs to be a continuous piece.
Sending happy spring time wishes your way, dear friend!
Phenomenal suggestion, my dear friend – love it! Thank you very much for putting forth that brilliant idea. I will definitely look into what kinds of suitable options may exist in that realm.
Many appreciative thanks as well for your thoroughly sweet words about this card and its vibrant colour palette.
I am leaning into the current season’s cheerful hues big time at the moment, with the two WIPs currently sitting on my desk both sporting it as well.
Health permitting, I’m hoping to finish and blog about one of them this month and the next in May. Beyond then, chances are, my thoughts (and projects) will shift a bit more towards summer and – surprise, surprise 😄 – fall time.
Oodles of hugs & the happiest of wishes for a terrific remainder of April,
🖤 Autumn
Oh my this is such a delicate, soft and beautifully detailed creation! The bird is so sweet and I love the touches of ribbon, lace and amazing cord framing you’ve done on this not to mention the gorgeous floral accents that set it off in Spring splendor! Very nicely done and I wish you a lovely Spring weekend!!
Sweet Vicki, your kindness sincerely touches and warms my heart. Thank you for the bevy of positive words regarding this festive springtime greeting. Each and every one of them means a great deal to me.
As spring gradually triumphs over wintertime once again around these Western Canadian parts, I find myself wonderfully inspired by its chipper, vibrant hues and have to WIPs on my desk at the moment that are both decked out in springtime shades as well. I eagerly look forward to sharing them both once they are finished.
Many heartfelt thanks again, coupled with the sunniest of hugs and happiest of wishes for a fantastic second half of April.
🖤 Autumn
A beautiful pastel card. That bird looks so delicate against the gorgeous layers with lace and ribbon.
What a kind, supportively lovely comment, dear Meg. Thank you very much for brightening my week with it.
I am thoroughly enmeshed in crafting with spring’s cheerful colour palette at the moment, with two more seasonally hued WIPs on my desk right now that are each sporting it as well. All things willing, I hope to get one finished and blogged this month and the next in May (or early June).
Beyond that, chances are my crafting will shift more towards summer and – to the surprise of no one who knows me, I’m sure 😄 – fall time.
Sunny hugs & joyful wishes for the remainder of April coming your way,
🖤 Autumn
I have taken my time to get to this post, but I am glad I eventually arrived as your card emanates a wonderful spring vibe.
I love the soft pastels of the patterned paper with the bold blue and red. The little pop of bright green (my favourite colour) adds a brilliant contrast and finishing touch which draws your eye to the sentiment.
I think I once made an 8×8 card, but that was at a workshop so not my doing really! My cards are tiny in comparison. I do feel your frustration over finding suppliers of large cardstock. I think every crafter must have a pet thing that they wish was more easily available. Mine is frame dies for A6 sized cards, just about the opposite of yours!
I am so glad spring is arriving for you. I think it is my favourite season because it follows winter and I just love to see everything coming to life.
The big, blousy cherry trees are out here now, so I alter my morning walk to view my favourites. Lilac is also coming out another of my favs and I am out in the garden most days, which always lifts my mood. xx
Sweet Hilary, I thank you abundantly and with the utmost of appreciation for the time you share here with me and my wee corner of the internet. Just as I do the tremendously kind, supportive, and downright beautiful things you say about my projects. Please know that your words always brighten and better my days.
So true regarding how crafters inevitably have certain items they really wish existed (or were more commonplace, if they do exist), but struggle to find. Thank you for sharing about one of yours. It sounds like the two of us should team up and launch a paper crafting company that specializes in a mix of small and extra-large products. 😃
We do not generally use the European standard of sizing here in North America, but if I should happen to catch wind of any companies that offer a good range of A6 dies either on this side of the globe or anywhere else, I will be sure to let you know about it right away.
Many thanks again, my dear friend. I hope that your April is going positively and it brings many beautiful and very enjoyable elements of your favourite season your way. 🌼
🖤 Autumn
PS: I utterly adore lilacs as well. It is a touch too soon still for them here, but the moment they burst forth again, I plan to gather my usual armfuls of them from the wild lilac trees that grow around our general area for as long as they remain in bloom. 💜
You are very welcome. The trouble with lilacs is how short lived the flowers are so whenever I see them I have stick my nose in and have a sniff – fabulous xx
Hello my dear friend, thank you for your lovely reply. I am exactly the same way and have been in seventh heaven as of late due to the local lilacs returning at long last. Between those that are tended in local yards (gardens) and those that grow wild around our area, I am lucky indeed to be within visual distance of at least one lilac bush almost anywhere I go in our neighbourhood.
Here’s to lilacs, sunshine, and everything that makes spring so wonderfully special!
🖤 Autumn
This is a beautiful card and lovely colours love it x
You are blush-inducingly kind, Ann. Thank you very much for your wonderfully kind words.
This was such a fun, somewhat out-of-the-ordinary colour palette for me to craft with. I can easily see returning to it again for additional spring/summer projects in the future.
Sunny hugs,
🖤 Autumn
Your thank-you card is incredibly and amazingly detailed and just beautiful! I love the cluster of amazing flowers and all the elegant framework too! I wish spring would find it’s way here because it dipped down to 30 last night and got quite chilly and windy. I fear this cold is going to turn directly into a blazing hot summer before long! There isn’t much we can do to change it, so I’ll just accept what comes each day and find something positive regardless 🙂
Aww, Carol, you are sweeter than all the honeysuckle that calls the sunny side of the year home. Thank you SO MUCH for brightening my spring with your incredibly kind and supportive words about this upbeat thank you card.
Gosh, do I hear you! Up until mere days ago, some of our nights were still dipping down to freezing and as recently as last week, I could still see my breath while out with our dog in the early to mid morning hours.
I share your concern regarding hopping from chillier than usual to staggeringly hot temps in the blink of an eye. They are predicting another scorching hot summer with fresh heatwaves here in Canada this year, so chances are, any day now, we’ll be longing for snowmen and icicles again on the double! ;D
That is a terrific outlook on life in general. I too strive to find the good in most circumstances – weather very much included.
Sunny hugs & many wishes for a beautiful, not too roasty-toasty summer ahead.
🖤 Autumn
This is such a gorgeous card, Autumn, and your friend is sure to be delighted with it. I’ve never attempted to make a card this size but it would make a wonderful framed piece to hang on the wall. You give great attention to detail and all your elements are beautifully placed. Hope you are enjoying spring!
Take care,
Hugs
Carol x
That is a truly lovely and encouraging comment, dear Carol. Thank you immensely for blessing my springtime with it.
Extra, extra large cards like this are, I find at least, a blast to make. They become something of a hybrid between cards and scrapbook pages, which just makes (as a huge fan of both) adore them all the more.
That is a great point regarding how nicely a piece this size would look as a wallhanging or framed piece of art. I have been thinking lately that I want to make more of those types of projects for our home, so may just be venturing into oversized card territory again in the not too distant future.
Sunny hugs from my heart to yours,
🖤 Autumn
What an adorably charming card, Autumn. And that sweet little bird is perfection. You did an amazing job- again.
Debi
Sweet Debi, you have be blushing more than spring’s first roses. Thank you tremendously for your wonderfully kind and encouraging feedback on this fun oversized springtime card. I can scarcely believe how quickly the season has flown by since it was created.
We are now less than a month away from summer and my thoughts are definitely shifting towards projects for that season (and, to no one’s surprise, I’m sure, our mutually beloved fall time that lies just beyond it).
Thank you again, my beautiful friend.
🖤 Autumn
Beautiful card! That paper is fabulous. I’m just starting to explore non-standard sized cards and the largest size I’ve made is a half sheet (5.5”x8.5”). If I go any bigger, I din’t know if I could fill the space. 😂
That is really cool, Trina! I love making 5.5 x 8.5 cards as well. True! It can be trickier sometimes to fill up that much real estate, but so much of the fun, I personally feel, of paper crafting lies in pushing ourselves and venturing out of our comfort zones sometimes.
And, if nothing else, you can always fill the space with things such as sequins, rhinestones, and/or paint splatters. Knowing that helps, I find, when one ventures into jumbo card territory. 🙂
Thank you very much for your terrific comment. I hope that you have a sunny, wonderful tail end of May.
🖤 Autumn