Gradually gentler weather is inching its way into our world once again. Snow can still be found lurking in shady hiding spots and atop local mountains around our wee town, but spring has begun to break free from its long hibernation, tinging the world with soft, fresh, thoroughly welcome hues again in the process.
Like many of us, I’m drawn to the sweet, tender shades of the current season when paper crafting during the spring months (which I got the ball rolling on a few weeks ago with my Be Amazing Springtime Bird’s Nest Card).
With that very palette in mind, as my paternal grandma’s birthday rounds the bend next month, I recently set to work creating a card for her special day.
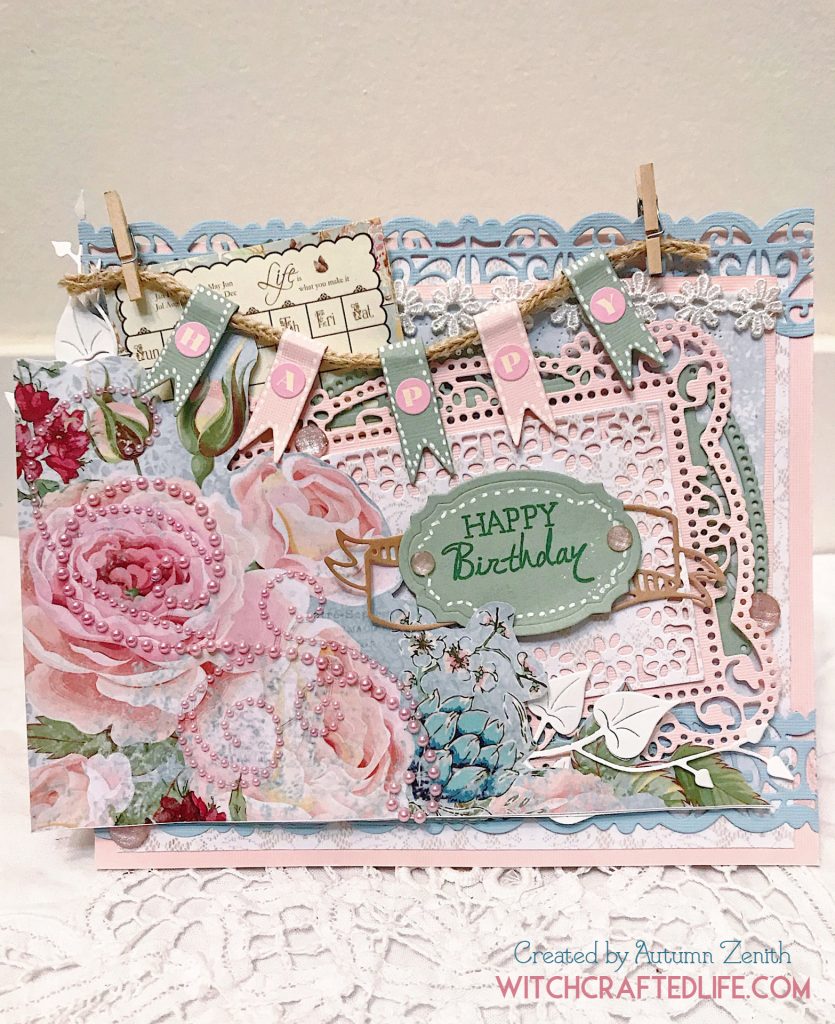
Shabby chic springtime happy birthday card
My grandma is a lovely woman who has had a lifelong passion for crafting (particularly knitting, sewing, and fabric doll making) and beautiful home décor.
Years before the term “shabby chic” entered mainstream vernacular, she had peppered her home with elements that would now fit squarely under that banner – along with ones that were rustic country and American primitive.
I learned about Victoria magazine, how to make a sublime English trifle, the best way to hang laundry on an outdoor line, and when a raspberry is perfectly ripe for the picking all from my grandma.
I attribute several of my own lifelong interests and passions to her as well – not the least of which is my unending love of, and interest in, the 19th and early 20th centuries.
Growing up, my grandma’s house was full of soft, sweet, thoroughly feminine touches. There was white wicker furniture on the covered deck, cabbage rose print bedding, a pale blue bathroom, crisply pressed table linens in Easter worthy shades, and much more.
My grandparents moved from that house over twenty years ago now. Some of those same elements went with them to the home they relocated to after retiring. Naturally though, a fair number changed with their new abode, downsizing, and shifting interests.
Still, when I think of my grandparent’s home as it looked in my early youth, the colours that I used in this birthday card are amongst those that jump out at me first. As such, I was eager to incorporate them in my grandma’s birthday greeting this year.
As much as I would have loved to go for an even more dimensional card, Canada Post has a rather irksome letter mail height limit of just 2cm (not inches, centimetres!) under which letter-sized mail must fit. If it goes over that thickness, you’re looking at parcel rates, which even at a national level are nothing short of comically steep in this country.
Therefore, if I know a card that I make is going to be mailed off (be it within Canada or abroad), I try to keep it on the flatter side.
This doesn’t automatically mean that I can’t still involve multiple layers, embellishments and plenty of engaging details. Thankfully that remains possible for many different types of cards.
Putting this feminine spring birthday card together
Funnily enough, I had originally taken some of the elements used on this card out to make a different birthday card that day. As soon as this design started to take shape, however, I knew that it was destined for my grandma.
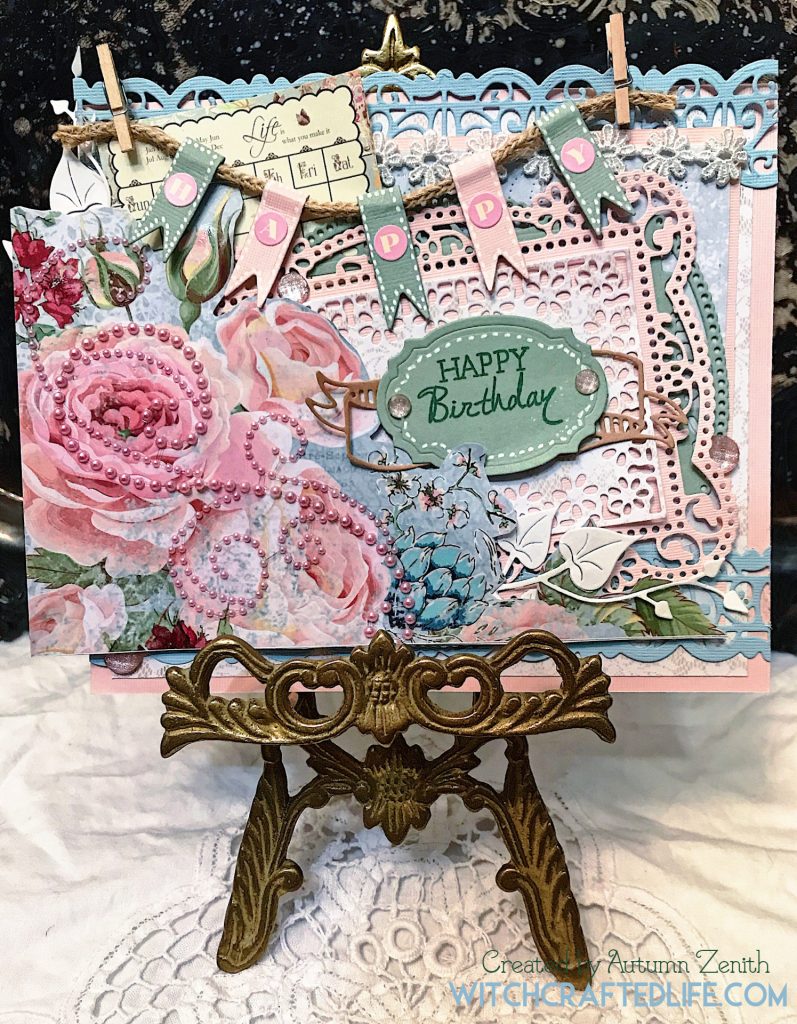
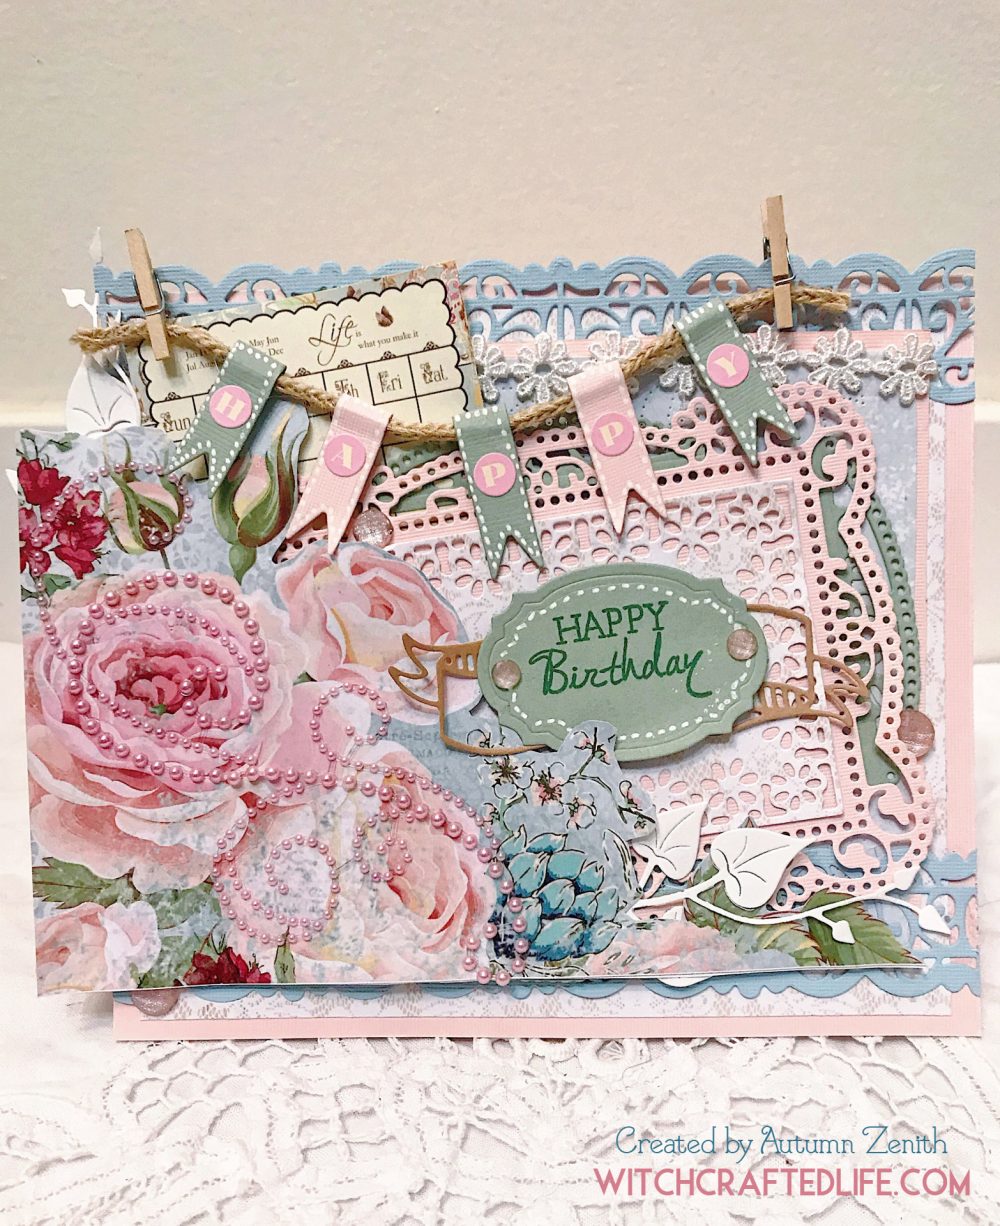
I began with a sheet of lightly textured pale pink cardstock for my card base. This was then topped with a beautiful piece of white on cream lace print paper.
Another layer of the same light pink cardstock, pale blue printed paper that I embossed (though the embossing ended by being so obscured here, I won’t even mention the folder in the product list), and various ornate die cut frames and border pieces were the next to be added.
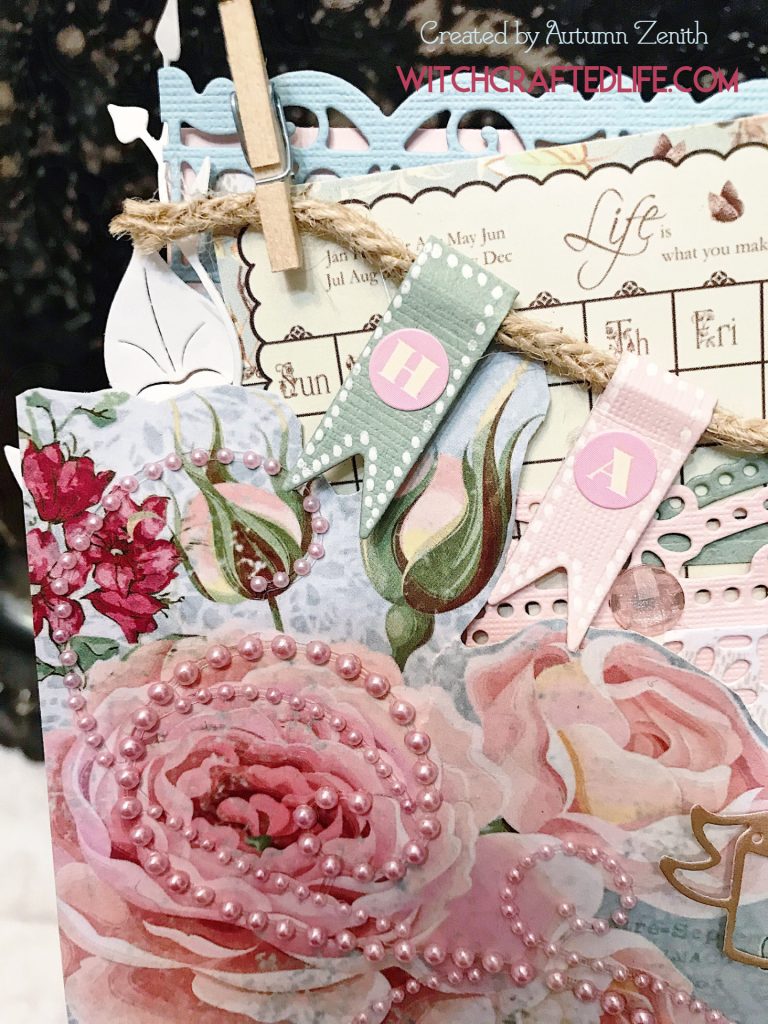
I then fussy cut the large piece of floral print paper from a gorgeous sheet of Prima paper and positioned it to intentionally overhang a wee bit off the left-hand side of the card.
Next, I dug around in my stash for a vintage-y looking piece that tied into the theme of birthdays and found it in the lovely Webster’s Pages mini calendar page that I tucked behind the flowers (and banner).
After that, it was on to the banner. A few die cut banner pieces created from pale sage green and the same light pink cardstock used before, each of which I added faux stitching to with a white Uniball pen.
I topped each banner flag with a round pink and white Jenni Bowlin alphabet sticker to spell the word “happy” and strung them on a length of rustic braided garden twine that I attached to my card with mini clothes pegs.
If you don’t have banner flag/pennant dies, you can cut as many matching shaped and sized strips of paper or cardstock as you need by hand instead (I’ve done this many times for various projects over the years).
I wanted a bit more texture on this card, so I included a springtime perfect piece of classic daisy chain style white trim. To complement this trim and to help the fussy cut floral panel stand out a bit more, I die cut some leaves with trailing vines from basic white cardstock.
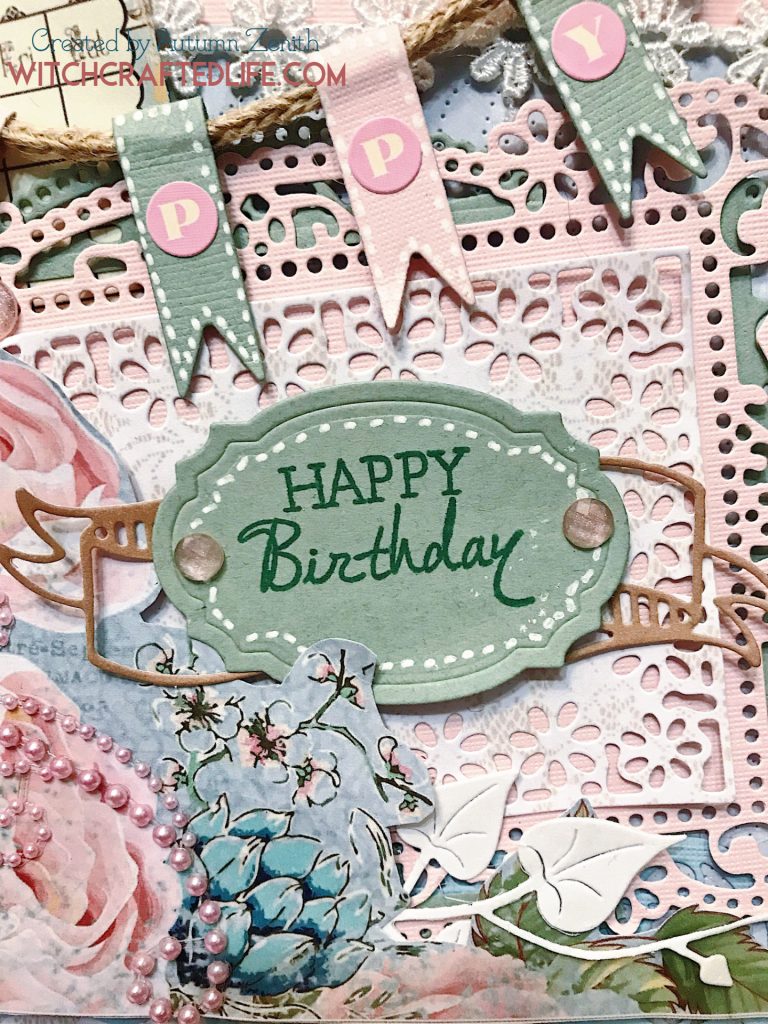
Next, I die cut the banner outline from pale brown cardstock and the decorative label shaped piece from light sage green cardstock. I stamped my classic sentiment of “happy birthday” in dark green ink and added some faux stitching around it with a white Uniball pen.
A few soft pink Prima gems nestled here and there, a flourish of pink pearls atop the fussy cut flower panel, and some strategically placed Glossy Accents on various parts of that panel finished off this pastel hued birthday greeting that I suspect many shabby chic lovers would enjoy receiving.
Card making tips and ideas from this project
-Obvious though this may sound, card bases do not have to be white, kraft, or black. They can be any colour that works for your project and are a great way to help set the tone for the rest of the palette that you’ll build on top of it.
-Look for trims that match or complement your die cuts and vice versa. Here, the white fabric trim goes awesomely with the border on the rectangular die cut piece that I used behind my sentiment.
-If you’re working with a large area of patterned paper (in this case, the fussy cut floral panel), try to match/harmonize as many of the other elements used on your card to that panel. This is what I did with my choice of light pink, blue, and green cardstocks.
–Hand drawn stitching works fabulously for small pieces and fiddly shapes that might be tricky to machine stitch on without potentially damaging (or if you don’t have – or don’t want to use – a sewing machine).
If you don’t already have a good quality white gel pen, I suggest investing in one if possible. They’re hugely useful for drawing stitches by hand on a huge range of different cardstocks and papers.
-I used rustic garden twine here for the string that the banner flags hang from, but you could easily swap in baker’s twine, hemp cord (natural or dyed), yarn or wool, a skinny piece of ribbon, beading chain, or a strip of paper or cardstock instead.
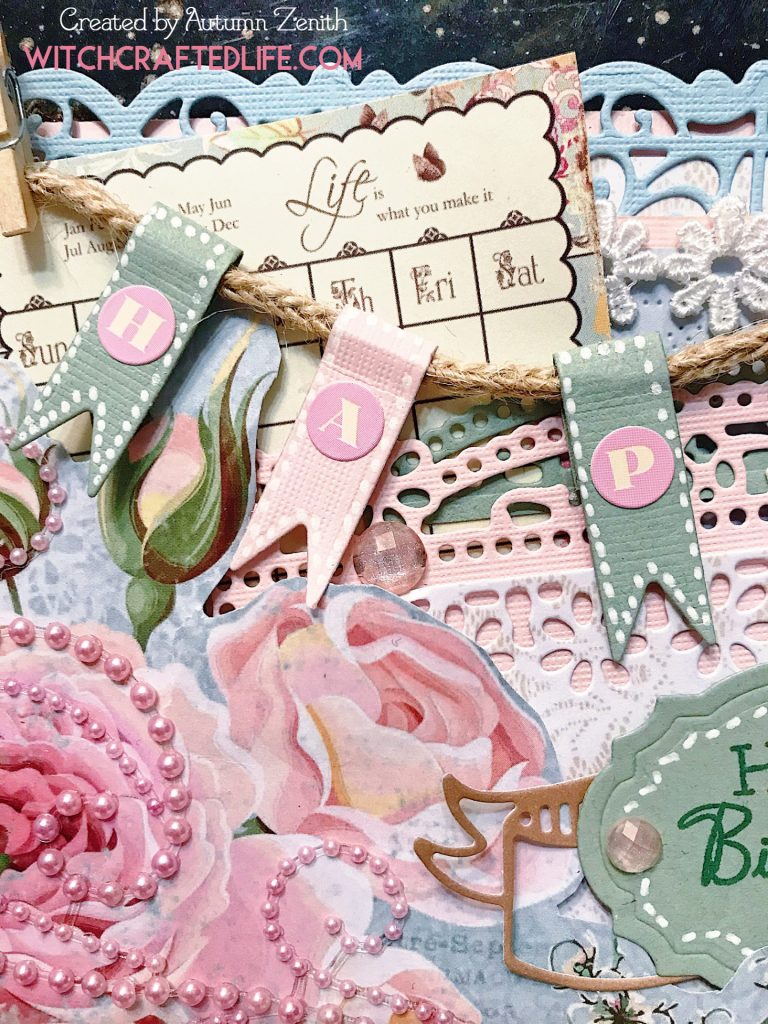
-Mini clothes pegs/pins are one of my favourite embellishments (they last appeared here in my Only Love Lets Us See scrapbook layout). They’re tons of fun, can be found from various online and offline sources (from eBay to Etsy to some dollar stores and craft stores), and add heaps of charm to any most any project.
-Let a little bit of your card base show. A design this full and eye-catching isn’t exactly overflowing with empty space. To help the eye rest and the design stops short of being too busy, I often like to ensure that a wee bit of the card base is visible in at least two areas of my design. In this case, that occurs at the top and bottom of the card.
Repeating the same pale pink colour of cardstock in the center panel of the card also helps to give a sense of open or white space, as it tricks, so to speak, the eye into thinking that it’s part of the largest area of the card (the base), when in fact it’s one of the last layers.
Products used to make this pastel floral birthday card
-White, light pink, light blue, light sage (or similar toned) green, and light brown or kraft coloured cardstocks
-Floral print paper – Rose Avenue Suite Collection Paper from Kaisercraft (the white + cream lace print paper that I also used here is the pattern on the back of this sheet)
-Happy birthday sentiment stamp
-Dark green ink pad – Ranger Archival Ink in Library Green
-Various decorative frame metal dies (or border punched pieces)
-Elegant border die (or punch or premade fancy border strip)
-Mini calendar page – Mini Calendar Cards from Webster’s Pages
-Mini alphabet stickers – Butterfly Pink Stickers from Jenni Bowlin
-Natural braided twine (see tips above for alternative product ideas that you can use here, too)
-Pink pearl embellishment flourish (this one is from Zva Creative – Prima and Recollections have released similar ones over the years as well)
-Light pink faceted adhesive gems – Midnight Garden Say It In Crystals from Prima
-White floral design trim – Vicki B. Wraps from Bo Bunny
–Ranger Glossy Accents (optional)
-Dimensional foam, pop dots, or similar to elevate some of your layers
-Adhesive, such as a tape runner, of your choice (I often use my Scotch Tape Glider)
Keep your recipients in mind when creating cards
While it’s definitely useful to have some general purpose cards on hand for birthdays and various other occasions that work well for a wide range of recipients, whenever possible, I truly love tailoring my projects to the person (or people – say a couple or family) who is going to be receiving it.
That’s exactly what I did with this cheerful, confectionary hued birthday card for my dear Grandma.
The past couple of years have not been the easiest for my grandparents, including on the health front, and I really wanted to convey my wishes for a positive b-day celebration and year ahead (which is why I purposefully used the word “happy” here two times).
I sincerely hope that my grandma’s birthday abounds with happiness – just as trips to her house did for me when I was growing up – and that this pastel floral card helps to make her special day all the more so.
Project share
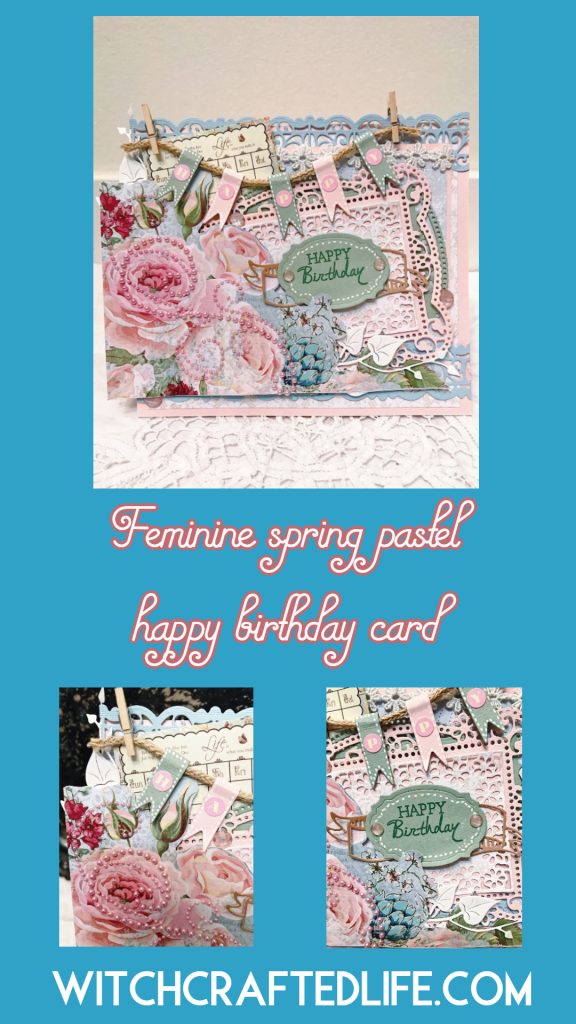
Pin the image below – or any other in this post – to Pinterest, pop it into your Instagram Stories, post in on Twitter or Facebook, or share it anywhere else you wish to help yourself find it again and to inspire others at the same time.
If you make a project based on or inspired by this card – or want to share any of your other handmade crafts with me – please use the hashtags #WitchcraftedLife and #WitchcraftedLifeMakes on social media so that I see can your beautiful creations.

So pretty. You’re so talented to not only design cards like this but also make them.
For reason which can be guessed, I have this deep soft spot in my heart for feminine colors and designs. They were off-limits to me growing up and my attraction to them grew only stronger due to that. Looking at these pictures makes me happy deep inside. Thanks!
And reading your heart-touching comment, Ally, truly makes me smile deep inside in turn. Thank you so much for sharing about the connection that you have to these sorts of intensely feminine shades and why they resonate with you to this day.
I hope that in more recent years, you’ve been able to inject a broader array of these sorts of soft, hyper-feminine shades into various areas of your life and in the process, to develop an even closer bond with them.
As a major “girly-girl” myself, I thoroughly adore them as well and if I’m not knee-deep in dark/moody/fall colours, chances are I’m reaching for soft, vintage-y feminine shades instead.
Thank you for your extremely kind compliments about this card. I’m greatly enjoying sharing some of my paper crafting projects publicly and support like yours only bolsters my confidence to keep doing so all the more.
♥ Autumn
This is stunning Autumn! I love all of the delicate dies you used and the gorgeous feminine details. The banner with the tiny clothes pins is so cute and your extra doodling with the white pen looks awesome! Thanks for following me via Bloglovin’ and I am now set up to receive your newsletter 🙂 Take care and enjoy the rest of your week.
Hugs, Tammy
Thank you SO much across the board, lovely Tammy. I hugely appreciate you following my blog as well and that you’ve signed up for my newsletter. Seriously, thank you!
This was such a fun card to make. I’m on a total mini clothes peg kick at the moment (they appeared in a LO I shared here a few weeks ago, too) and have some fun fall ideas in mind for them as well, so I doubt we’ve seen the last of my mini clothes peg stash yet this year. 😄
I hope that you’re doing positively at the moment and enjoying a safe, peaceful final weekend of April.
Big hugs & oodles more thanks,
♥ Autumn
A stunning card Autumn, I love everything about it – the little banner is a fun addition and the die cut details are so pretty, the flowers are beautiful and your pastel colours go so well together, unfortunately again I am not able to read all of the text but I am sure your Grandma will treasure her card.
Pauline – Crafting with Cotnob
x
Thank you deeply, sweet Pauline. I sincerely appreciate your wonderfully kind words. Please do not worry at all if you’re not able to read everything I write here. I understand and am so sorry again that you are living with the daily challenges of life with MD. I’m sure that is a very difficult condition to navigate the waters of.
I hope so as well. She’s always been a big supporter of my paper crafts and is one of my favourite people to make projects for. She had a rather rough go of things for a while on the health front back around the start of the year, so my heart gives extra thanks that she’s able to celebrate another birthday this year.
Many hugs & cheerful weekend wishes coming your way,
♥ Autumn
What gorgeous colours and textures you used for this card. It is simply stunning and its recipient a very, very lucky lady. I’m sure your grandmother will be very pleased and touched! xxx
You’re wonderfully sweet, kind and encouraging, dear Ann. Thank you immensely!
I really hope so as well. The colour palette and imagery is her to a tee, so I’d be quite surprised if this springtime hued make didn’t brighten her upcoming b-day.
Big hugs & scores of sunny wishes for a terrific weekend,
♥ Autumn
That is one beautiful card from the textures right down to the tiny details! I love the use of the mini clothespins, too!
Thank you so much, my very dear friend. You’re immensely kind!
I’m a major mini clothespeg kick at the moment. They appeared on a scrapbook page that I shared here a few weeks ago and I have some really fun ideas for fall projects that may include them as well. They’re such a versatile little embellishment and one that I’m going to try and keep some of in my paper crafting stash from here on out, if possible.
I sincerely appreciate your comment and hope that you’re enjoying a relaxing, super safe, and thoroughly lovely final weekend of April.
♥ Autumn
Thank You for visiting my wee blog and leaving such lovely comments. Your card is stunning, what pretty colours you have gone for. I have so many mini clothes pegs and never use them but you have inspired me to, Bright Blessings Hazel x
Hi Hazel, you’re very welcome. Thank you wholeheartedly in turn for your blush inducingly sweet compliments on this springtime birthday card, and for visiting my blog. I appreciate it a great deal. 🥰
Aren’t mini clothespegs darling? I’m on a serious kick with them at the moment (they last appeared here in a pet themed LO I posted earlier this year) and have some really fun fall make ideas in mind with this delightful embellishment.
Sunny, abundant blessings to you as well!
♥ Autumn
What a work of art that card is, but most of all, what a work of LOVE! I know your grandmother will appreciate this and know how much work and thought went into it. I adore the “shabby chic” look – this reminds me heavily of that palette from the late 90s around the time I was working in a year-round Christmas store – we had decorations that fit in with this theme. I have a skirt with that cabbage rose print! I should wear it this week…such inspiration you are, Autumn!
I also very much appreciate how much work these big posts are for you too – thank you!
Thank you immensely, my lovely friend. Your kindness and support, including your recognition of a post this size and scope, is a heart-touching gift that I sincerely treasure. 🙏
I melt like butter on toast for cabbage rose print anything and would be elated to see your skirt starring these dreamy, romantic blooms.
I suspect – holiday lover that I am – that I’d really enjoy working in a Christmas shop. Was it an experience that you look back fondly on? What was your favourite aspect of the job?
Thank you again tremendously, Shelia. I hope that you guys have a super safe, positive, beautiful week as April passes the torch to May.
♥ Autumn
Stunningly gorgeous, Autumn! I adore the layers of pink and sage- to welcome Spring. The pink pearls are the icing on the cake for me!!! Just divine.
Your grandmother sounds like a lovely and special woman, and I’m sure she’ll love this card.
“Victoria magazine” has been a staple in my home for years. In fact, I was reading the current issue earlier today😘
Debi
Thank you so much, sweet Debi. Your comments bring continued joy to my heart.
My grandma is a very special lady and we’re especially grateful to be toasting her b-day again this year, as she experienced some serious health issues around the start of January that gave us all reason for concern. Thankfully she’s doing worlds better on the health front now and continuing to live life to the fullest.
Victoria magazine is magnificent! I really, really want to subscribe one day myself. It would also be a blast to track down some copies from my childhood. I learned so much about the 19th and early 20th century from them and am sure they helped cement my passion for the past all the more.
Thank you again, my beautiful friend. 😘
May you have a serene, safe, wonderful tail end of the month.
♥ Autumn
Oh how stunning!!! I love that the colors you used are reminiscent of your childhood memories and the soft colors of gram’s decor….It’s so fun to revisit these sweet nostalgic moments of our youth through papercrafting, isn’t it? Love all the cute little touches, too. The clothespins are darling! xo
🥰 You are such a sweet, wonderfully lovely person, dear Ivana. Thank you so much for your heart-touching comment.
It really is a special treat to keep some of our most cherished and important memories alive via our paper crafting. In a lot of ways, I think people (understandably) see scrapbooking as the main way to do so, but we can easily imbue any type of project with our own personal connections to day past as well (love that!).
Aren’t they precious? I’m on a mini clothespeg kick at the moment. This is the second project I’ve made with them so far this year and have some ideas swirling around in my head for fun fall makes that see them come out to play again. 😃
Tons of hugs & happy wishes for a safe, serene, beautiful week,
♥ Autumn
Wow! I love this! I love the flow of the pearls on the roses. The color combination is pure loveliness. I like the stitching lines you added with the white pen. Wishing you a lovely day.
Thank you so much, sweet Angie. Your wonderfully supportive comments are rays of sunshine in my week.
This was such a fun, lovely card to make. Knowing that my grandma and I share various passions in common, helped the design (of it) to flow with great ease, as I had only to think how I might design a shabby chic springtime birthday card for myself.
I really hope that she likes this greeting and that it helps to brighten her special day, which will be devoid of a family get together this time around due to everyone self isolating.
Thank you again, my friend.
Big hugs & cheerful start of May wishes,
♥ Autumn
Oh dear, what an amazingly beautiful card. And she sounds like an amazing lady who deserves it. Can I wish for a card for my birthday? 😀 If I got one of your amazing cards, it would be gift enough, and I would frame it and hang it in my bedroom. Wishing you a lovely day, dear. 🙂
For what is definitely not the first time in my life, your incredibly kind and supportive comment made me blush up a storm, dear Sanne. Thank you wholeheartedly for everything that you said. 🙏
Great minds! Earlier this year I drew a sketch (in a notebook I keep for paper crafting ideas) for a birthday card that I’m hoping to make just for you this year. Knowing that you’d be keen to receive one of my cards means the world to me and I will do everything I possibly can to make that happen. 😘
The biggest of hugs & happiest of wishes for May,
♥ Autumn
This is gorgeous and your post was most enjoyable to read.
You’re extremely kind, Donna. Thank you for your heart-touching and thoroughly supportive comment. It really means a lot to me to know that you enjoyed this springtime birthday greeting and the post that houses it. 🥰
May you have a sunny, super safe, beautiful 5th month of the year (complete with ample time to craft). 🌼
Big hugs,
♥ Autumn
Oh dear, it is amazing! I’m hopping up and down with joy now! And I’m a Halloween loving Autumn child, so I simply cannot wait. Your cards are so fabulous, pure art! Have a lovely day, dear. :))
It brings my heart immense joy to know that, dear Sanne – just as it will to create and mail off a handmade card for you come the crisp, beautiful days of our very favourite season.
Thank you so much for your extremely kind words about my paper crafts. Creating them is, by far, one of the most positive, enjoyable, and cathartic activities in my life.
I hope that you have a wonderful day (and 2nd half of May), too.
Tons of cheery hugs,
♥ Autumn
Wow, I adodre this card. Such lovely details and soft colours.
You’re splendidly kind, Anesha. Thank you so much! I really hope that it finds favour with my grandma as well. 🥰
Wishing you a safe, sunny and very happy weekend,
♥ Autumn